My latest DIY for Design*Sponge is up today. I created these leaf bowls to use as catchalls all around your home. Sometimes when I’m creating something new I get a little carried away with the process and forget about the blogging part. But one of the most important aspects of blogging a project is the styling. It’s something I try to put more thought into with each project. Props are a great way to show the item as if you were using it in real life. They make it easier for you the reader to imagine it in your own home and want to make it!
So when I went to style these dishes the first prop that popped into my head were keys. Something we all need every day and something we all lose from time to time. I thought lovely colourful keyrings creating accents over the white dishes. Great image right? Goes to find keyrings… has NO keyrings. WHAT? After almost 5 years of blogging I don’t have a keyring or two lying around. I mean I must have made a keyring DIY at some point but I couldn’t find one anywhere.
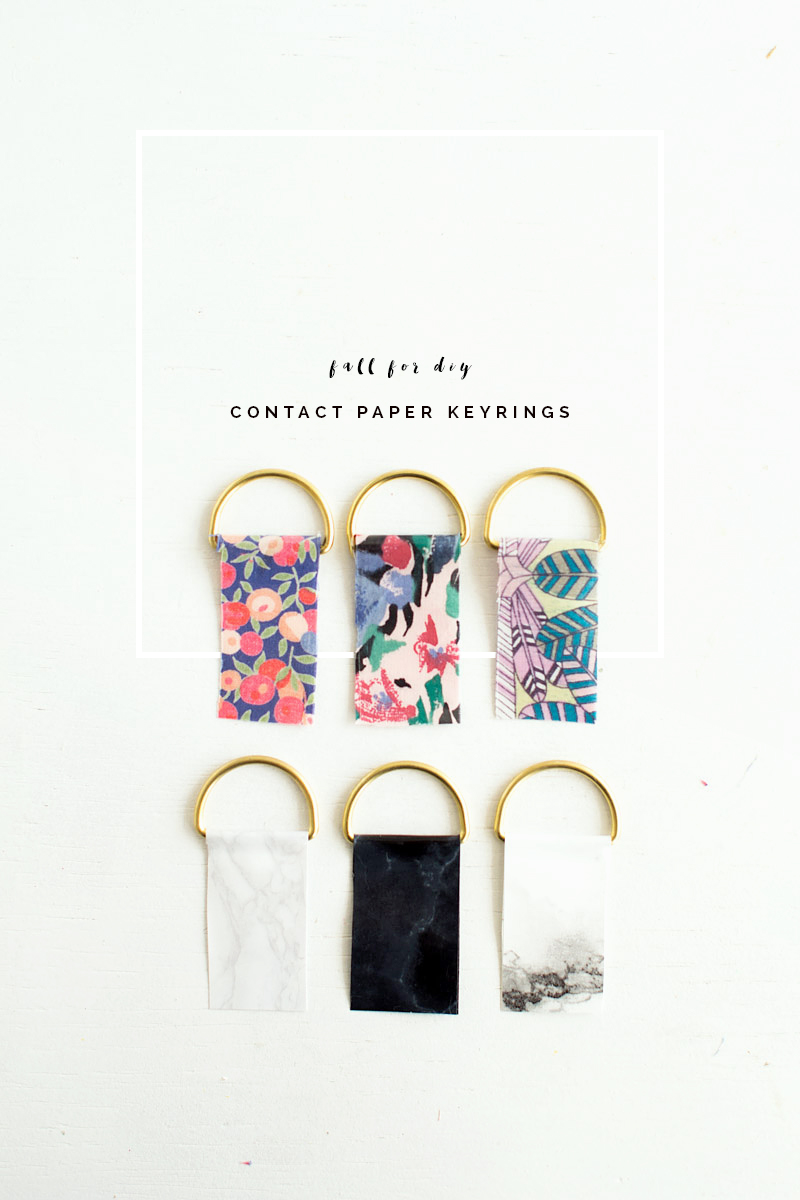
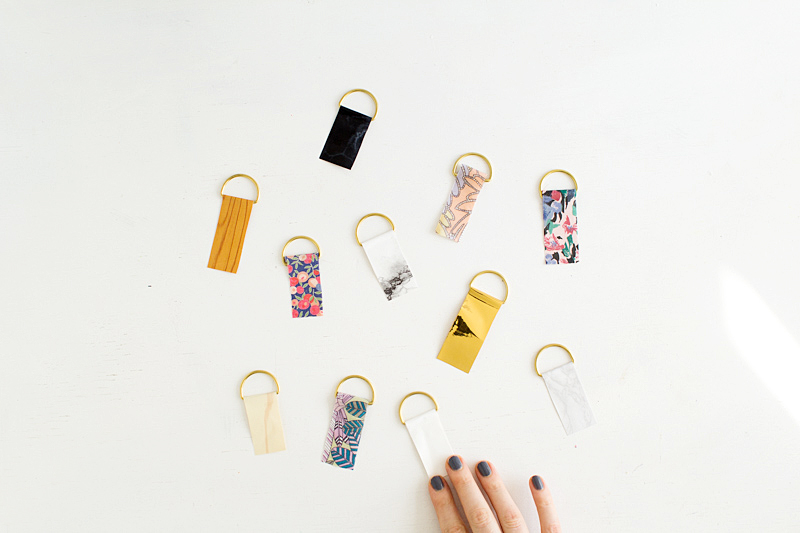
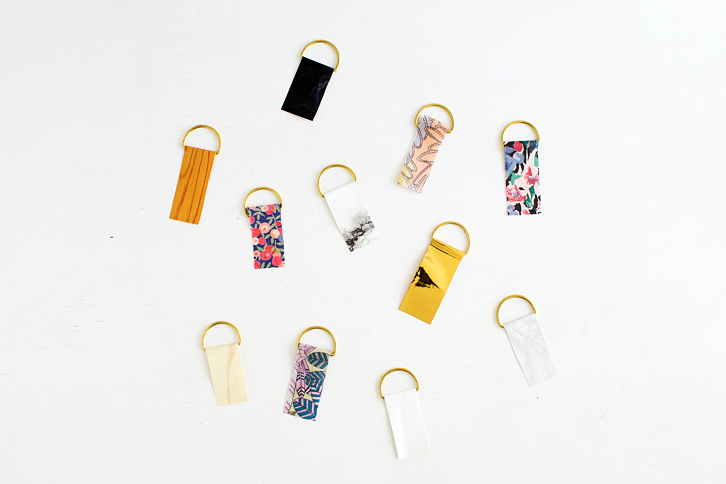
So I used a tassel as a replacement, but I thought perhaps I should try out a little keyring DIY so I’m not in that position again! So here we have DIY contact paper keyrings and not just one tutorial. Below are two different ways you can make a keyring from contact paper!
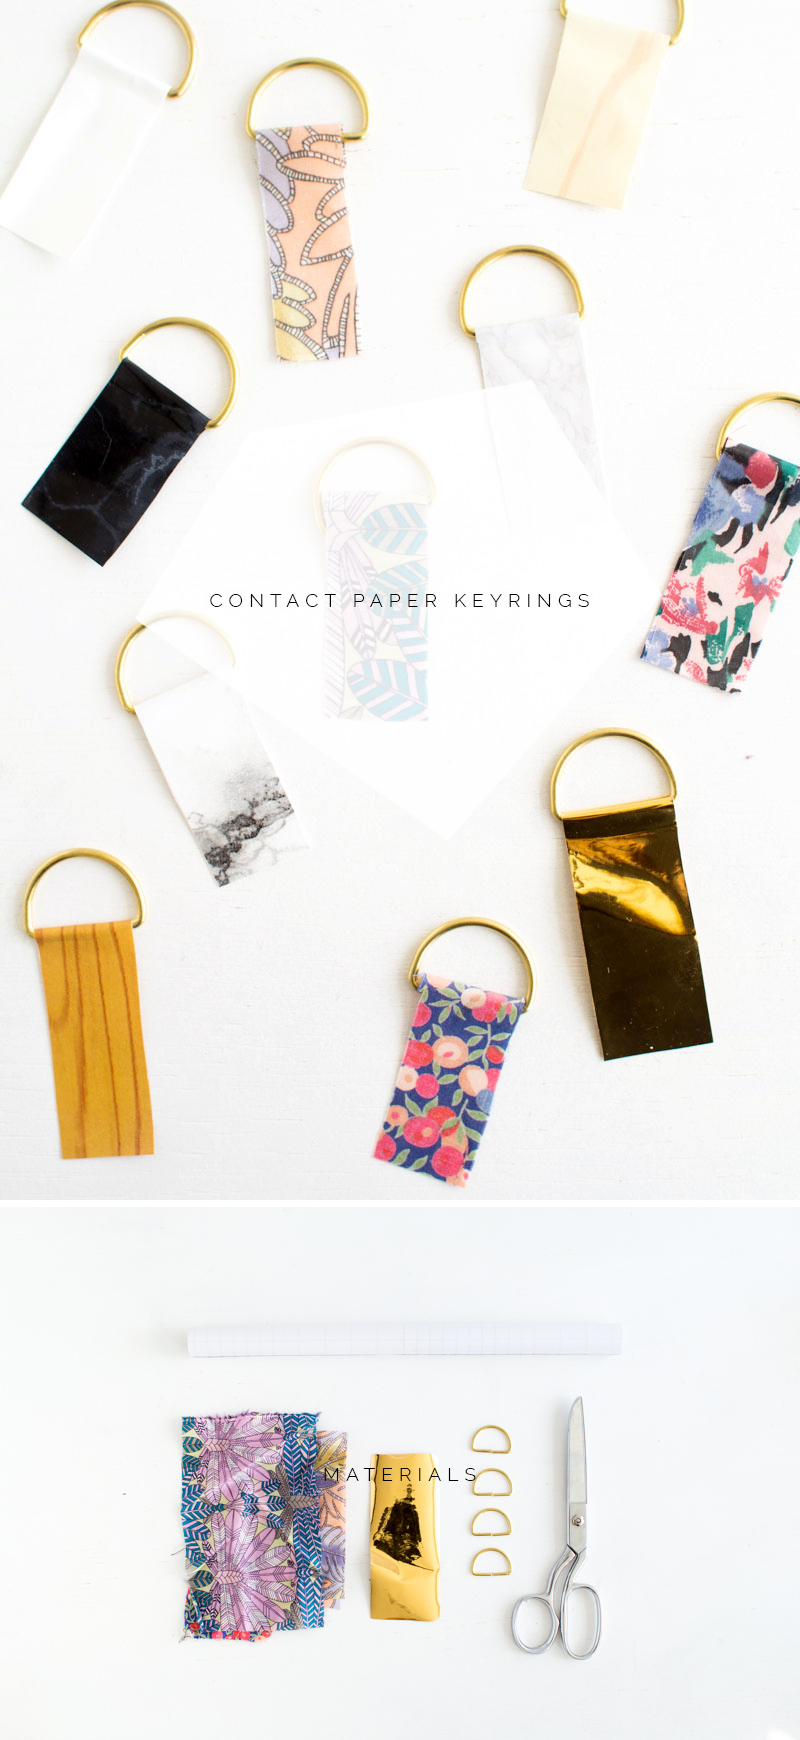
Materials
D-rings | Self adhesive contact paper | Fabric scraps | Scissors
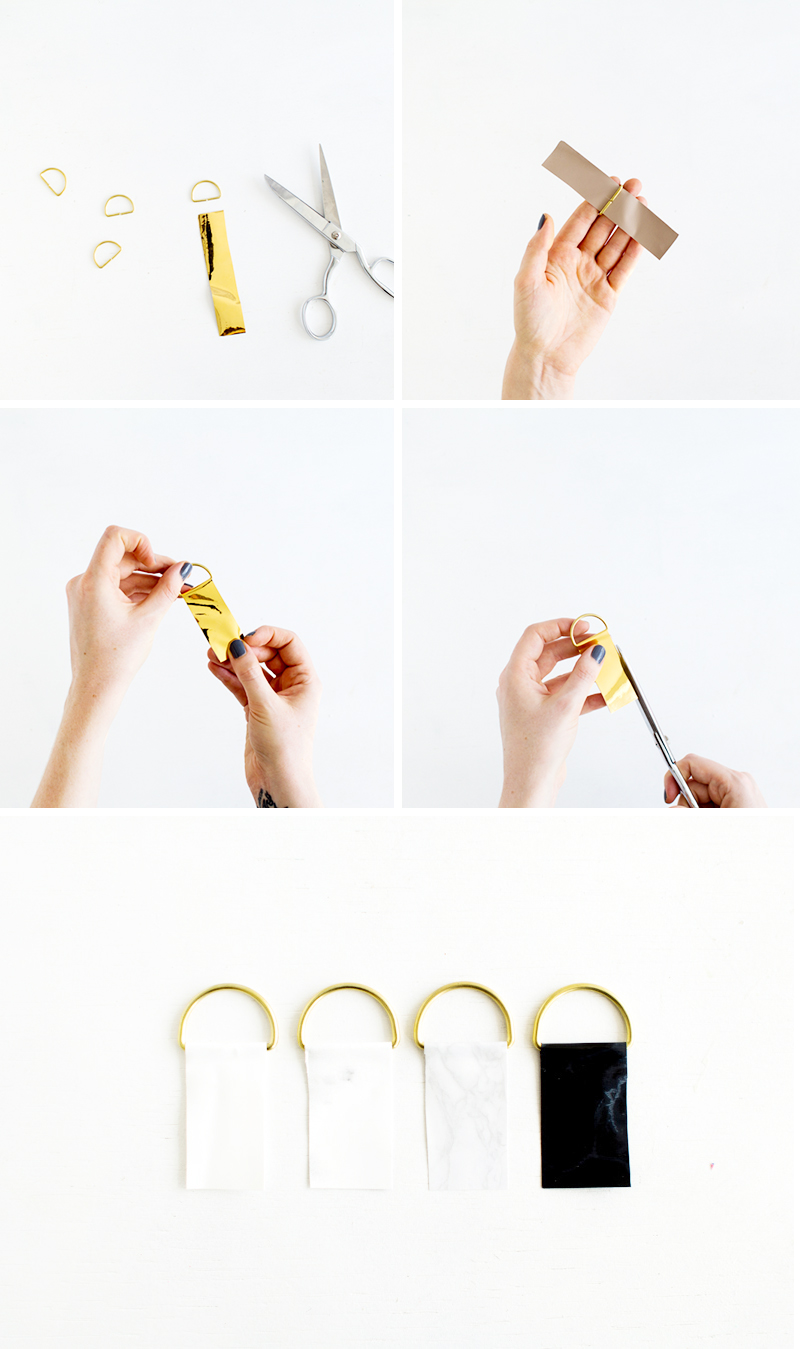
The first keyring is made simpy from the contact paper itself.
1. Cut strips of contact paper the same thickness of the straight edge of the ‘D’.
2. Remove the backing paper and slide through the ring.
3. Fold both sides together, smooth down and trim the edges to make neat.
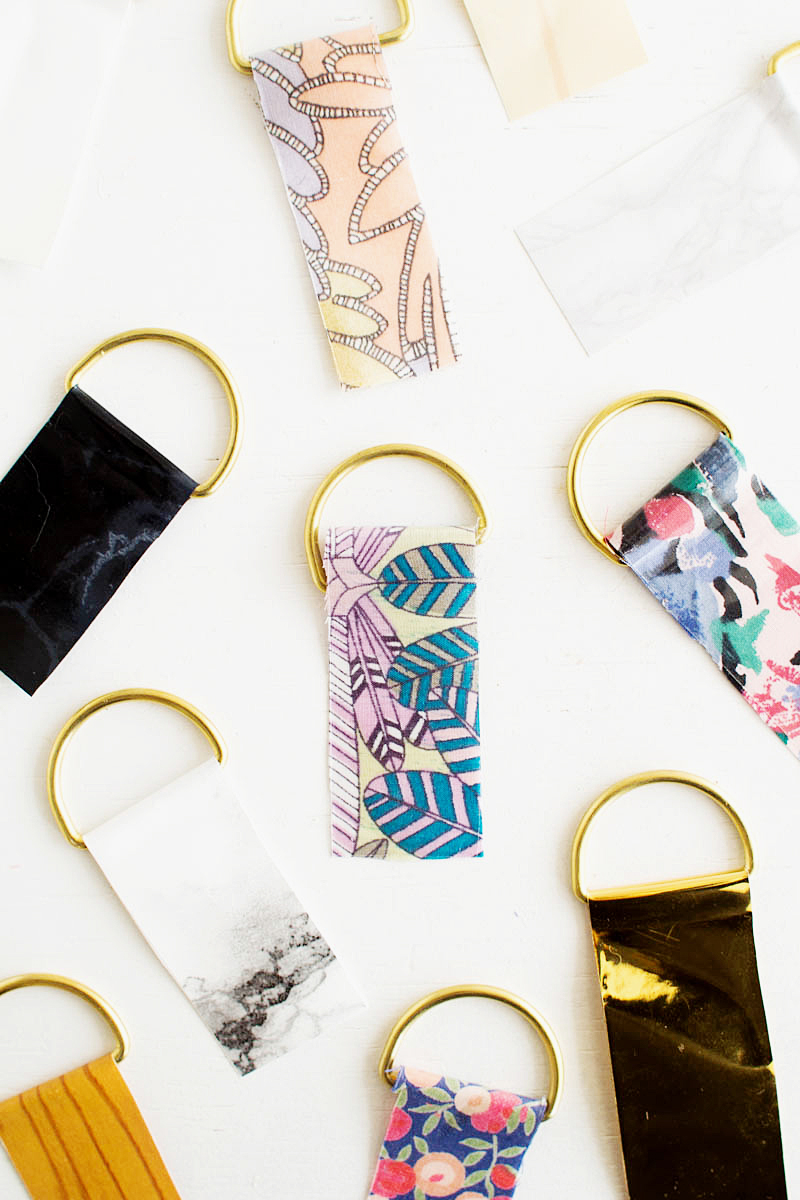
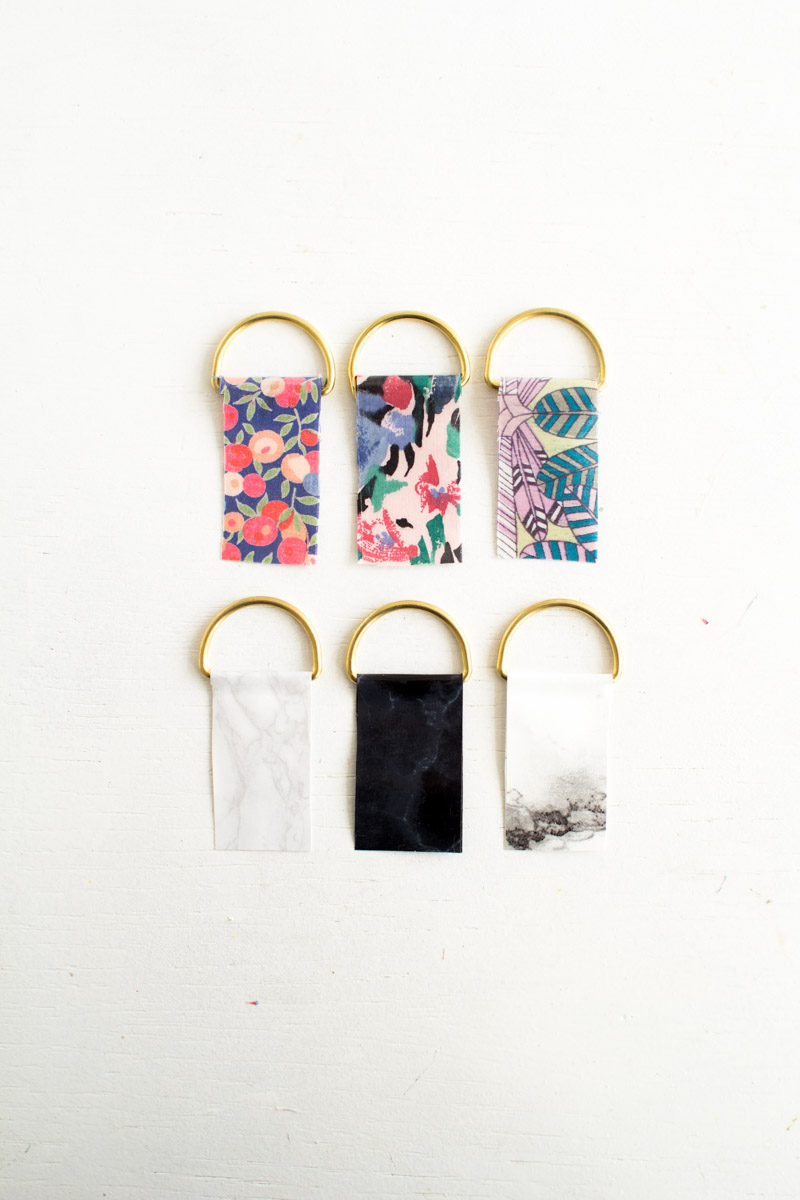
The second keyring uses clear contact paper to cover fabric strips. It’s a great way to use up all your fabric (or paper) scraps and means you have so many customisable options!
1. Cut strips of both contact paper and fabric the same thickness of the straight edge of the ‘D’.
2. Peel off the paper backing and lie the fabric just over halfway up the strip of contact paper. Press down to secure.
3. Thread the remaining contact paper through the D-ring and fold over ensuring the fabric wraps over the straight edge of the ‘D’ to cover it.
4. Press the contact paper over the fabric and trim off the excess.
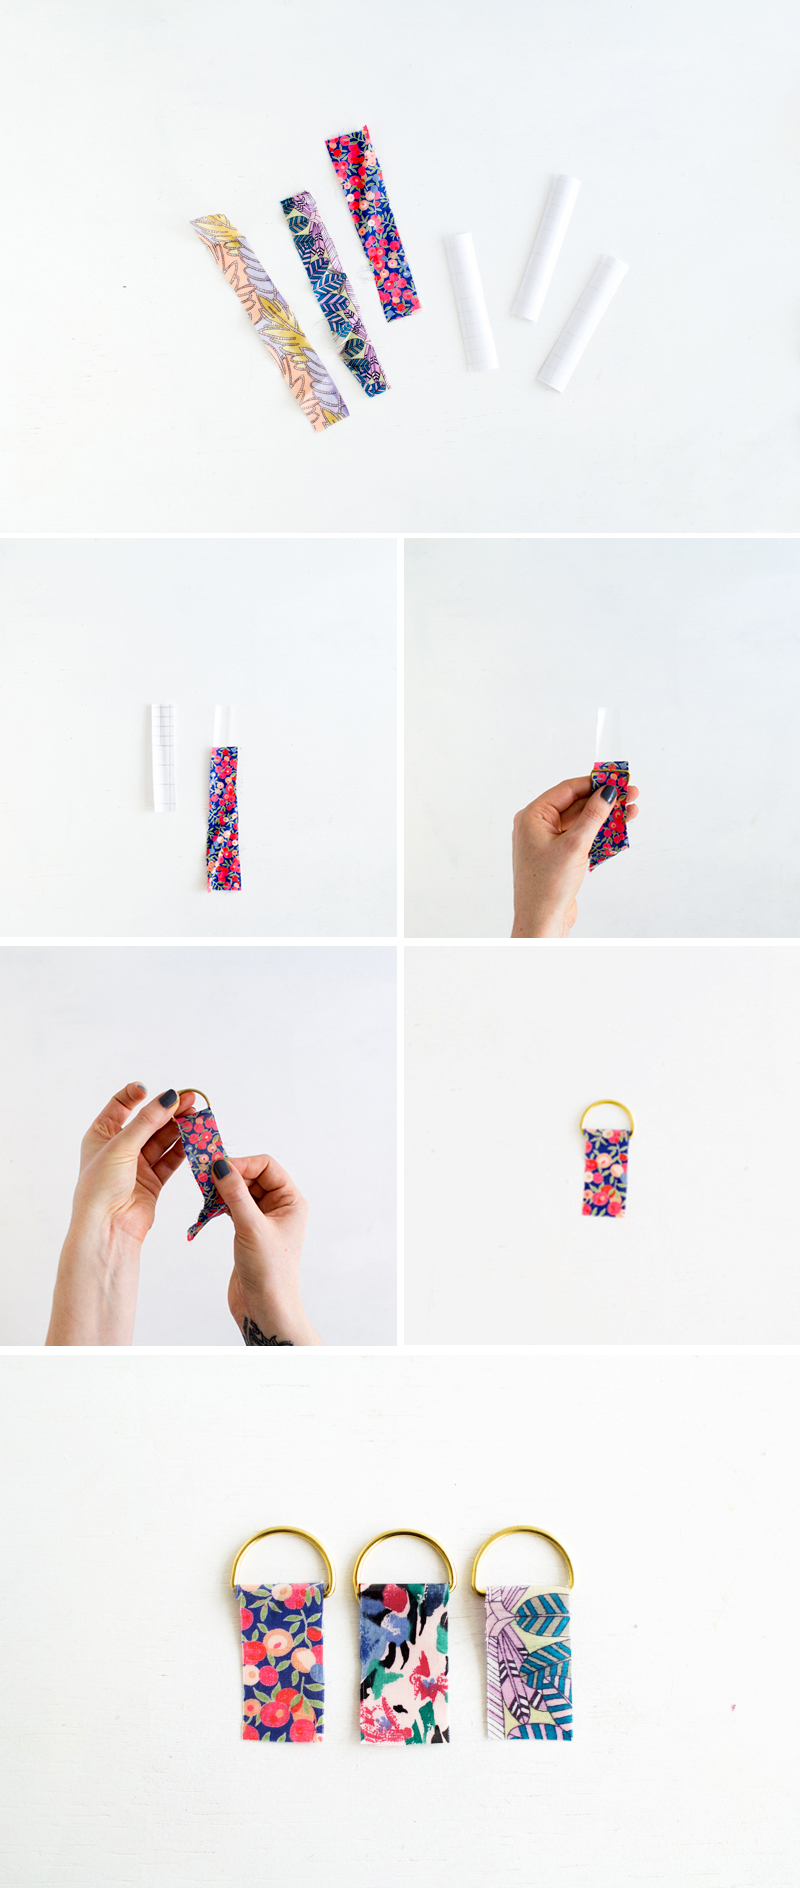
And there you have it! Contact paper keyrings, two ways. Which is your favourite?
Related
Original article and pictures take fallfordiy.com site
Комментариев нет:
Отправить комментарий