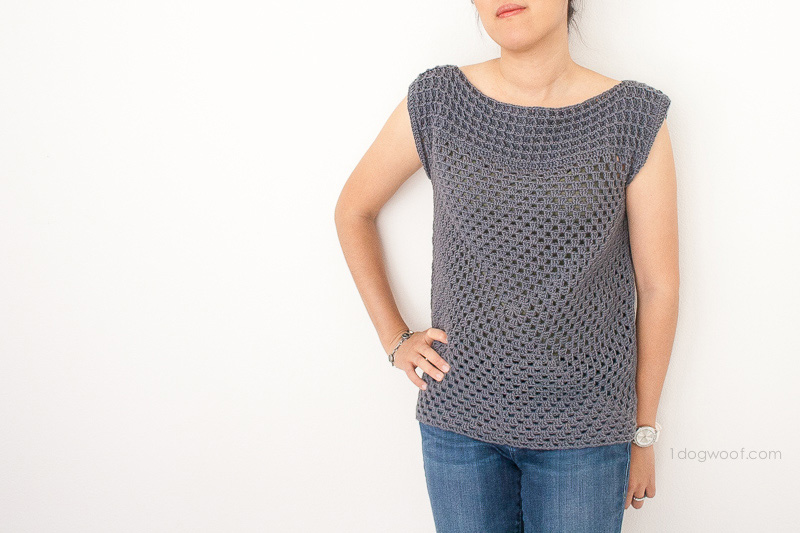
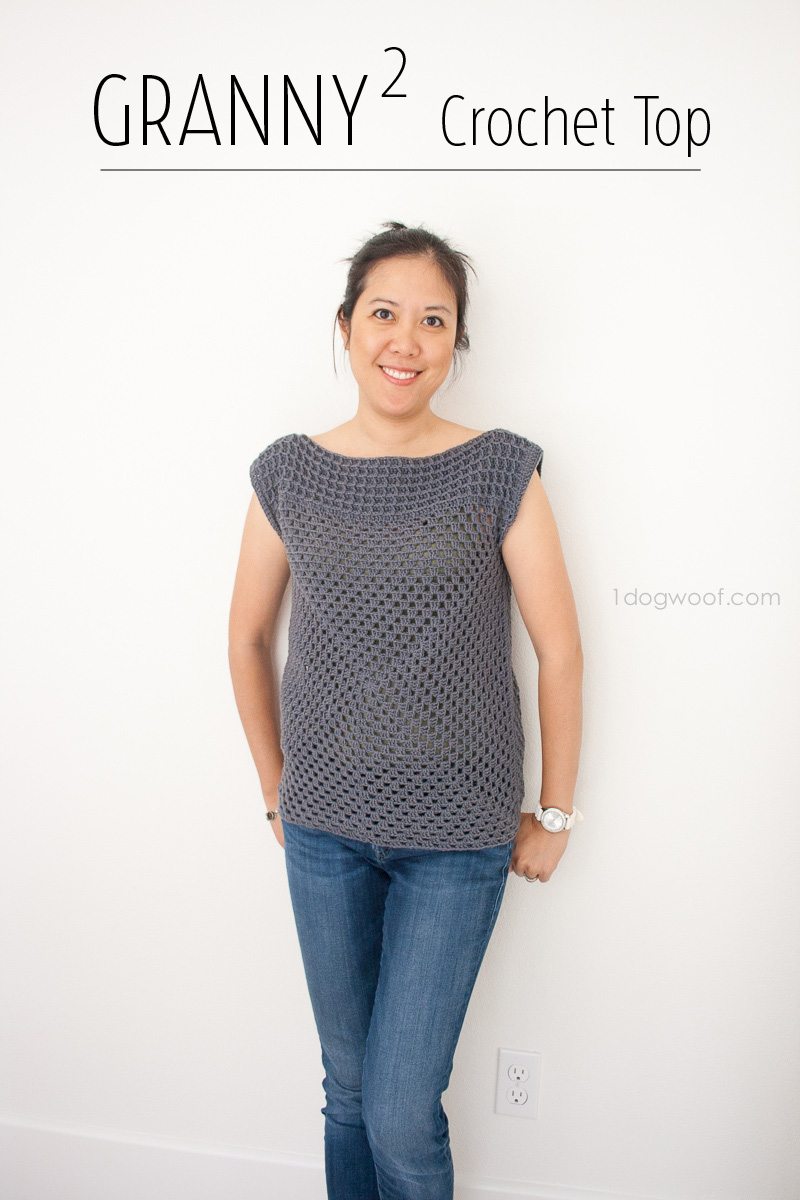
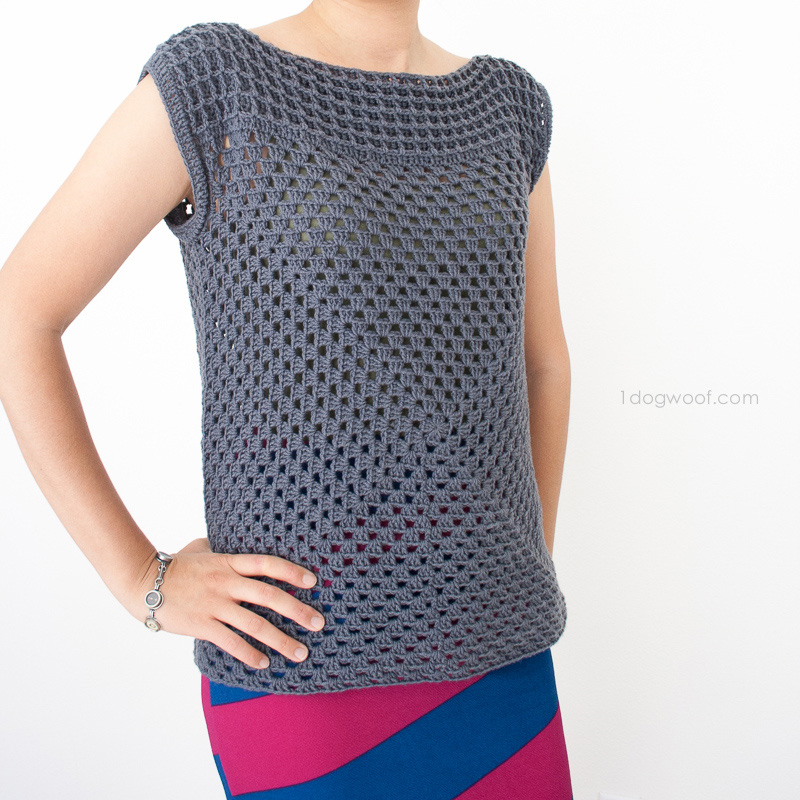
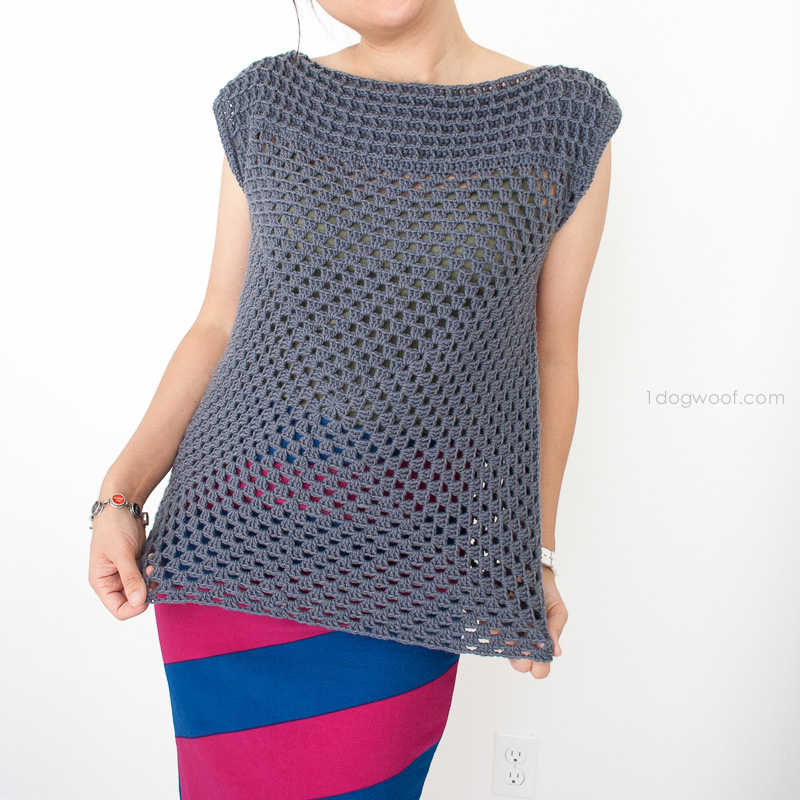
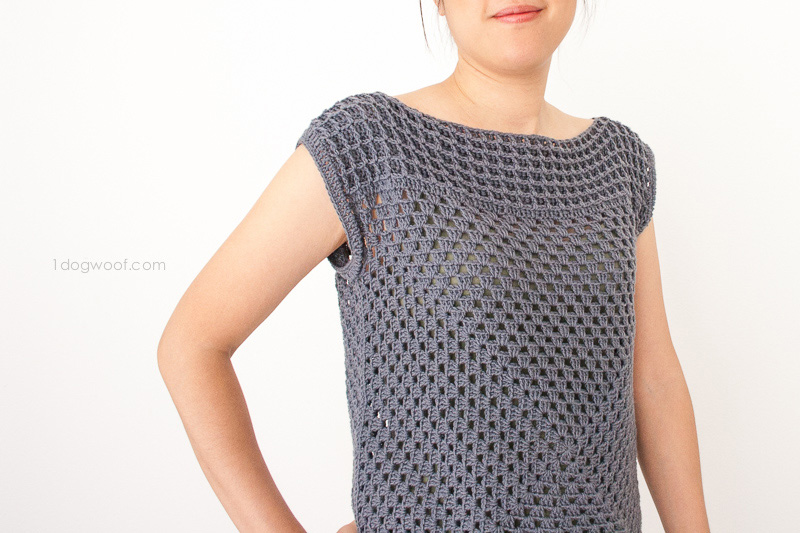
I know it’s the middle/end of summer, so it was a bit hot wearing my new Granny Squared crochet top to work, considering it’s made from 100% Merino Wool, but I ended up having to wear a jacket anyways because of the crazy air conditioning in the office! This blouse worked up super quick and because of the texture, makes for an interesting basic shirt without it being boring!
Ever since designing my first piece of clothing, the Summer Diamonds Kimono Cardigan, I’ve been intrigued by how our everyday clothes are constructed. My cardigan was constructed from side to side. The matching toddler dress was constructed as a tube. Actually, when I was thinking about how to design the Summer Diamonds Toddler Dress, I took inspiration from the basic pillowcase dress, which is just two rectangles sewn together, with holes for your head and arms. This granny square shirt uses the same idea.
I used Lion Brand’s LB Collection Superwash Merino yarn for this project. Their LB Collection is a line of yarn that features different natural fibers, with bamboo, silk and this washable merino wool. The yarn itself was thinner and lighter than I expected, although I’m not sure what I was really expecting, since I don’t work in wearable style yarns very often. At first I planned to make a blanket, but this yarn really lends itself to clothing and the shirt drapes really well. It’s also very warm. Very very warm. The yarn is light, but 3 balls of it made into a shirt, even with the looseness and the holes, results in a very warm cozy feel.
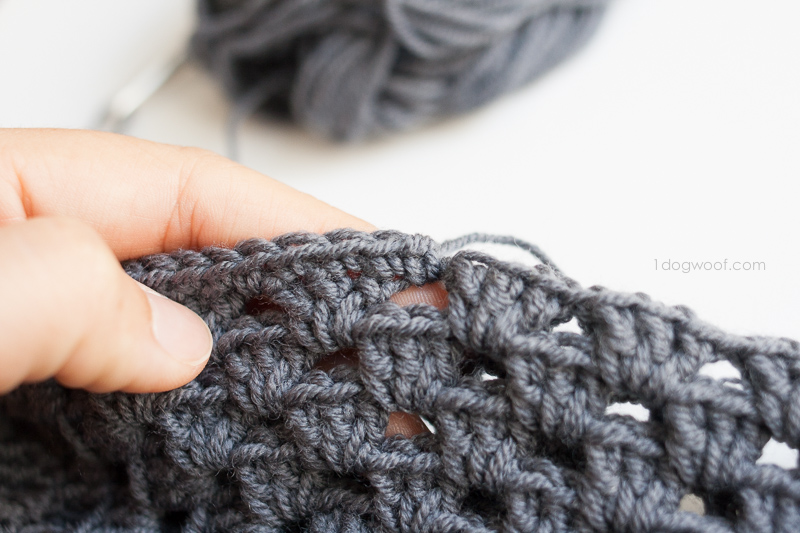
When I started with the idea of putting two granny squares together, the immediate problem was that I’d have two squares. My body type is long and lean and I don’t wear cut-offs, so two squares wasn’t going to do it for me. I needed to add length to my squares. I guess I could have used fringe, but I decided to add a textured block up at the shoulders instead. I’ve always liked the somewhat military look with emphasis on the shoulders (but not the 80’s shoulder pad trend). So I knew I wanted a strong texture up top, not just a row after row of stitches. After looking around at new stitches to learn, I fell in love with the modern geometric look of the waffle stitch. And the makings of this granny square shirt was as simple as putting those two ideas together!
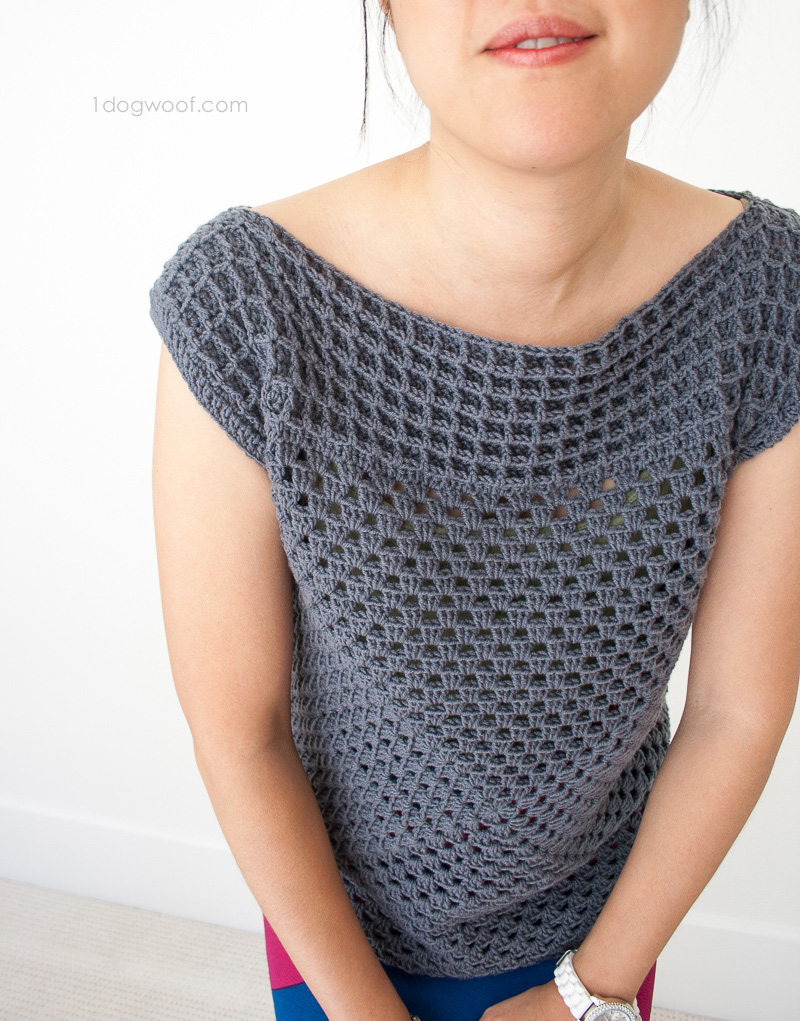
The basic construction of this shirt is to make two granny squares. Add the waffle onto each granny square to make two rectangular pieces. Then, seam the pieces together, leaving room for your arms and head. Finish off the arm holes by creating tiny little cap sleeves. The seams at the shoulders naturally creates a boatneck neckline so I didn’t have to worry about designing a collar. I also didn’t add any border to the bottom of the shirt – I kind of like it a bit raw at the bottom.
Would you believe this is the first time I’ve worked a basic granny square?! I’ve made a granny square quilt before, but used a slightly different pattern for each square. I love how simple this pattern is, and how quickly it works up. Once you get the general idea, you don’t need to constantly count stitches and the time just flies by!
Sizing
This pattern can be easily altered for sizing, since it consists of 2 main blocks – the granny square and the waffle motif up top. The number of granny square rounds will determine the width of the shirt, so increase the number of rounds to make a larger shirt, or decrease to make a smaller shirt. Once you have the square done, you can work the waffle pattern across one side of the granny square, regardless of the width of the square. Always work Row 1 of the waffle pattern, which is a row of double crochets. Then, work the next 2 rows described below in pairs for as many pairs as necessary to create the desired length of the shirt. The seams and the sleeves are dependent on the size of the two pieces and can also be adjusted accordingly.
Also remember that for my shirt, I used a lightweight, size 3 yarn. Using yarn of different thicknesses and different sized hooks will yield different results. The best part is you can just start and then compare to shirts from your wardrobe as you go!
You can also purchase an inexpensive, ad-free and comment-free PDF version of the Granny Squared Crochet Top pattern on Craftsy (US only) or on Etsy (international buyers, start here!). The file will be available for download immediately after payment. Thank you for helping me continue to provide these fun free patterns!
Supplies
- 3 balls of Lion Brand LB Collection® Superwash Merino Yarn in Charcoal (100g/3.5oz, 305 yds/280m)
- scissors
- embroidery needle
Abbreviations
- sl st – slip stitch
- sc – single crochet
- dc – double crochet
- fpdc – front post double crochet – work a normal double crochet stitch, but around the post of the indicated double crochet stitch, not through the two loops at the top.
Pattern Notes
- Gauge: 4 rounds of the granny square = 3.5 inches. Total yardage ~ 900 yds
- The chain stitches at the beginning of rows and rounds count as a dc stitch unless otherwise noted.
- Stitches are worked into the chain 1 space in the granny square motif, not the actual chain stitch. The only place where the chain 1 stitch is treated as a stitch is when working the mattress stitch up the side of the shirt.
- The length of the shoulder seams is adjustable and open to interpretation. I chose to seam the shoulders about 13-14 stitches, which covered about 4 waffle blocks to create a fairly large boatneck opening. To create a tighter neckline, just create a longer seam along each shoulder.
- The length of the side seams is also adjustable and customizable. I seamed up the sides around 77 stitches to create an arm hole that fit my arm. Obviously, depending on your arm, you can make a larger or smaller arm hole by less or more of the “fabric” together.
- When using the mattress stitch to seam up the side of the shirt, you’ll see 4 loops because you’re holding two sides together. Work the mattress stitch into the 2 loops in the middle – the front loop of the back piece, and the back loop of the front piece.

- Here’s a video to show how to work the mattress stitch!
- The number of stitches in the cap sleeves is pretty arbitrary. The instructions say to work stitches evenly around the sleeve hole (or up one side, and down the other, however you want to think about it). I recommend not putting in too many stitches; rather, spacing them out pretty evenly. If you work in too many stitches, your sleeve will be ruffled, and I think it looks better when it’s a little tapered.
Granny Square Cap Sleeved Top Instructions
Round 1: Start with a magic circle. Ch 3. Work 2 dc into magic circle. Ch 2. Work [3 dc, then ch 2] 3 times into the magic circle. Join with sl st to the 3rd ch at the beginning of the round.
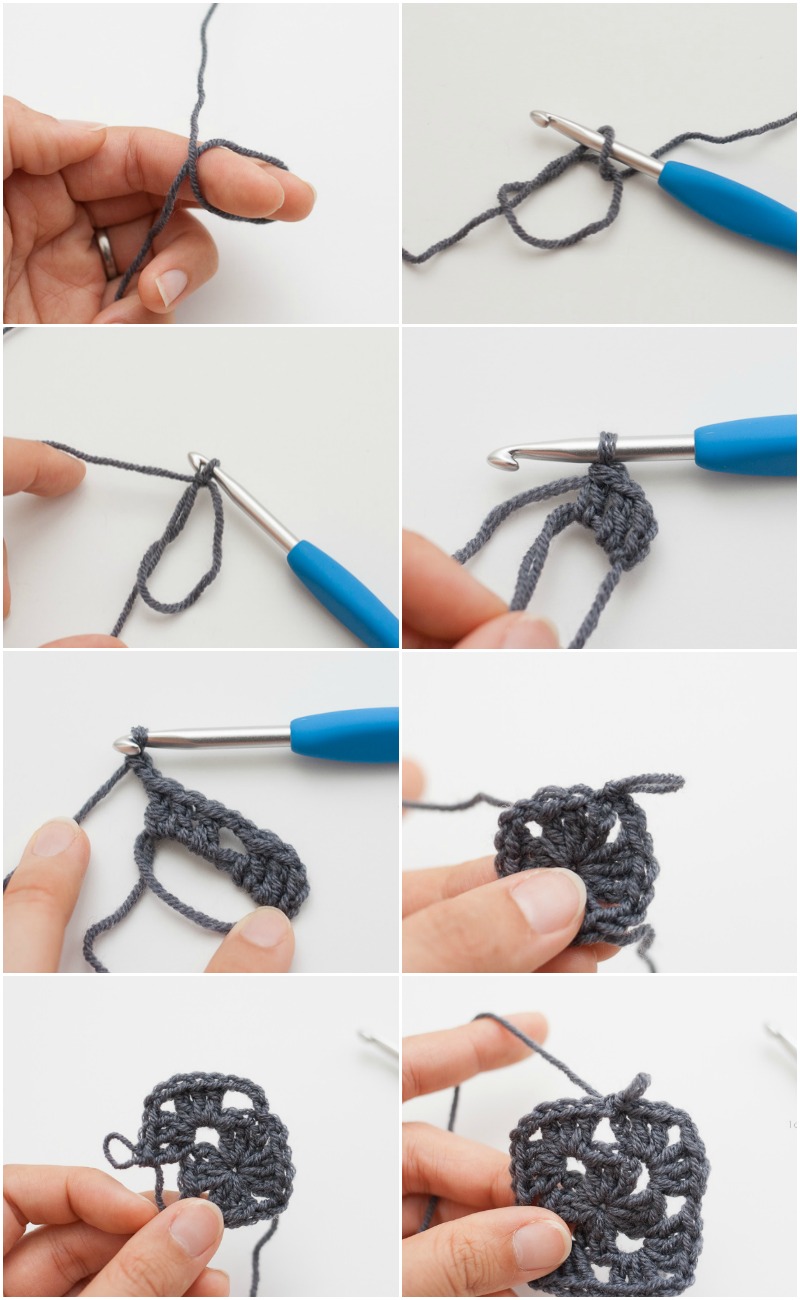
Round 2: Ch 4. Skip the 3 dc cluster and work [3 dc, ch 2, 3 dc, ch 1] in the next corner ch 2 space. Work [3 dc, ch 2, 3 dc, ch 1] in the next corner ch 2 space, 2 more times. In the last ch 2 space, work [3 dc, ch 2, 2 dc]. Join with sl st to the 3rd ch (out of 4 chains) at the beginning of the round.
Round 3: Ch 3. Work [2 dc, ch 1]. *In next corner ch 2 space, work [3 dc, ch 2, 3 dc, ch 1]. Work [3 dc, ch 1] in next ch 1 space.* Repeat from * 2 more times. In next ch 2 space, work [3 dc, ch 2, 3 dc, ch 1]. Join with sl st to 3rd ch at the beginning of the round.
Round 4: Ch 4. Skip the first 3 dc cluster and work [3 dc, ch 1] in the next ch 1 space. *In the next corner ch 2 space, work [3 dc, ch 2, 3 dc, ch 1]. Work [3 dc, ch 1] in each of the next 2 ch 1 space.* Repeat from * 2 more times. In the next corner ch 2 space, work [3 dc, ch 2, 3 dc, ch 1]. Work 2 dc in next ch 1 sp. Join to 3rd ch at the beginning of the round.
Round 5: Ch 3. Work [2 dc, ch 1]. Work [3 dc, ch 1] in the next ch 1 space. *In next corner ch 2 space, work [3 dc, ch 2, 3 dc, ch 1]. Work [3 dc, ch 1] in each of the next 3 ch 1 space.* Repeat from * 2 more times. In next corner ch 2 space, work [3 dc, ch 2 dc, ch 1]. Work [3 dc, ch 1] in the next ch 1 space. Join with sl st to 3rd ch at the beginning of the round.
Round 6: Ch 4. Skip the first 3 dc cluster and work [3 dc, ch 1] in each of the next 2 ch 1 space. *In the next corner ch 2 space, work [3 dc, ch 2, 3 dc, ch 1]. Work [3 dc, ch 1] in each of the next 4 ch 1 space.* Repeat from * 2 more times. In the next corner ch 2 space, work [3 dc, ch 2, 3 dc, ch 1]. Work [3 dc, ch 1] in the next ch 1 space. Work 2 dc in the next ch 1 sp. Join to 3rd ch at the beginning of the round.
Round 7: Ch 3. Work [2 dc, ch 1]. Work [3 dc, ch 1] in each of the next 2 ch 1 space. *In next corner ch 2 space, work [3 dc, ch 2, 3 dc, ch 1]. Work [3 dc, ch 1] in each of the next 5 ch 1 space.* Repeat from * 2 more times. In next corner ch 2 space, work [3 dc, ch 2, 3 dc, ch 1]. Work [3 dc, ch 1] in each of the next 2 ch 1 space. Join with sl st to 3rd ch at the beginning of the round.
Round 8: Ch 4. Skip the first 3 dc cluster and work [3 dc, ch 1] in each of the next 3 ch 1 space. *In the next corner ch 2 space, work [3 dc, ch 2, 3 dc, ch 1]. Work [3 dc, ch 1] in each of the next 6 ch 1 space.* Repeat from * 2 more times. In the next corner ch 2 space, work [3 dc, ch 2, 3 dc, ch 1]. Work [3 dc, ch 1] in each of the next 2 ch 1 space. Work 2 dc in the next ch 1 sp. Join to 3rd ch at the beginning of the round.
Round 9: Ch 3. Work [2 dc, ch 1]. Work [3 dc, ch 1] in each of the next 3 ch 1 space. *In next corner ch 2 space, work [3 dc, ch 2, 3 dc, ch 1]. Work [3 dc, ch 1] in each of the next 7 ch 1 space.* Repeat from * 2 more times. In next corner ch 2 space, work [3 dc, ch 2, 3 dc, ch 1]. Work [3 dc, ch 1] in each of the next 3 ch 1 space. Join with sl st to 3rd ch at the beginning of the round.
Round 10: Ch 4. Skip the first 3 dc cluster and work [3 dc, ch 1] in each of the next 4 ch 1 space. *In the next corner ch 2 space, work [3 dc, ch 2, 3 dc, ch 1]. Work [3 dc, ch 1] in each of the next 8 ch 1 space.* Repeat from * 2 more times. In the next corner ch 2 space, work [3 dc, ch 2, 3 dc, ch 1]. Work [3 dc, ch 1] in each of the next 3 ch 1 space. Work 2 dc in the next ch 1 sp. Join to 3rd ch at the beginning of the round.
Round 11: Ch 3. Work [2 dc, ch 1]. Work [3 dc, ch 1] in each of the next 4 ch 1 space. *In next corner ch 2 space, work [3 dc, ch 2, 3 dc, ch 1]. Work [3 dc, ch 1] in each of the next 9 ch 1 space.* Repeat from * 2 more times. In next corner ch 2 space, work [3 dc, ch 2, 3 dc, ch 1]. Work [3 dc, ch 1] in each of the next 4 ch 1 space. Join with sl st to 3rd ch at the beginning of the round.
Round 12: Ch 4. Skip the first 3 dc cluster and work [3 dc, ch 1] in each of the next 5 ch 1 space. *In the next corner ch 2 space, work [3 dc, ch 2, 3 dc, ch 1]. Work [3 dc, ch 1] in each of the next 10 ch 1 space.* Repeat from * 2 more times. In the next corner ch 2 space, work [3 dc, ch 2, 3 dc, ch 1]. Work [3 dc, ch 1] in each of the next 4 ch 1 space. Work 2 dc in the next ch 1 sp. Join to 3rd ch at the beginning of the round.
Round 13: Ch 3. Work [2 dc, ch 1]. Work [3 dc, ch 1] in each of the next 5 ch 1 space. *In next corner ch 2 space, work [3 dc, ch 2, 3 dc, ch 1]. Work [3 dc, ch 1] in each of the next 511ch 1 space.* Repeat from * 2 more times. In next corner ch 2 space, work [3 dc, ch 2, 3 dc, ch 1]. Work [3 dc, ch 1] in each of the next 5 ch 1 space. Join with sl st to 3rd ch at the beginning of the round.
Round 14: Ch 4. Skip the first 3 dc cluster and work [3 dc, ch 1] in each of the next 6 ch 1 space. *In the next corner ch 2 space, work [3 dc, ch 2, 3 dc, ch 1]. Work [3 dc, ch 1] in each of the next 12 ch 1 space.* Repeat from * 2 more times. In the next corner ch 2 space, work [3 dc, ch 2, 3 dc, ch 1]. Work [3 dc, ch 1] in each of the next 5 ch 1 space. Work 2 dc in the next ch 1 sp. Join to 3rd ch at the beginning of the round.
Round 15: Ch 3. Work [2 dc, ch 1]. Work [3 dc, ch 1] in each of the next 6 ch 1 space. *In next corner ch 2 space, work [3 dc, ch 2, 3 dc, ch 1]. Work [3 dc, ch 1] in each of the next 13 ch 1 space.* Repeat from * 2 more times. In next corner ch 2 space, work [3 dc, ch 2, 3 dc, ch 1]. Work [3 dc, ch 1] in each of the next 6 ch 1 space. Join with sl st to 3rd ch at the beginning of the round.
Round 16: Ch 4. Skip the first 3 dc cluster and work [3 dc, ch 1] in each of the next 7 ch 1 space. *In the next corner ch 2 space, work [3 dc, ch 2, 3 dc, ch 1]. Work [3 dc, ch 1] in each of the next 14 ch 1 space.* Repeat from * 2 more times. In the next corner ch 2 space, work [3 dc, ch 2, 3 dc, ch 1]. Work [3 dc, ch 1] in each of the next 6 ch 1 space. Work 2 dc in the next ch 1 sp. Join to 3rd ch at the beginning of the round.
Round 17: Ch 3. Work [2 dc, ch 1]. Work [3 dc, ch 1] in each of the next 7 ch 1 space. *In next corner ch 2 space, work [3 dc, ch 2, 3 dc, ch 1]. Work [3 dc, ch 1] in each of the next 15 ch 1 space.* Repeat from * 2 more times. In next corner ch 2 space, work [3 dc, ch 2, 3 dc, ch 1]. Work [3 dc, ch 1] in each of the next 7 ch 1 space. Join with sl st to 3rd ch at the beginning of the round.
Round 18: Ch 4. Skip the first 3 dc cluster and work [3 dc, ch 1] in each of the next 8 ch 1 space. *In the next corner ch 2 space, work [3 dc, ch 2, 3 dc, ch 1]. Work [3 dc, ch 1] in each of the next 16 ch 1 space.* Repeat from * 2 more times. In the next corner ch 2 space, work [3 dc, ch 2, 3 dc, ch 1]. Work [3 dc, ch 1] in each of the next 7 ch 1 space. Work 2 dc in the next ch 1 sp. Join to 3rd ch at the beginning of the round.
Round 19: Ch 3. Work [2 dc, ch 1]. Work [3 dc, ch 1] in each of the next 8 ch 1 space. *In next corner ch 2 space, work [3 dc, ch 2, 3 dc, ch 1]. Work [3 dc, ch 1] in each of the next 17 ch 1 space.* Repeat from * 2 more times. In next corner ch 2 space, work [3 dc, ch 2, 3 dc, ch 1]. Work [3 dc, ch 1] in each of the next 8 ch 1 space. Join with sl st to 3rd ch at the beginning of the round.
Round 20: Ch 4. Skip the first 3 dc cluster and work [3 dc, ch 1] in each of the next 9 ch 1 space. *In the next corner ch 2 space, work [3 dc, ch 2, 3 dc, ch 1]. Work [3 dc, ch 1] in each of the next 18 ch 1 space.* Repeat from * 2 more times. In the next corner ch 2 space, work [3 dc, ch 2, 3 dc, ch 1]. Work [3 dc, ch 1] in each of the next 8 ch 1 space. Work 2 dc in the next ch 1 sp. Join to 3rd ch at the beginning of the round.
Round 21: Ch 3. Work [2 dc, ch 1]. Work [3 dc, ch 1] in each of the next 9 ch 1 space. *In next corner ch 2 space, work [3 dc, ch 2, 3 dc, ch 1]. Work [3 dc, ch 1] in each of the next 19 ch 1 space.* Repeat from * 2 more times. In next corner ch 2 space, work [3 dc, ch 2, 3 dc, ch 1]. Work [3 dc, ch 1] in each of the next 9 ch 1 space. Join with sl st to 3rd ch at the beginning of the round.
Round 22: Ch 4. Skip the first 3 dc cluster and work [3 dc, ch 1] in each of the next 10 ch 1 space. *In the next corner ch 2 space, work [3 dc, ch 2, 3 dc, ch 1]. Work [3 dc, ch 1] in each of the next 20 ch 1 space.* Repeat from * 2 more times. In the next corner ch 2 space, work [3 dc, ch 2, 3 dc, ch 1]. Work [3 dc, ch 1] in each of the next 9 ch 1 space. Work 2 dc in the next ch 1 sp. Join to 3rd ch at the beginning of the round.
Waffle Block
Row 1: Work a standing dc in the corner ch 2 space. Work 1 dc in each of the next 88 st. The last dc is the corner ch 2 space. Turn. (89)
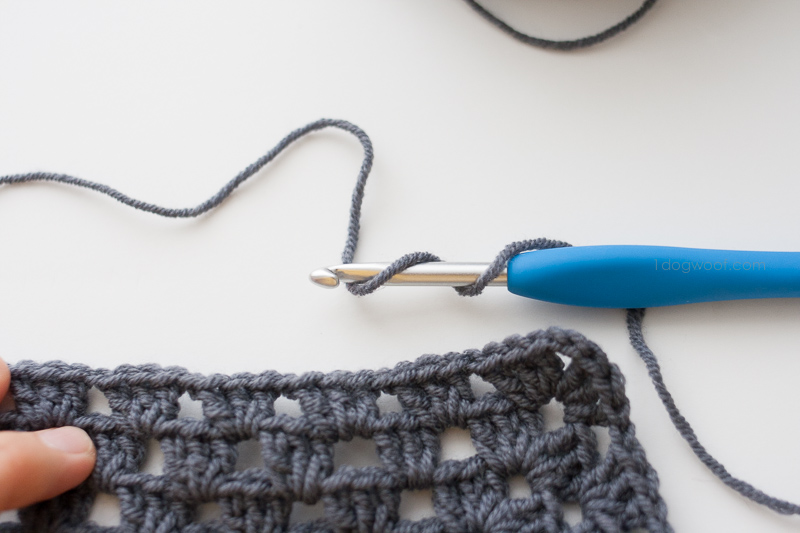
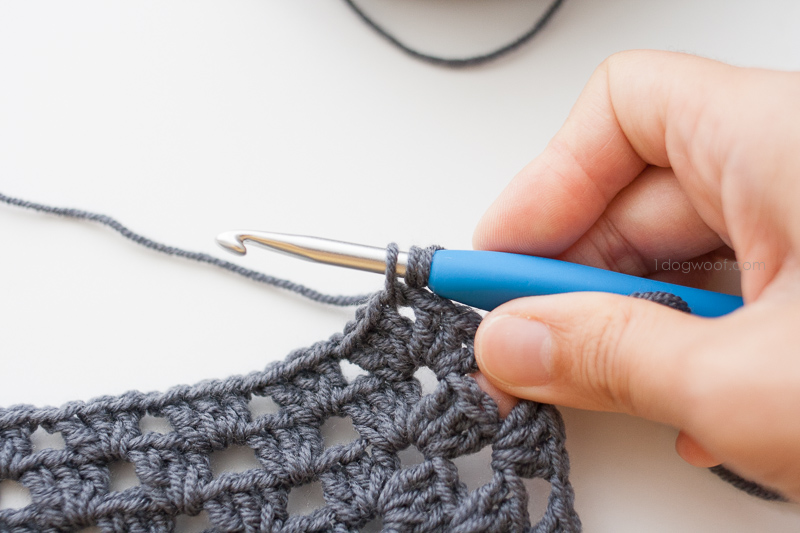
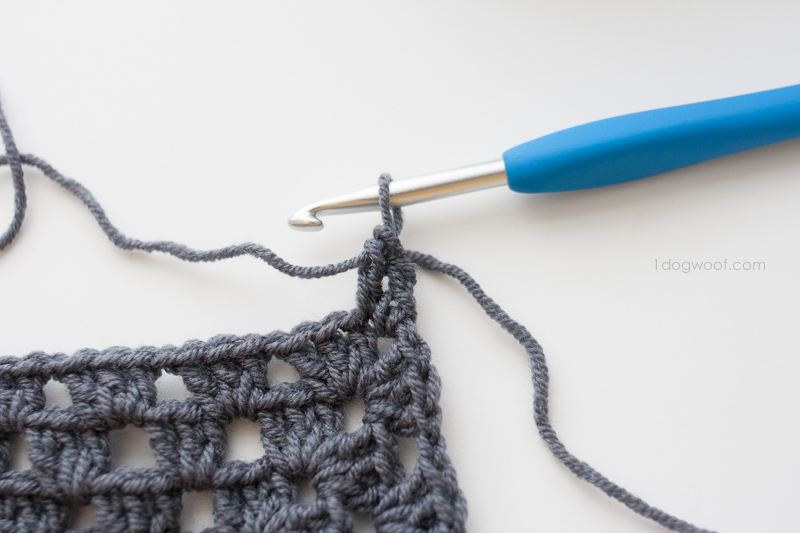
Row 2: Ch 3 (counts as 1st dc made). *Work 1 dc in next st. Work 1 fpdc in each of next 2 st.* Repeat from * 28 more times. Work 1 dc in last st. Turn. (89)

Row 3: Ch 3 (counts as 1st dc made). *Work 1 dc in each of next 2 st. Work 1 fpdc in next st.* Repeat from * 28 more times. Work 1 dc in last st (which is the 3rd turning chain). Turn. (89)
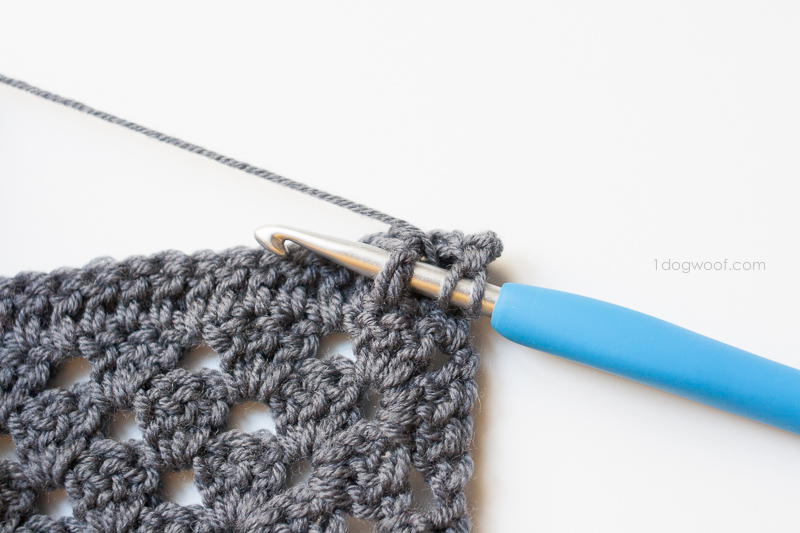
Rows 4-13: Repeat Rows 2 and 3 as a pair, 5 more times. Cut a tail about 1 foot long and fasten off.
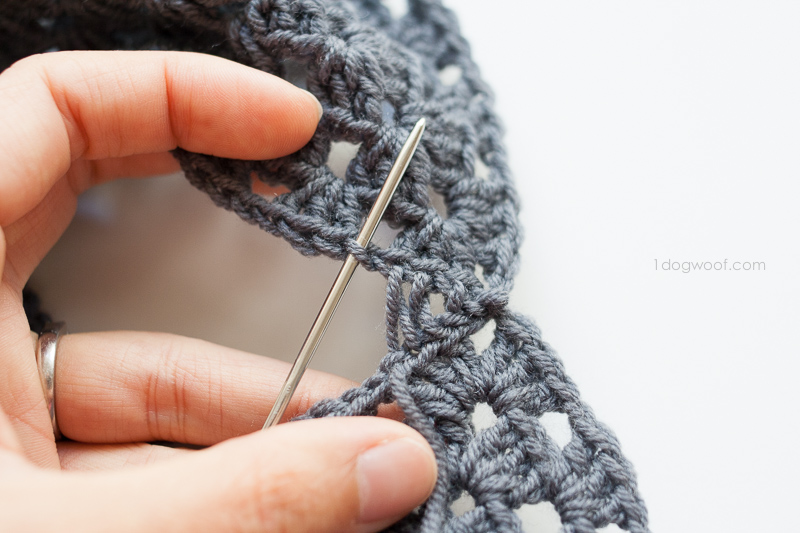
With wrong sides facing, use the tail from the waffle section to seam up the shoulder. Use the mattress stitch to join a length of about 12-14 stitches. Repeat for the other shoulder.
Side Seam
To seam up the sides of the shirt, start with a double knot worked through the corner ch 2 spaces of both pieces, wrong sides facing. Use the mattress stitch to join a length of about 77 stitches, ending in the ch 1 sp between the 19th and 20th dc clusters. Cut a tail, fasten off and weave in ends. Repeat for the other side seam.
Sleeve
Round 1: Work 1 standing sc into the last stitch where the the seam was joined. Work sc evenly around the arm hole and join with sl st to the first sc.

Round 2: Ch 2 (does not count as stitch). Work 1 dc into same stitch, and 1 dc into each stitch around. Join with sl st to first dc.
Round 3: Ch 1. Work 1 sc into same stitch, and 1 sc into each stitch around. Join with sl st to first sc. Cut tail, fasten off and weave in ends.
All done!
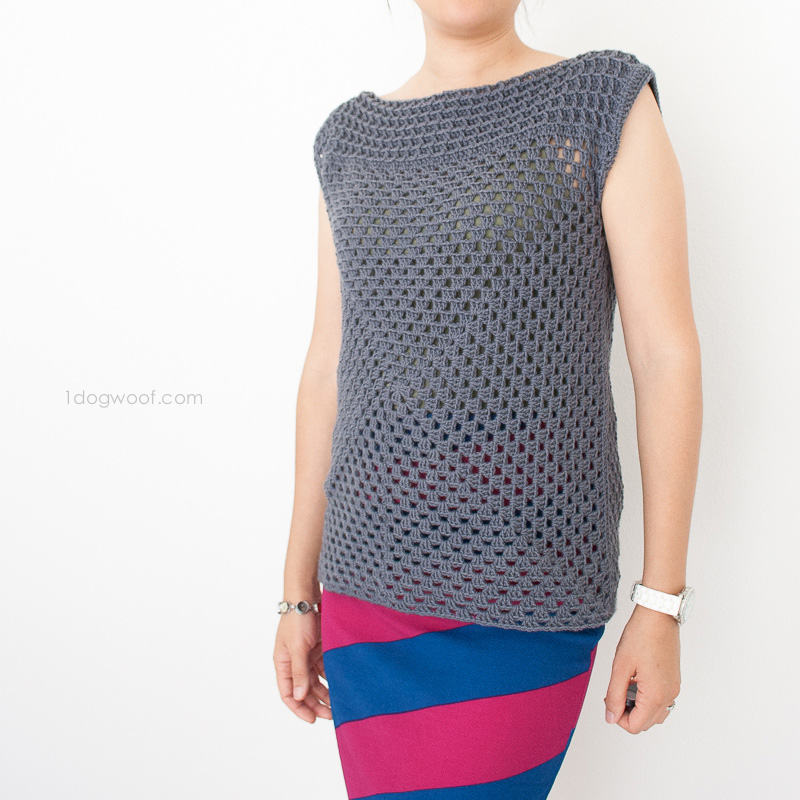
Because the shirt features a granny square, with all the holes in it, I did need to wear something underneath. I mean, I guess you don’t have to…. I tried a nude colored tank at first, but it looks way better with something darker underneath. For the photos, I wore an olive green tank.
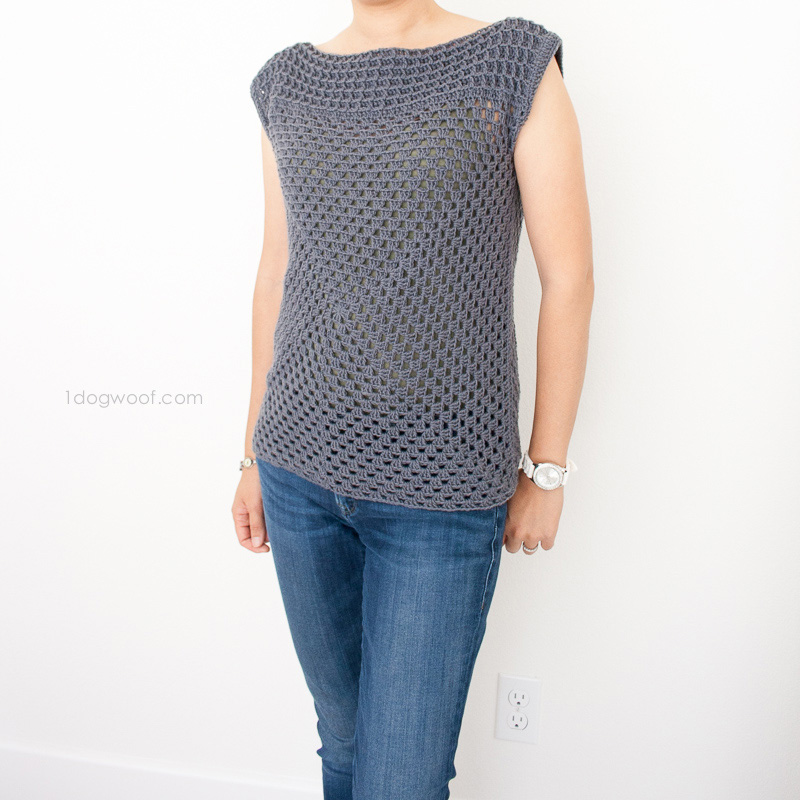
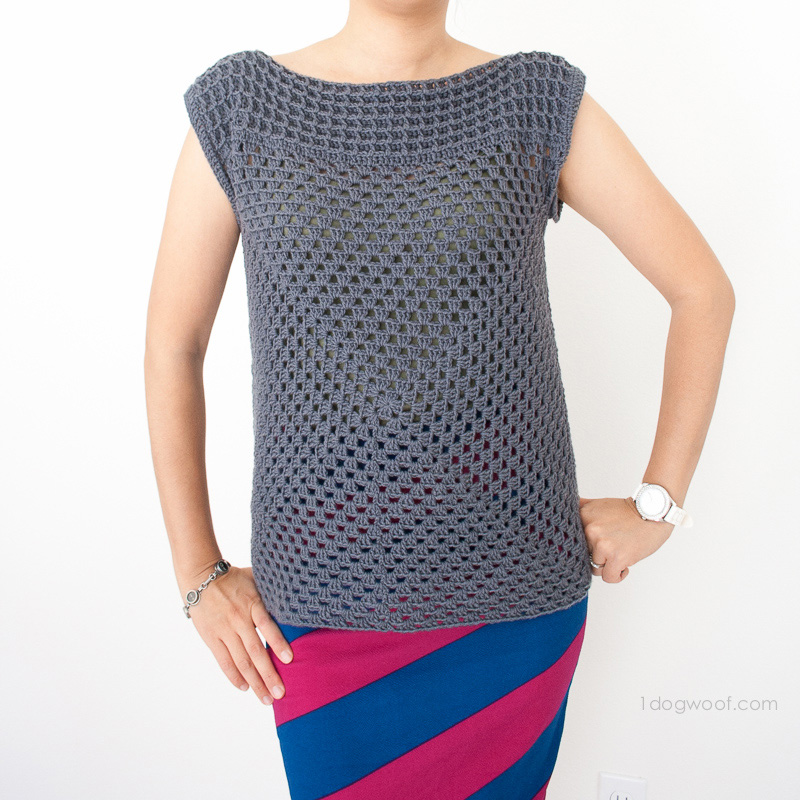
It goes great with jeans, and with my more colorful and patterned Lularoe skirts as well. I didn’t feel I needed to add jewelry, since the focus is on the waffle weave right up at the neckline. (Plus, I didn’t want anything to snag!) I’m so excited to have a good looking basic staple added to my wardrobe!
I’d love to see how you make this shirt your own, either by using different colors or altering the size for different body shapes and age groups. Share your completed projects with me on Facebook (One Dog Woof) or Instagram (@1dogwoof), or just follow along to see what yarn shenanigans I’m up to!
I received product from Lion Brand Yarn for this project and post. The pattern, all notes, instructions, photos and opinions are 100% my own.
Check out my pattern shops on Craftsy and Etsy where you can purchase printable PDFs of my latest crochet patterns. These PDFs are formatted without comments or ads, and have instructional photos at the bottom for optional printing.
I sometimes include affliate links in my supply lists. Purchasing from these merchants earns me a small commission with no extra cost to you, and goes towards supporting One Dog Woof.
Please be respectful and do not sell or distribute this pattern in any way, especially as your own. Instead, share the original blog post link! You can sell finished products made from this pattern by giving credit to One Dog Woof as the pattern designer and linking to the blog post. If you have any questions regarding distribution or translation of this pattern, please see my Terms of Use. Thank you for your consideration!
Original article and pictures take www.1dogwoof.com site
Комментариев нет:
Отправить комментарий