I’m quite enamored with just about everything craft related, but I get especially excited when I get to create a piece of jewelry or another type of accessory. I was so happy when Nicole was open to the idea of me sharing a jewelry-based DIY with you all, and I hope you enjoy it. And while the idea of making your own jewelry may sound a bit intimidating, I assure that if you’re even somewhat remotely ‘crafty’, you can create something for yourself with just a few basic items you can find at just about any craft store.
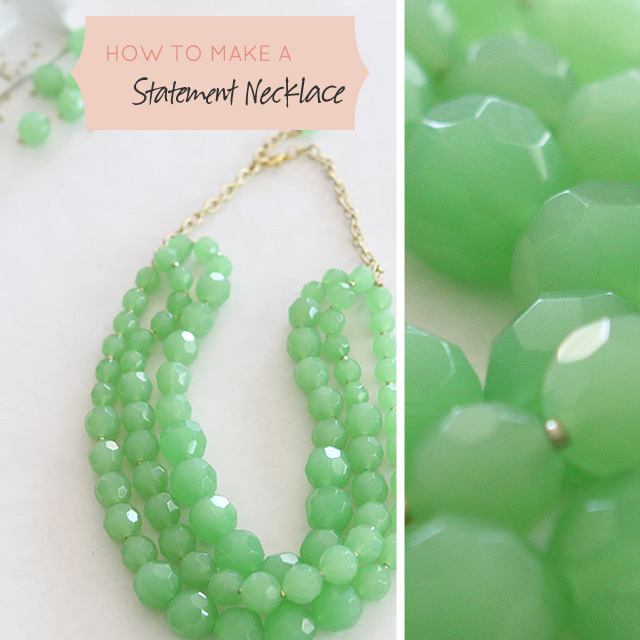
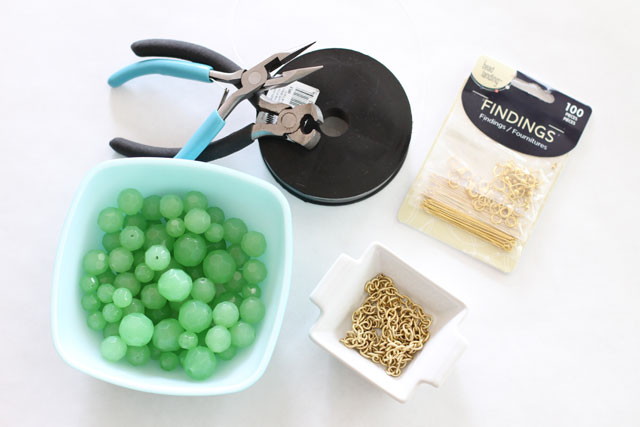
To get started with this particular statement necklace, take a trip to your local Michael’s (or other craft store), which is where I picked up everything you see below, including the beads, and pick up the following items:
Jade colored beads in multiple sizes (I used 3 different sizes), mono-filament jewelry wire (it looks just like fishing line), a package of jewelry chain, an all purpose pack of ‘jewelry findings’, which includes jump rings, crimping beads, lobster claw closures, and pin wires. You can buy all of these items in separate packages but if you’re a beginner or aren’t doing a lot of jewelry making, this all purpose pack is great. You also want to have a pair of scissors on hand, as well as a pair of needle nose pliers and wire cutters, which they sell on the cheap at a craft store, or you could always use a pair from your tool chest. Total supplies, if you include buying the tools, should run you less than $30. *Note that over the weekend I made this necklace again for a friend and this time I used a jewelry wire called Soft Flex in ultra fine. It was actually great to work with and because this necklace gets a little heavy, it is really sturdy and should hold up better over time. It is quite a bit more than mono-filament, but may be worth it in the end.
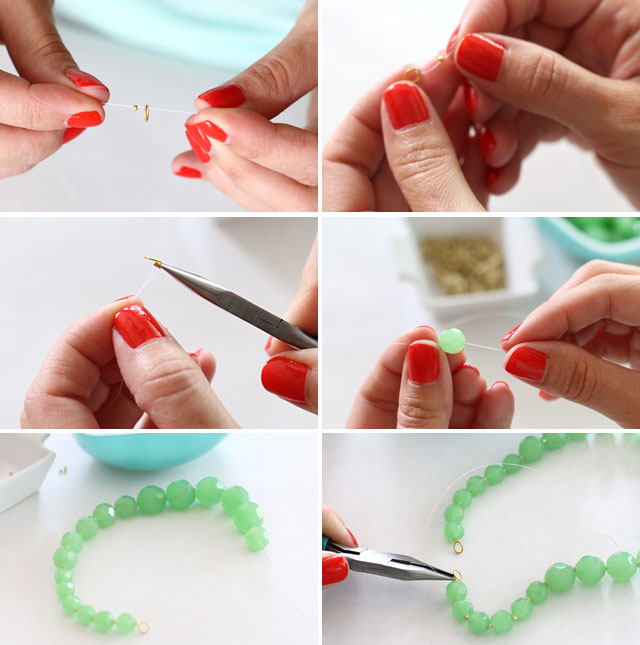
Begin by cutting a length of your jewelry wire (roughly 18 inches), and string 1 of the crimp beads and a jump ring through the tail end of one side. Loop the wire over the jump ring and through the crimp bead again, creating a loop that is held together by the crimp bead. Gently but firmly squeeze the crimp bead shut with your needle nose pliers. There’s an actual bead crimper that they sell, but I’ve never had a problem closing my crimp beads shut with my pliers. You’re now ready to begin stringing your beads. Once you’ve completed one strand, close it off using the same method that you began with, using a crimp bead and jump ring. Your other 2 strand will now attach to this single jump ring. Trim the extra jewelry wire. Note that each strand will be approximately 14-15 inches long when finished. You don’t want all 3 strands to be exactly the same length so that they lay better on your neck.
Since I’m not an actual jewelry designer and do this for fun, I always try to keep my designs relatively simple. I always love the look of mixed metals and gems, but I leave the real pattern mixing to the professionals, and stick to similar materials and tonal, or complementary, colors when creating something new. With this necklace, the only variations I made was to use a slightly different pattern with all three strands. One strand uses just the 2 smaller sized beads and has tiny gold seed beads spaced between each one. The other 2 strands contains a mixture of all 3 sizes, but in a slightly varying pattern.
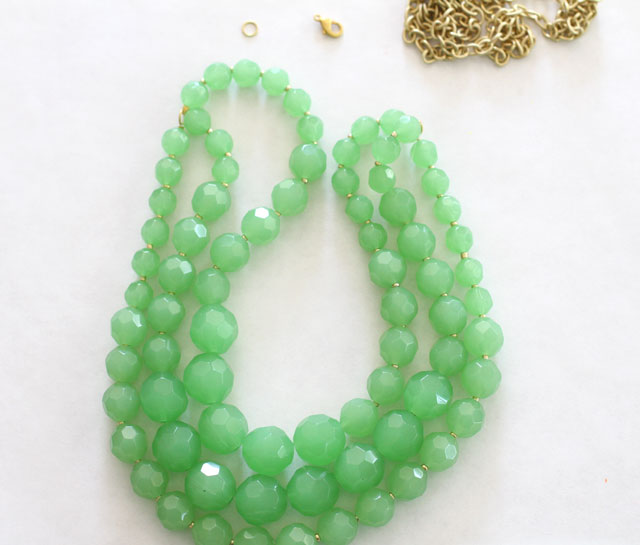
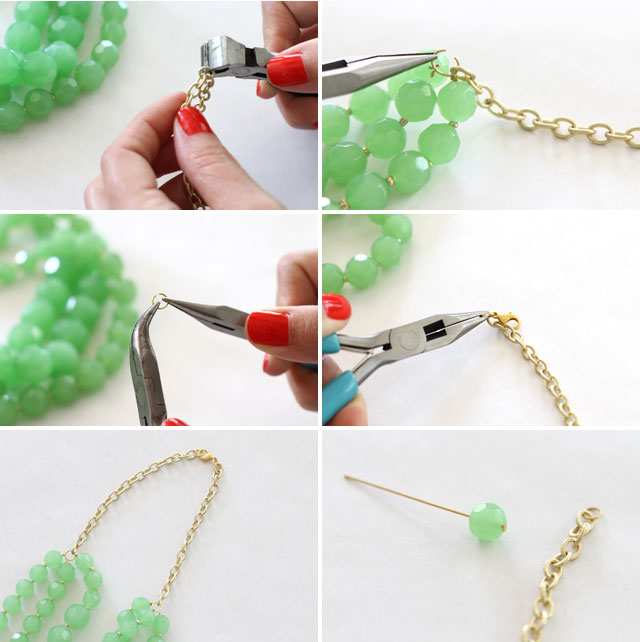
Once the body of your necklace is finished, it’s time to attach your chain. I think adding the chain creates a more finished look, and it also makes the necklace adjustable. Snip off 2 pieces of chain with your wire cutters. My chain is approximately 2.5″ long on each side. Attach each piece of chain to the jump ring on either side. A tip when opening and closing your jump rings; if you have 2 sets of small pliers on hand, gently pry each end apart, as shown, and then squeeze shut. This helps to maintain the shape of the ring, but it’s not necessary. Grab 2 more jump rings and attach it to the end of one chain, and attach it to the lobster claw and chain on the other end. Now you have your closure. If you’d like to really lend a finished look to your necklace, you could grab a sapre bead and attach it to one of the pin heads and then run it through a loop of chain and twist it shut, nipping off the end with your wire cutters, but this is not necessary.
You’ve now finished your necklace and are ready to try it on! Total time to complete this necklace is 45 minutes or less, depending on your comfort level with working with the tools and beads.

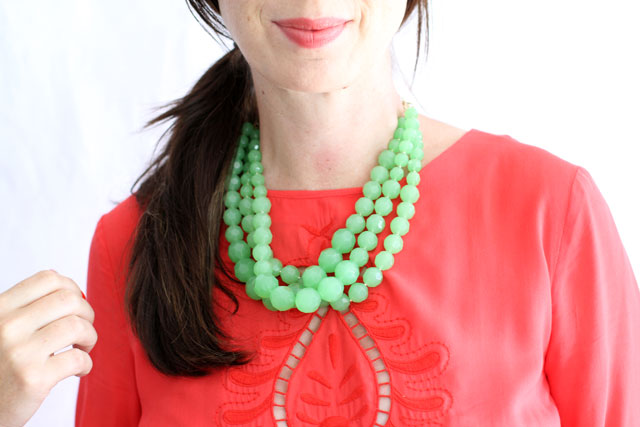
I tried the necklace on with a white tee, a chambray shirt, and this red dress, and it looked great with all three options, but I really love the way it pops against the red. Jewelry making is one of the most rewarding hobbies I have, and I hope this inspires you to give it a try. Please let me know if you have any questions.
Original article and pictures take makingitlovely.com site
Комментариев нет:
Отправить комментарий