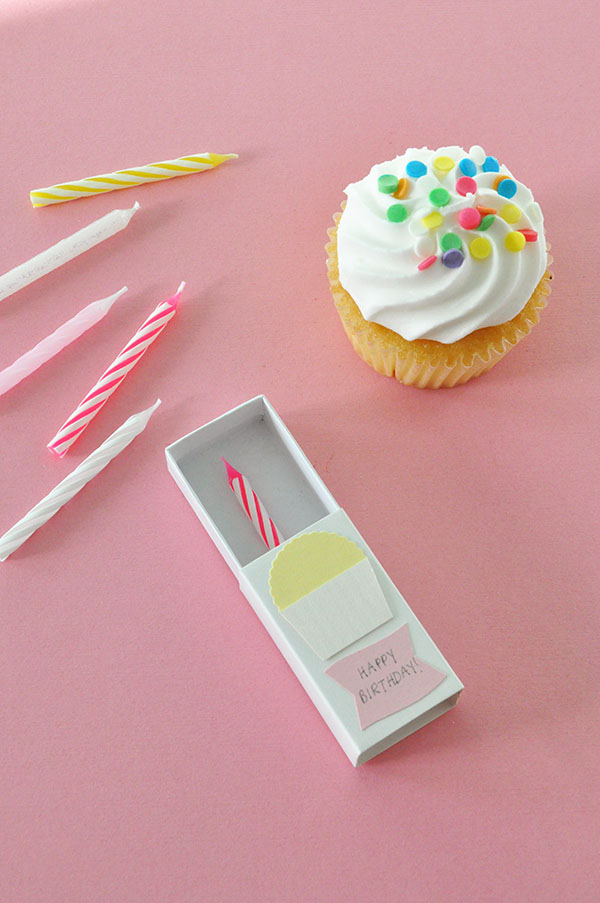
I love including a little treat in with birthday cards. Usually the treats have to be flat (like stickers or temporary tattoos) but not for this birthday card! Repurpose an empty matchbox into a unique birthday card with a fun surprise inside! Paired with a homemade cupcake, wouldn’t this be the sweetest gift ever?


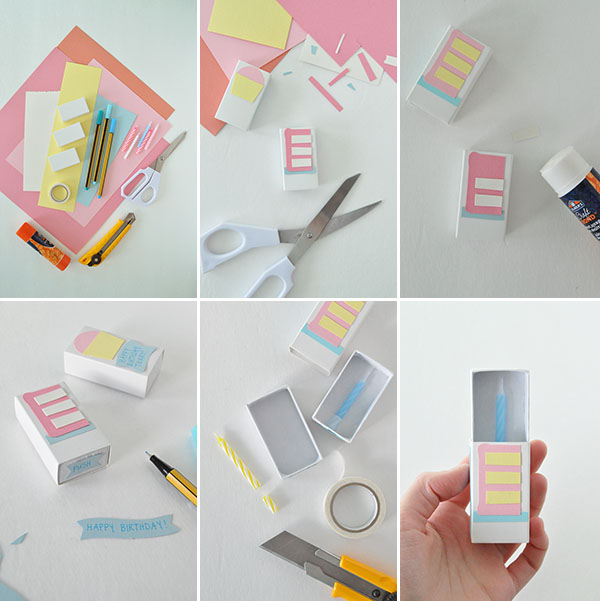
Materials: Craft paper, birthday candles, craft matchboxes, washi tape, markers, glue stick, craft blade, scissors
Step 1: Cut craft paper into the shape of a slice of layer cake (or a cupcake) for the front of the matchbox.
Step 2: Use the glue stick to adhere all the pieces to the matchbox.
Step 3: Cut little paper banners for the sides of the box – make sure to make one that says “Push” for the bottom of the box. Cut banners for the sides and/or back to write a birthday message. Glue the pieces down.
Step 4: Use a small piece of washi tape to attach the birthday candle into the box. If your candle is too long, use your craft blade to trim down the bottom.
Step 5: Voila! Give your matchbox card to the birthday girl or boy as is or tied onto a gift.

Original article and pictures take ohhappyday.com site
Комментариев нет:
Отправить комментарий