By Kelli Hall, a Minted Community Designer

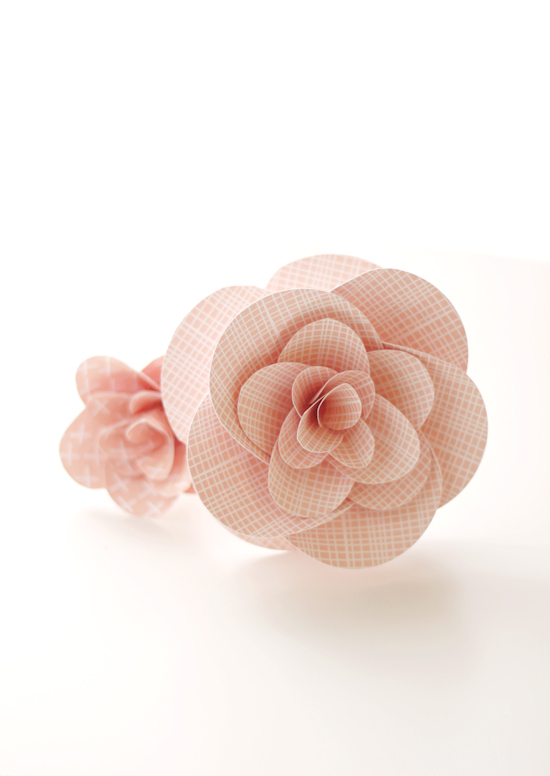
I love the tradition of creating a rehearsal bouquet from ribbons collected during a bridal shower, but it can feel a little expected. I recently hosted a close friend’s bridal shower, and for a fresh twist, I gave her a few paper flowers created from the party confetti we used at her event. It stays true to the custom of taking pieces from the bridal shower and crafting a stand-in bouquet for the wedding rehearsal, but instead of a tangle of ribbons on a paper plate, she’ll have pretty handmade paper flowers to carry.
To make these flowers…
I was inspired by this video tutorial, along with some style tweaks of my own. It’s as simple as creating petals multiple and layering them in increasing sizes.

Supplies:
• Pencil
• Glue sticks
• Glue gun
• Arrowhead Pastels circle garland discs or table confetti (12-15 pieces creates a big 6″ bloom)
• Scissors
• Long wooden skewers

Step 1: To create the largest petals, Start with a stack of any style Minted confetti or 3.25″ circles. (If you don’t have confetti on hand, you can make these using colored paper and a circle cutter) Give the large petals a slight curl by rolling them around a wooden spoon handle or a pencil. It will take about 4 or 5 large curled petals to create the biggest bloom shown. The smaller flower blossom contains only medium and small petals.
Step 2: Create medium and small petals by using the remaining uncurled largest circle pieces, and folding them in half. Trace a medium crescent shape on the folded paper that is about 2.5″ from tip to base. Cut the shape out with scissors and soften the fold by rolling it around a pencil. Repeat this step until you have about 5 medium petals. Create small petals using the same method, only tracing a crescent shape about 1.5″ at its widest point. Cut and curl same as medium petals.
Step 3: Once you’ve completed the petal making, you should have about 5 large petals, 5 medium petals, and 4 small petals.
Step 4: Roll one of the smallest petals into a cone shape, and affix with a dot of hot glue. This will be your innermost flower petal.
Step 5: Take another small petal, add a dot of hot glue at the base, and roll it around the small cone shape.
Step 6: Continue layering petals, in a concentric pattern (working smallest to medium) until all medium and small petals have been applied. If you stop at this point, You will have a small bloom. Attach a wooden dowel at the base of the flower with a dot of hot glue to create a stem. To create a large bloom, continue layering the large curled petals before inserting the dowel.
Step 7: Create paper leaves by using a contrasting color. Fold a flat disc in half and trace a crescent shape in similar style to the petal, only leave a more pointed angle at the tip. Cut out this shape and, leaving the crease in the leaf, attach this to the flower stem using a dot of hot glue.
Step 8: Add some finishing petals to the bottom of the large bloom. Create these by snipping a .75″ slit at the bottom of one of the largest circles. Draw these slightly together and affix with hot glue. Attach these petals to the base of your flower, positioning them to curl downward for a bloomed look.
Step 9: Bind the stems with glue, twine or ribbon.

Tips:
• Try curling petals a different way for a messier look
• To affix stems securely, insert the pointed end of a wooden skewer into the base of the paper flower. (there should be some small spaces created by the layered petals)
Find more of Kelli on her blog.
Original article and pictures take www.minted.com site
Комментариев нет:
Отправить комментарий