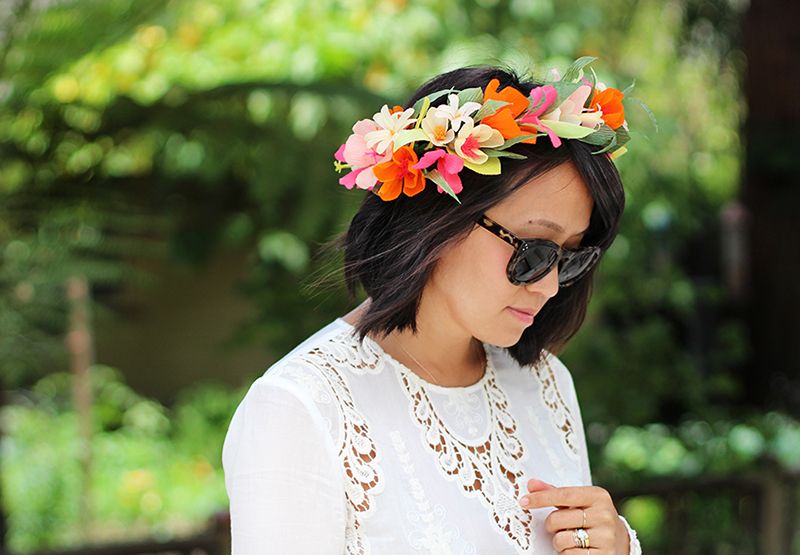
The artists and creative geniuses at the ever dreamy Castle In The Air recently introduced me to the Globe de Mariée. It’s a French tradition dating back to the 1800s where a couple would preserve mementos from their wedding and marriage together in a glass cloche bell jar. One of the many sentimental items included, besides jewelry, photographs and locks of their babies hair, is the bride’s wedding crown which made from wax orange blossoms and flowers. I mean, is this just the most romantic thing you’ve ever heard of? So when the crepe paper experts of the Castle demonstrated how to make a waxed floral crown, I knew a tutorial on how to create a bigger, more dramatic version would be the perfect thing to share with you, especially with weddings, festivals and midsummer celebrations in full effect. Plus, I love the idea of coating the paper flowers with wax – with the amount of time it takes to make a paper crown, you want it to last forever! So without further ado, here is the how to:
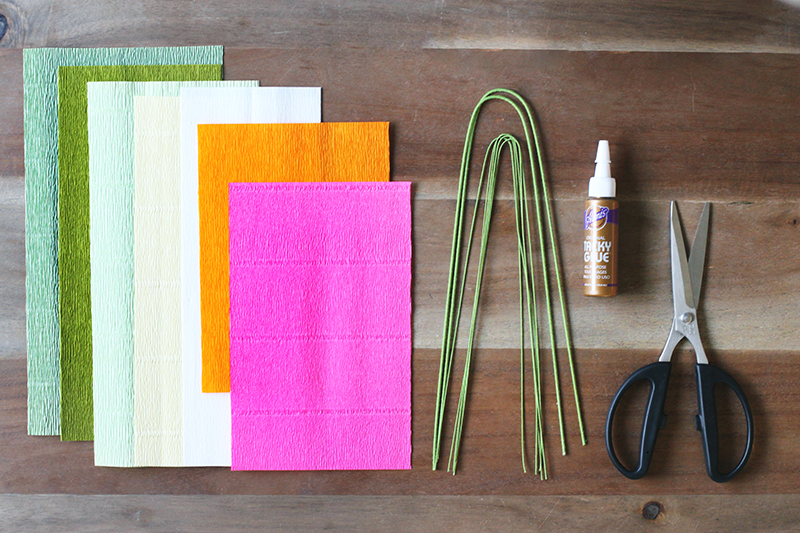
You’ll need:
wire cutters
paintbrush (optional)
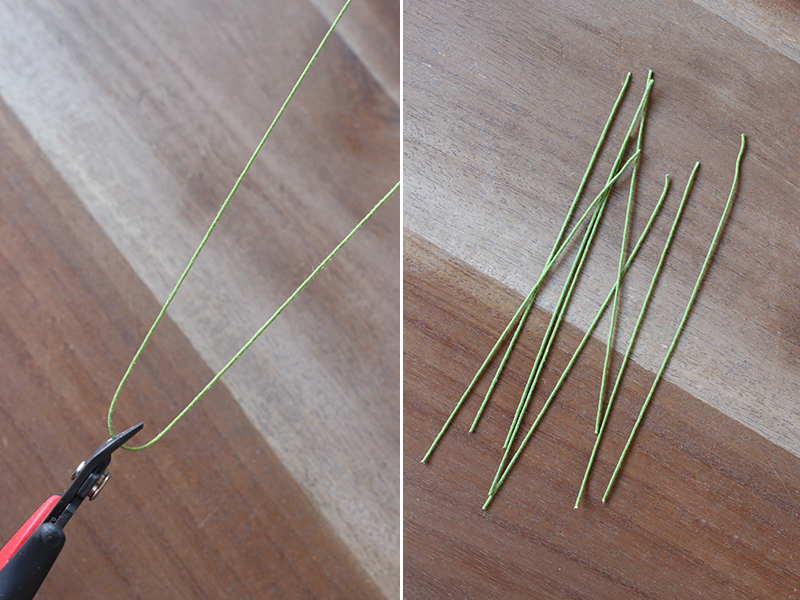
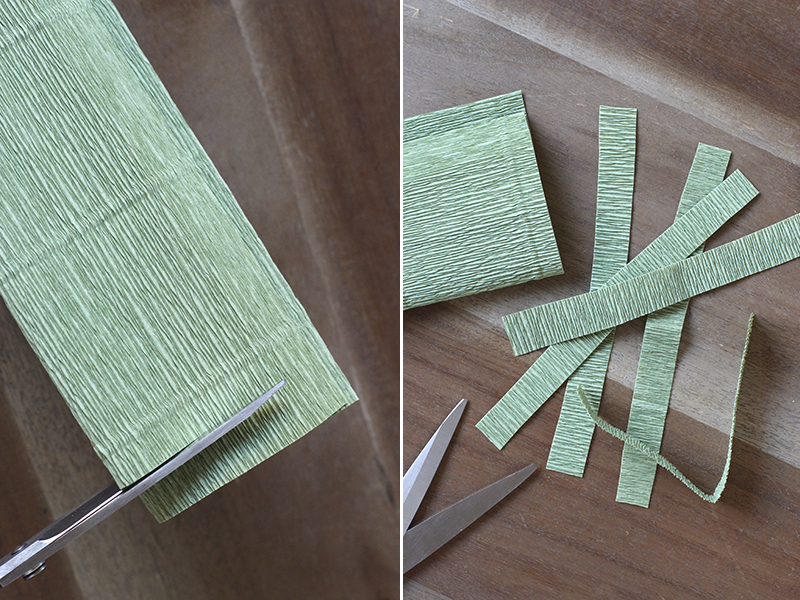
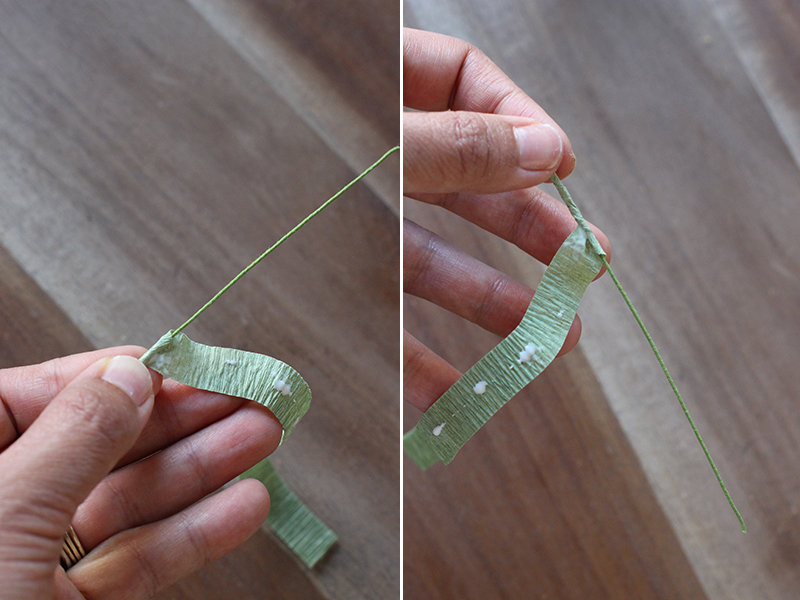
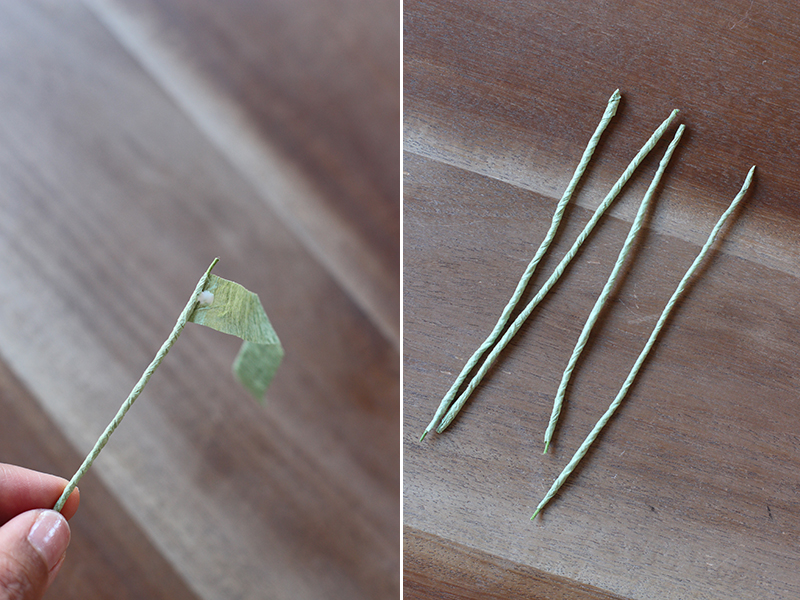
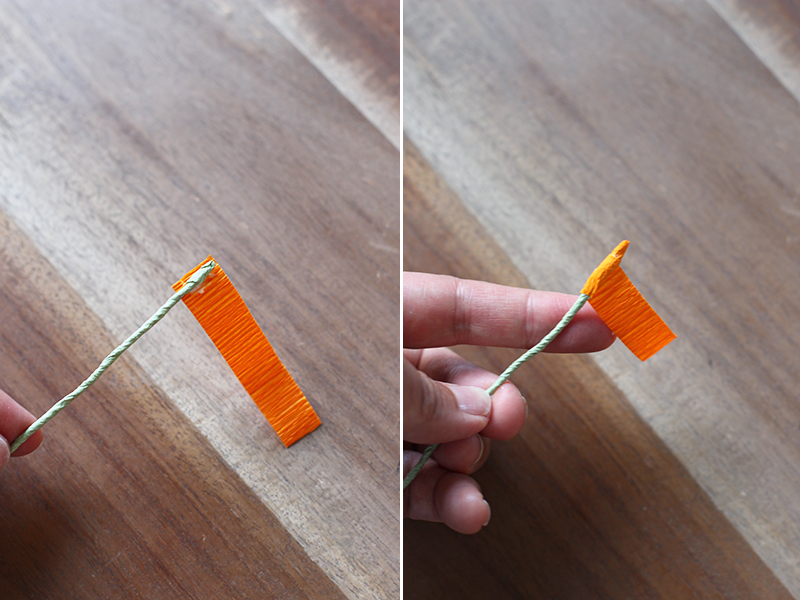
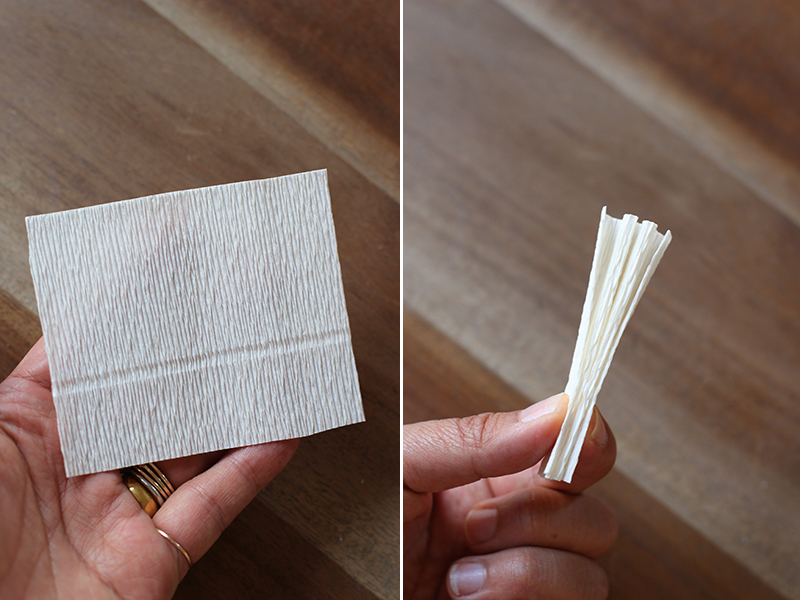
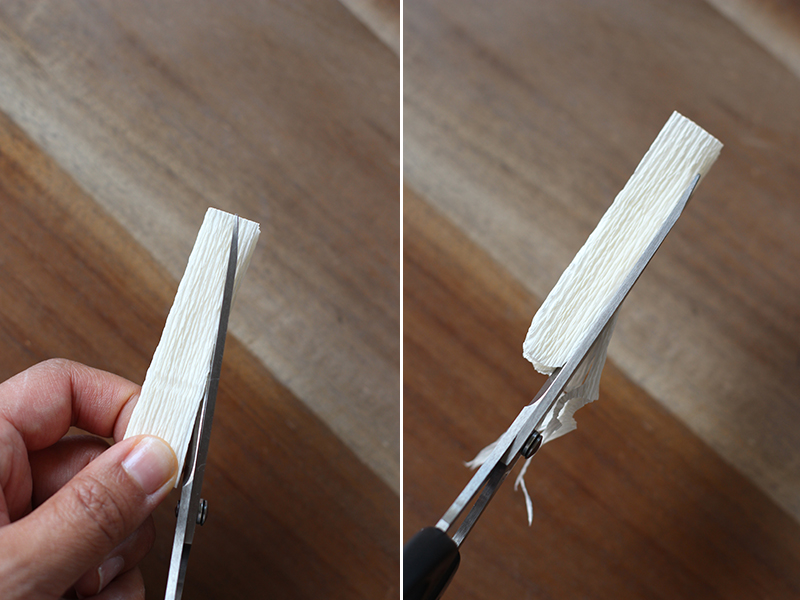
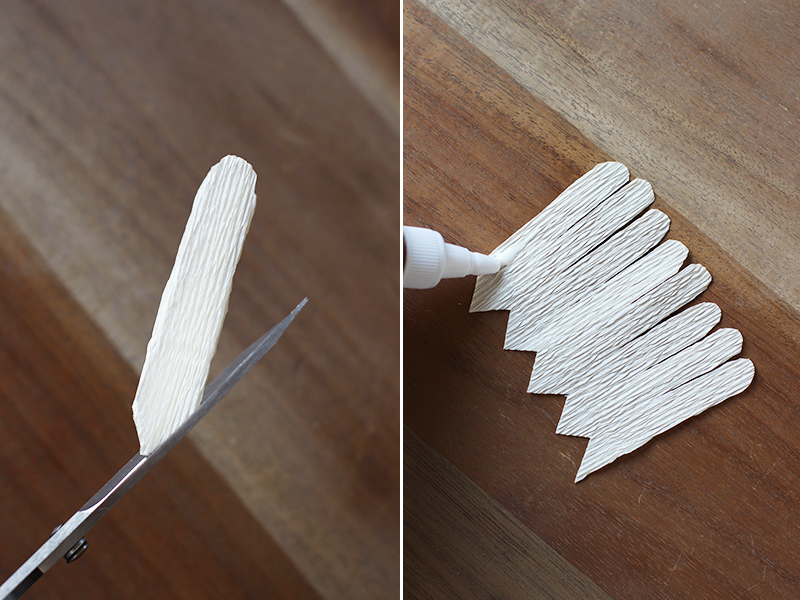
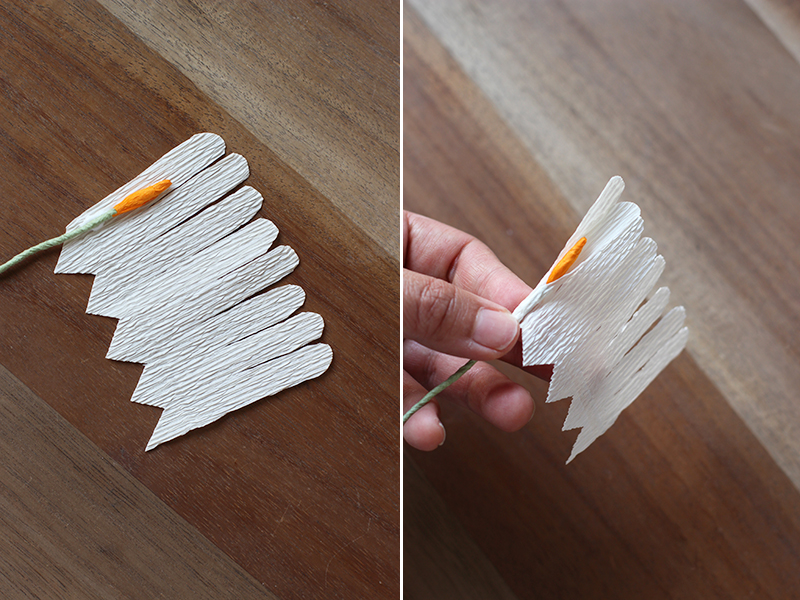
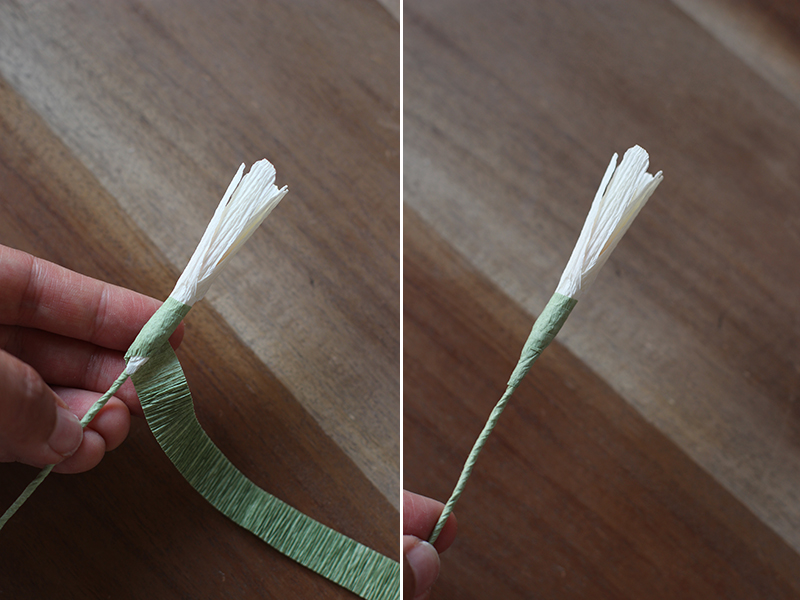
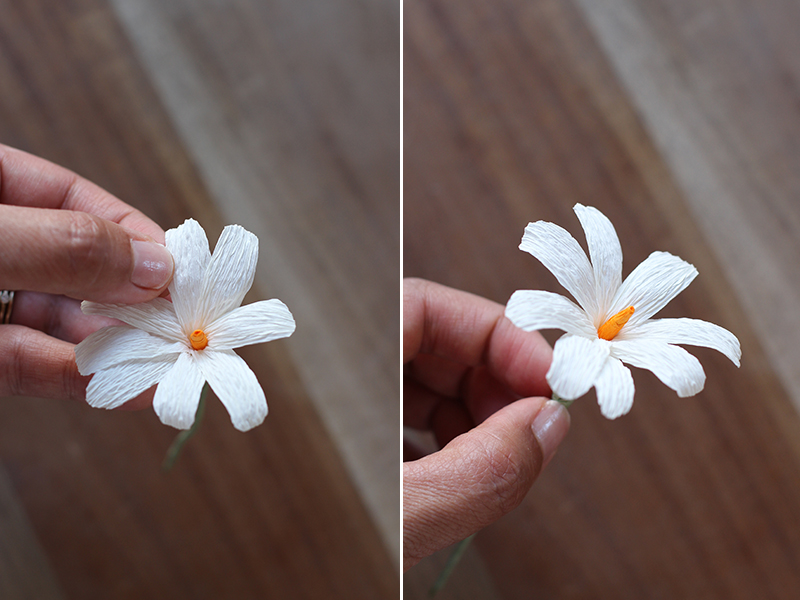
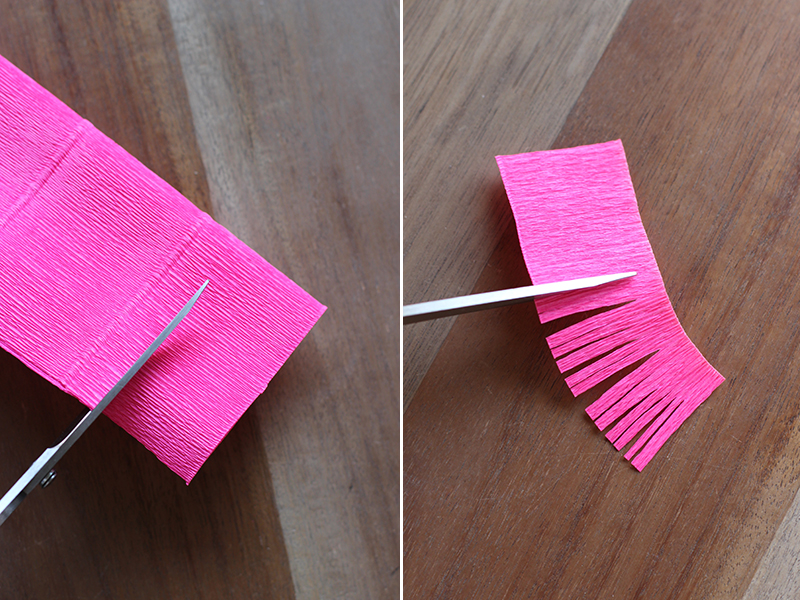
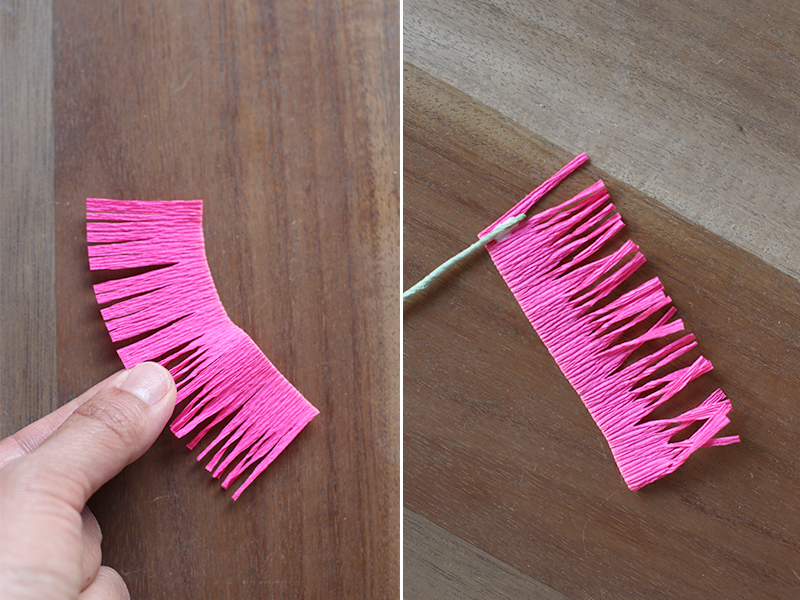
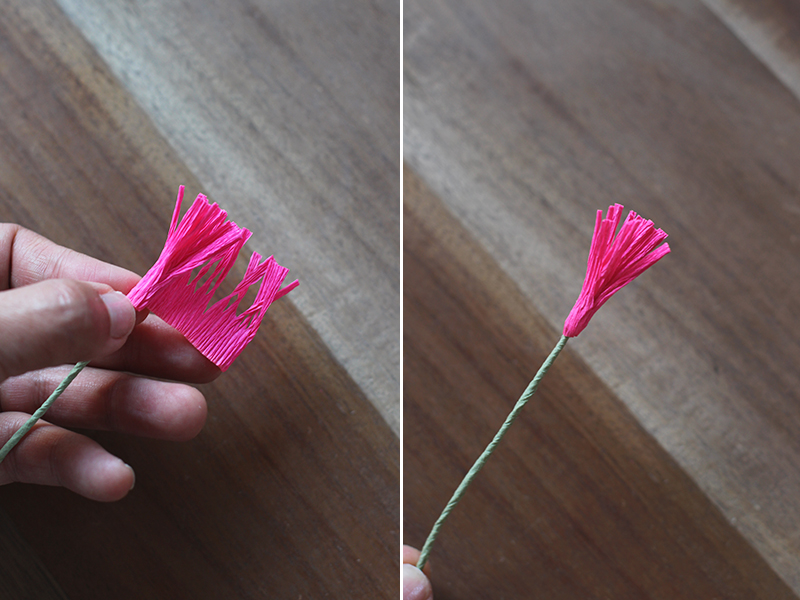
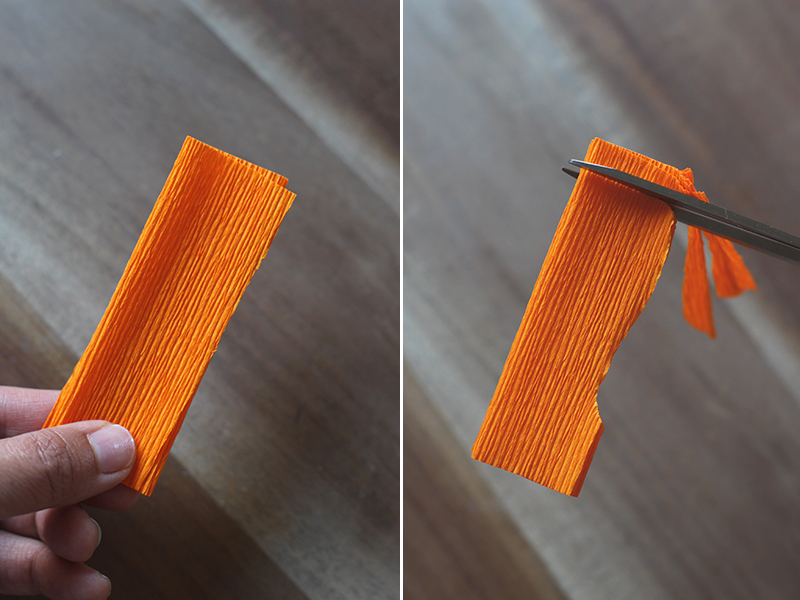
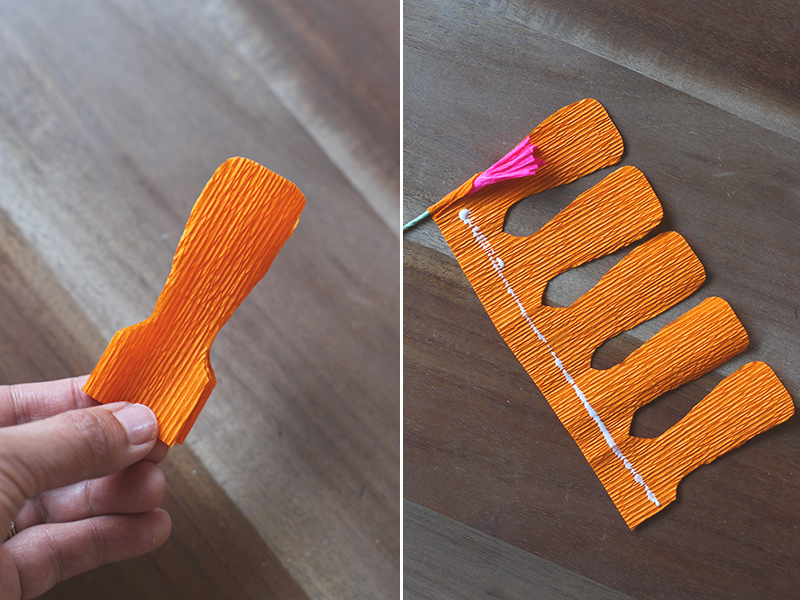
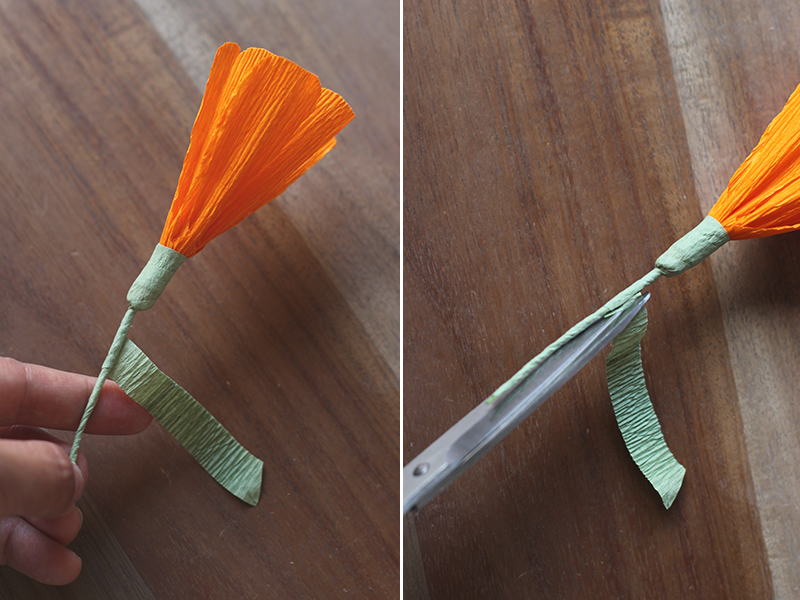
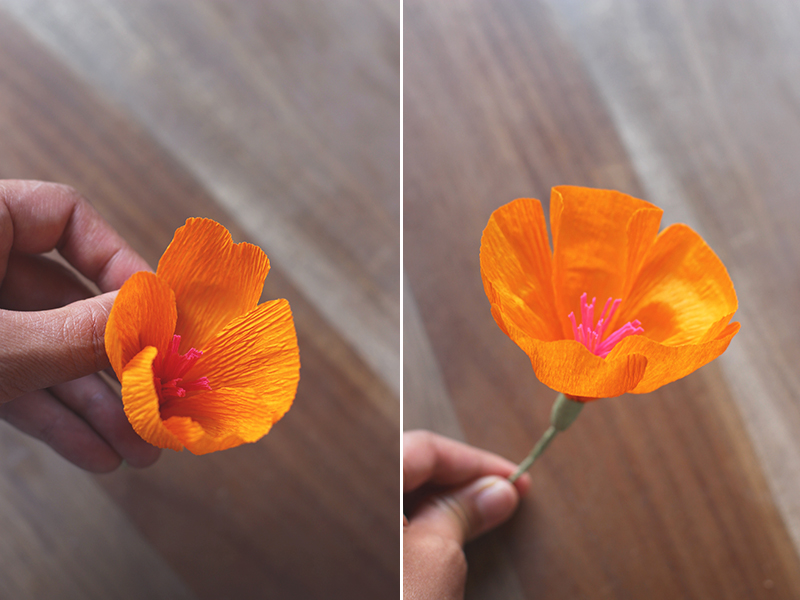
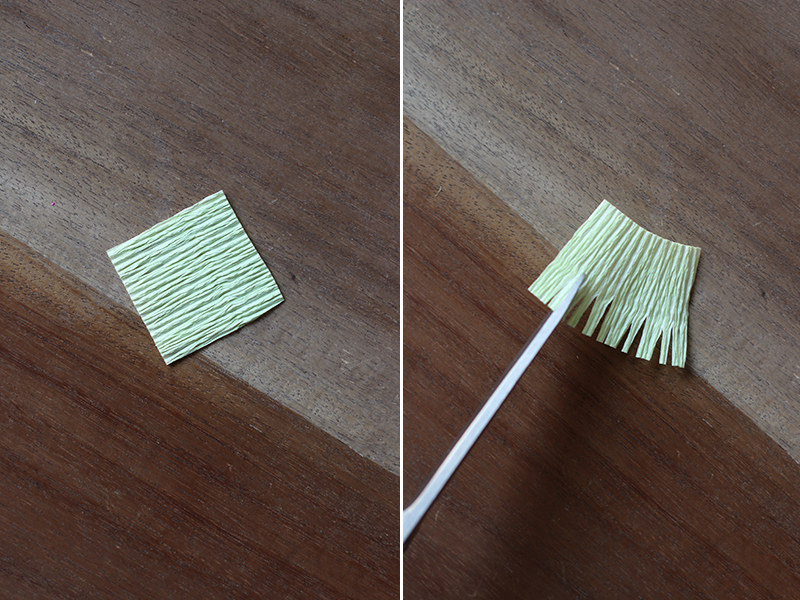
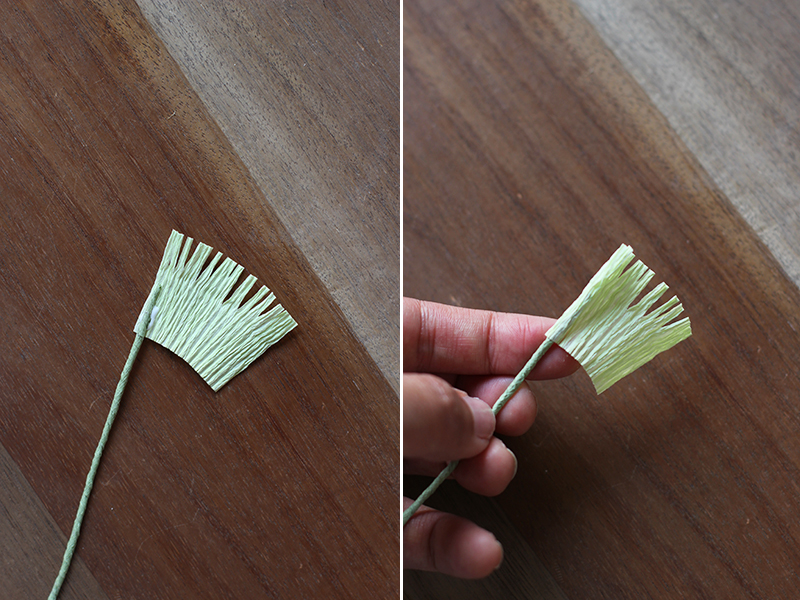
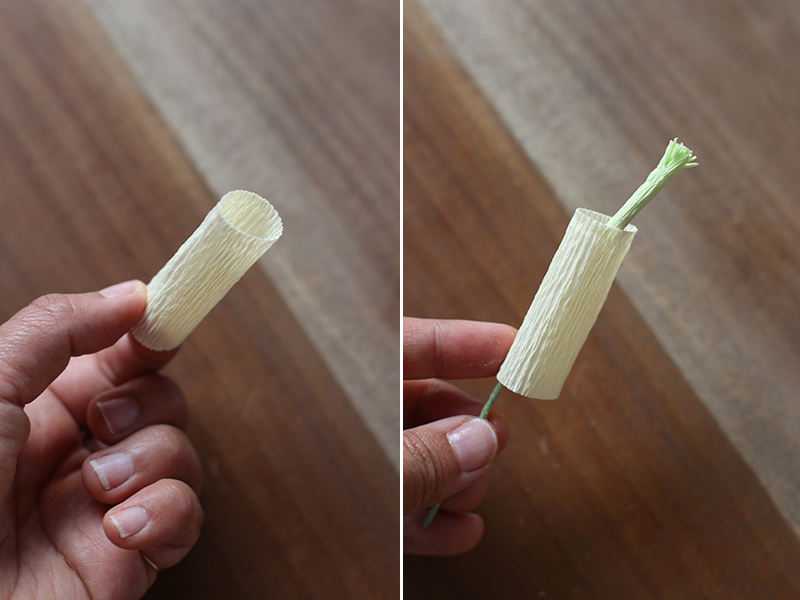
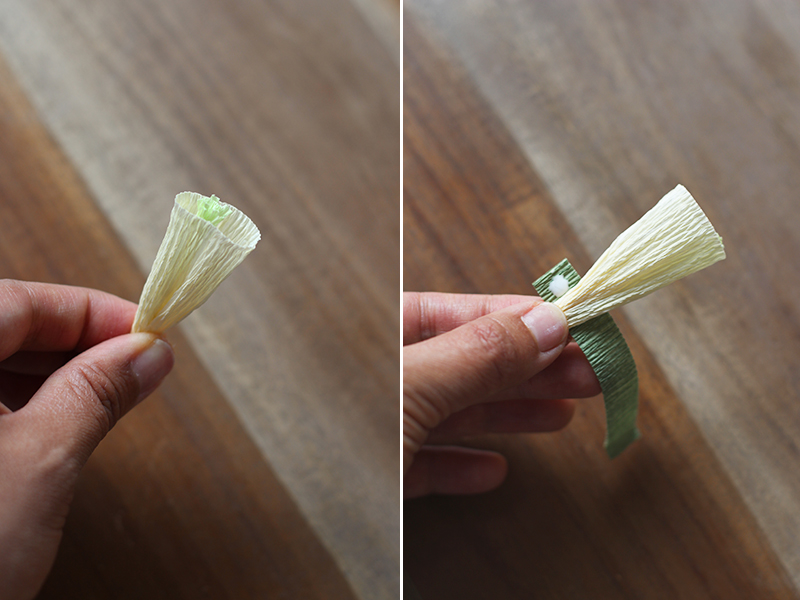
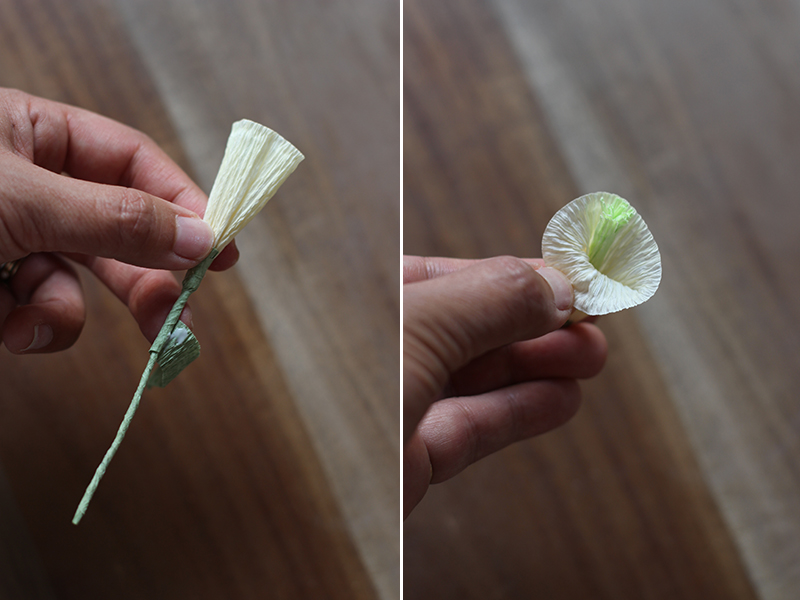
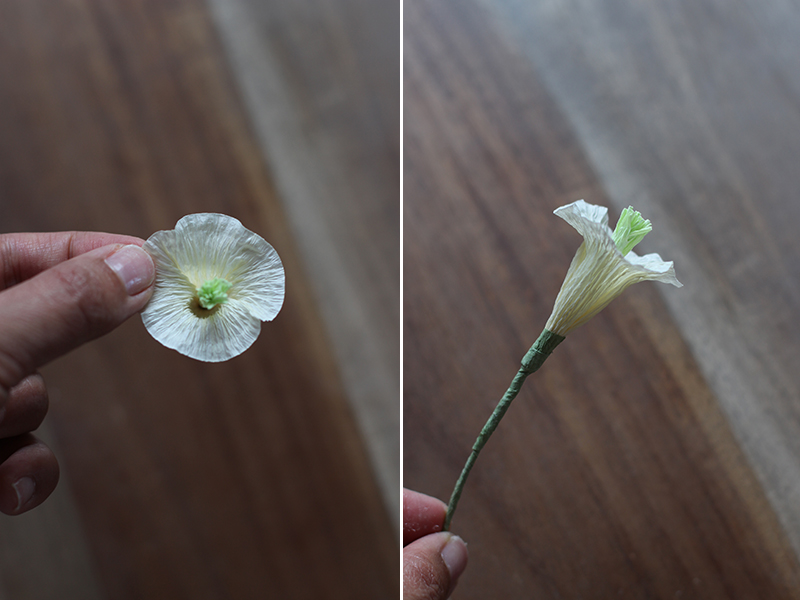
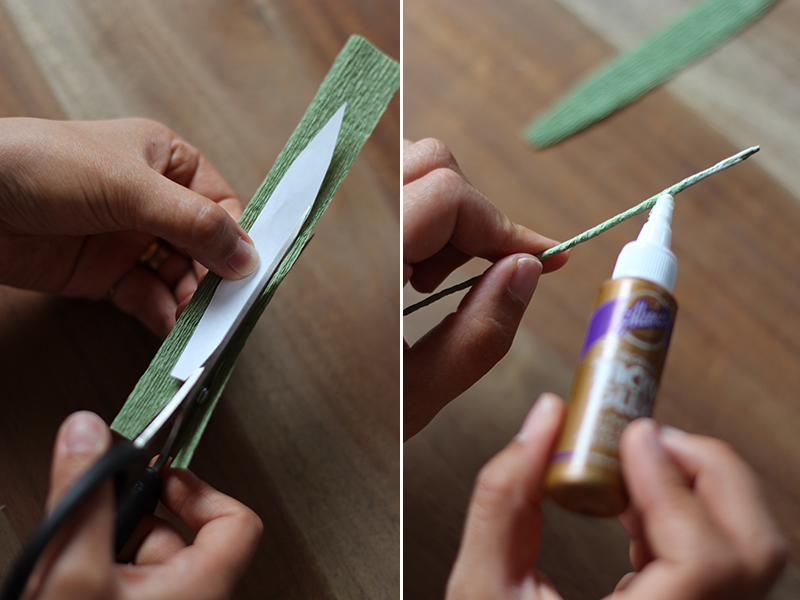
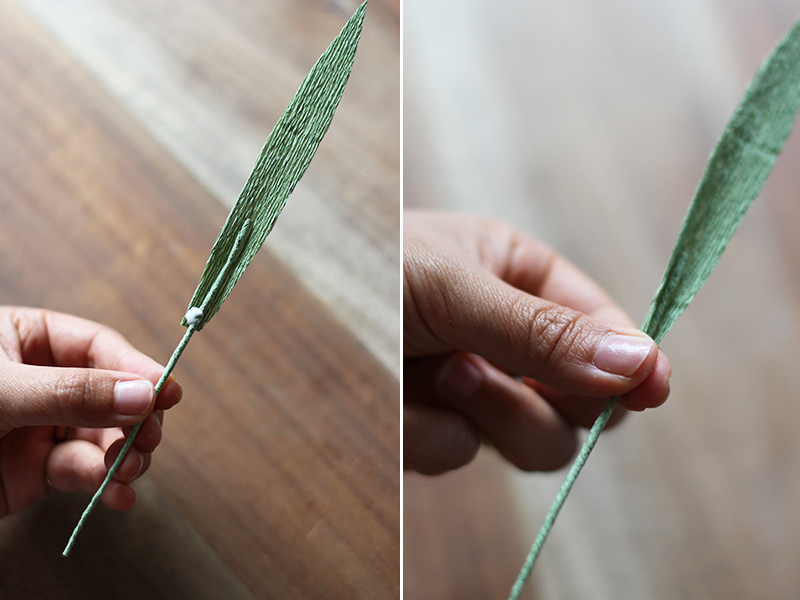
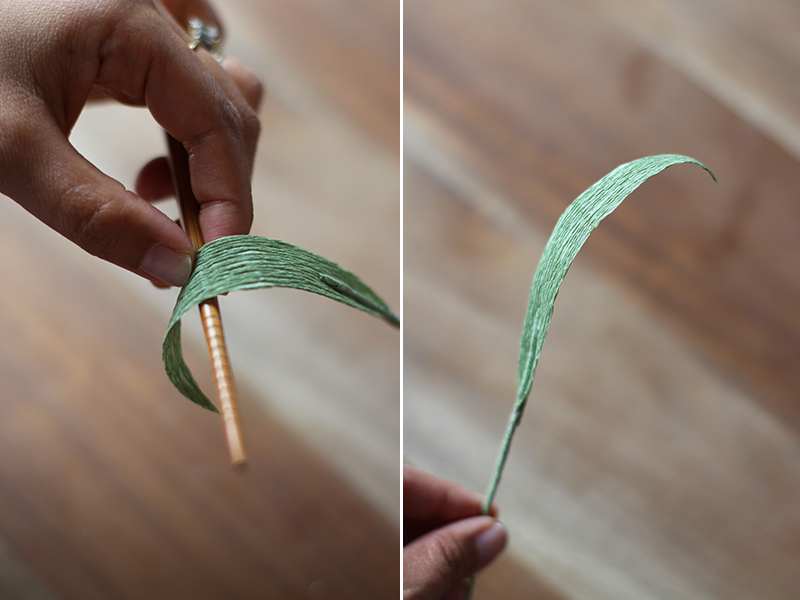
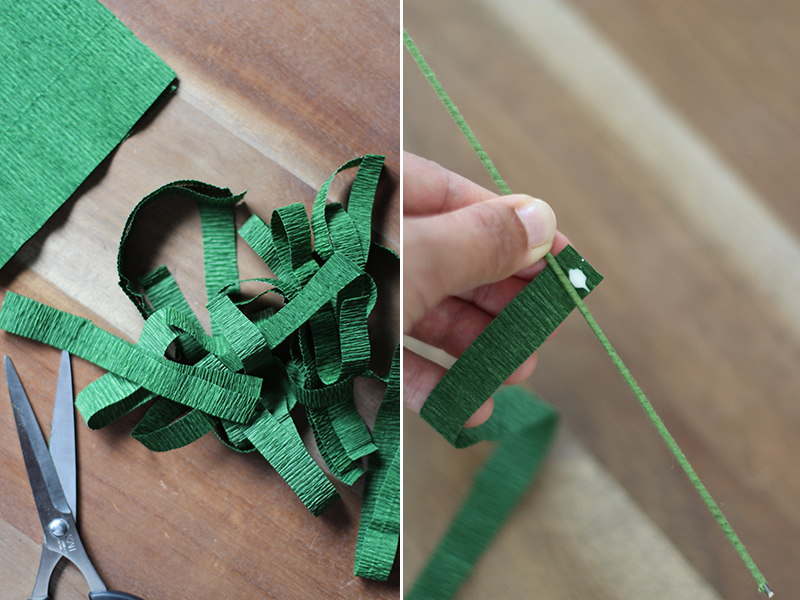
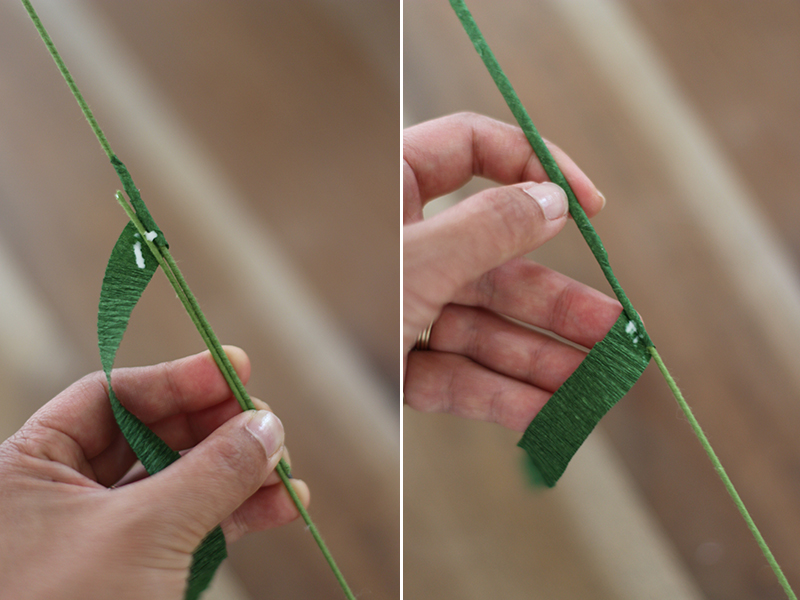
Start by cutting the 22 gauge wire into quarters, to about 4-5 inches long. Cut a handful of 1/4″ strips of green crepe paper against the grain. Apply the tiniest drops of tacky glue onto a strip and start wrapping around the top of the wire. Crepe paper works a lot like floral wire. While holding the top end of the wire, pull and twist the crepe paper around at a downwards diagonal. Wrap tightly! Finish with a dab of glue before trimming any excess. Your stems are finished! For a daisy, all you need is a small strip of orange crepe paper to make the stamen. Wrap around the tip of the stem, just as you did with the green crepe paper. But instead of working your way down, just twist the paper onto itself, creating something that resembles a small cotton swab. Cut a 2″ x 4″ piece of white crepe paper, with the grain going along vertical, short edge. Fold into an accordion to create 5 layers. Lay the bottom of the daisy petal pattern along the bottom edge of the accordion and cut along the pattern. Cut a point on the bottom – this will allow it to wrap around the stem easier. Open up the accordion and then put a tiny dab of glue on the bottom left corner. Lay the stem on the left side and start wrapping. Take the tightly wound bundle and wrap another green strip of crepe paper around the base of the flower and onto the stem. Then fan out the petals, one at a time. Bend or curl them over a chopstick or pencil. Them use your fingers to spread out each flower petal. To make a poppy, we’ll start with a 1″ x 3″ piece of crepe paper for the fringed stamen. The grain should go vertically, along the shorter edge of the paper. Cut a fringe, leaving about a 1/4″ base. Roll the fringe between the index finger and thumb, creating a twisted look. Place a tiny dab of glue in the lower left corner and place the stem on top of it. Roll it several times around the tip of the stem and finish with tacky glue. Then, cut a 3″ x 5.5″ piece of orange paper and fold it into a 5 fold accordion. Use the poppy pattern to cut out the petals, leaving the base intact. Open it up, run a thin line of glue long the bottom and place the stamen at the end. Roll the petals around the stamen pleating the petals as you go. Add a strip of green crepe paper around the base of the flower – pulling, wrapping and twisting downwards. Finish it with a drop of glue and trim away any excess. Pull the petals out one at a time, using your fingers to expand each petal. To make a bell flower, start with a 1 x 1″ piece of crepe paper. Cut a 1/4″ fringe along the grain. Wrap the fringe around the top of a stem. Ruffle the fringe with your fingers. Then cut another 2 x 2″ piece of white crepe paper. Run a very thin line of glue along the grain. Close square to form a tube and place it over the stem. Pleat and pinch the base and wrap a strip of green crepe paper around the base. Peel the top of the tube away from the stamen. Spread open with your fingers. To make leaves, use the patterns to cut the shapes out of green crepe paper. Remember to align the petal patterns lengthwise, along the grain of the crepe paper. Run a line of glue along the top of the stem. Place it onto the bottom of leaf. Put another tiny tab of glue at the base of the leaf and roll it between your fingers. Use a chopstick or pencil to give the leaf some bend and curve.
Now, it’s time to coat the flowers into beeswax. This step is optional and can be skipped. The wax, however, will preserve the flowers while giving them a transparent, realistic appearance. Turn on the melting pot and add the beeswax pellets. Careful when working with melted beeswax. It’s hot!
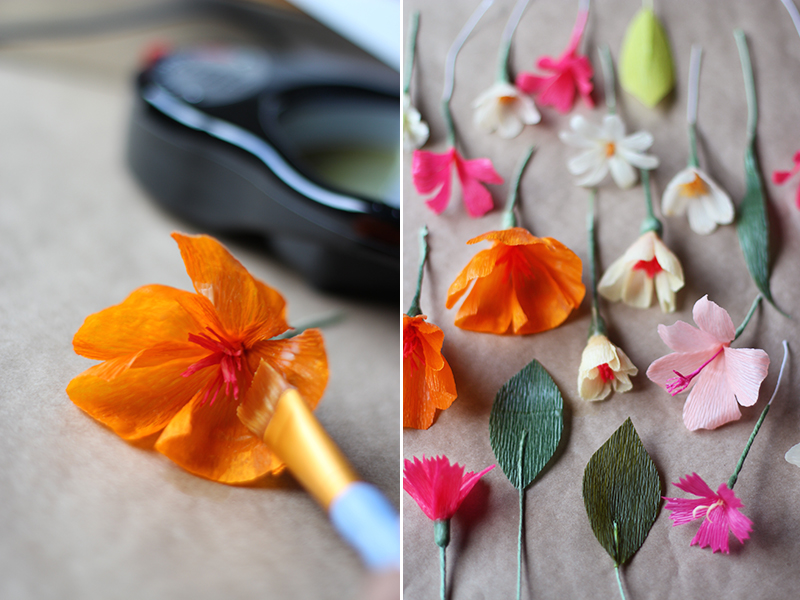
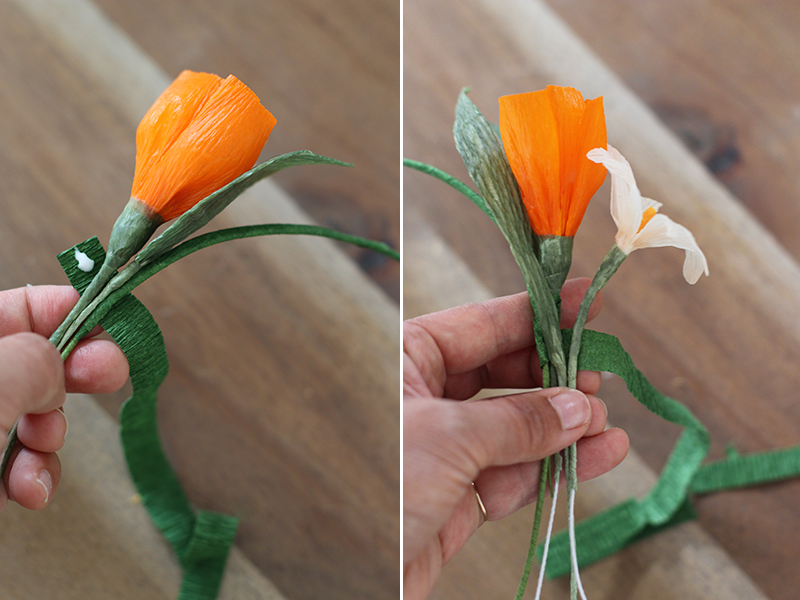
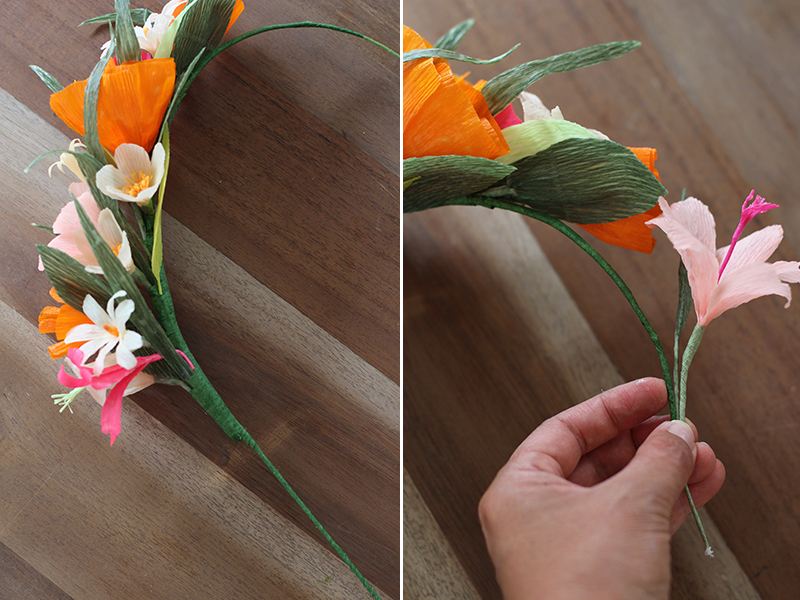
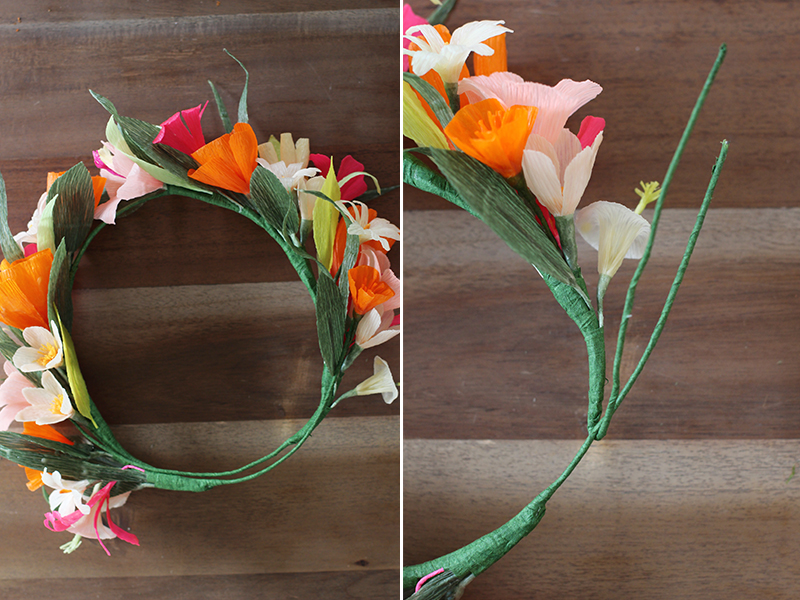
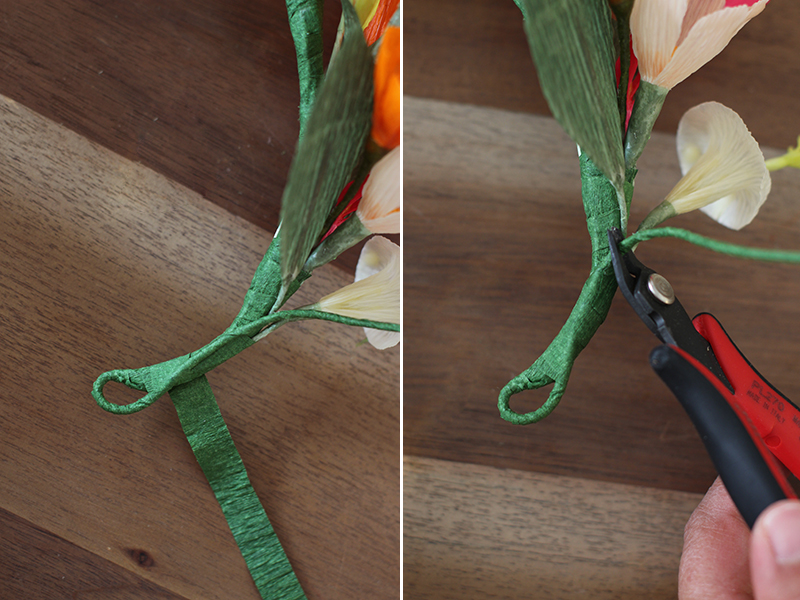
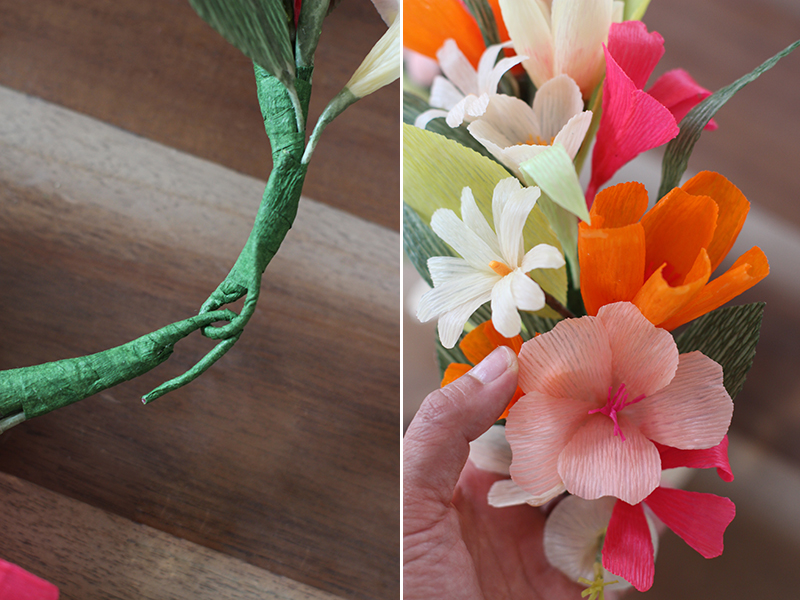
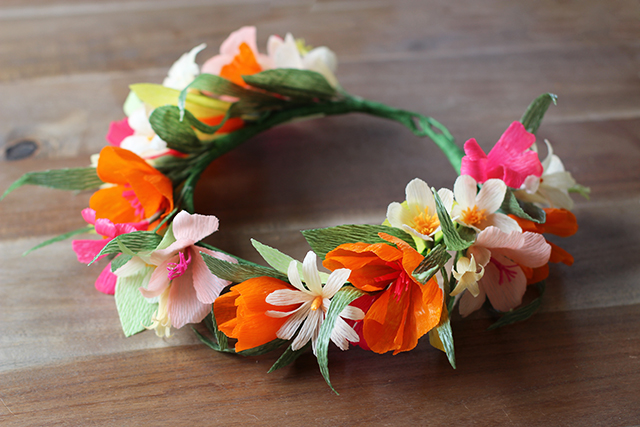
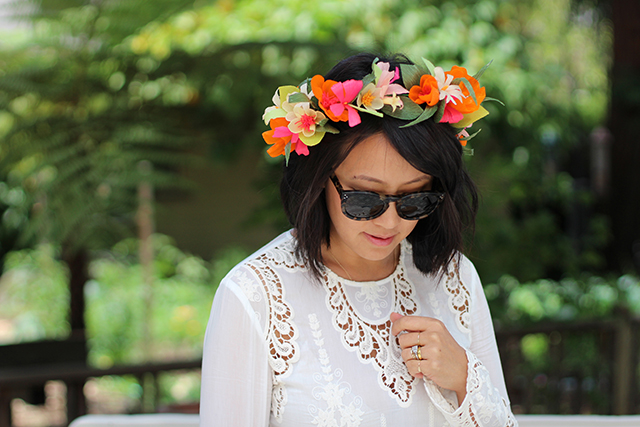
Dip the paintbrush into the melted wax and gently brush evenly over the entire flower. You don’t want to add more than a couple of coats per section since the wax will build up and dry opaque. Set aside to dry and harden. You’re ready to assemble the crown! Cut several 1/2″ strands of dark green crepe paper. Glue and wrap one strip tightly around the bottom 3 inches of one of the 18 gauge wires. After a couple of wraps, lay the other 18 gauge wire next to it and continue to wrap the two wires together. You now have a single piece of thick wire that is long enough to wrap around your head. Form the wire into a large U shape. Bundle a flower and a couple of leaves together and attach it to the center of the U shaped wire with a strip of crepe paper. Make sure the flowers are pointing towards the center of the U shape. Continue adding more flowers as you work down the wire, wrapping them along the way. Continue adding and wrapping. Once your green strip has run out, simply glue it closed and start with another strip. Stop adding flower about 5-7 inches. Trim any excess stems and wrap the bottom tips. Now repeat on the other side. Start at the center again with the flowers facing towards the middle of the U shaped wire. Curve the ends in, creating a circle. Lay it on top of your head for a proper fit. Bend one side of the wire back in the opposite direction. Use a strip of crepe paper to create a small loop. Trim away any excess wire. Now thread the other side through the loop and bend backwards. Trim the wire. Your crown now has it’s own closure! Go back and bend the flowers outwards from the center and adjust the leaves. Voila – your crepe paper flower crown is finished!! Add a ribbon . . . Wear it year after year. Don’t forget to follow Castle In The Air’s amazing video tutorial for more tips and instruction. Have fun and happy Midsummer! (images by HonestlyWTF; tutorial adapted from Castle In The Air) Original article and pictures take honestlywtf.com site


Комментариев нет:
Отправить комментарий