Right, Halloween is over and that means one thing… Christmas preparation can begin! Let’s talk about my favourite topic, gifts!
To me the perfect gift is really indulgent. It’s a luxury that I would never consider buying just for myself. Too often I ask for an essential item. Something I need but haven’t got for myself yet. Not the most exciting present right? The best kind of gift is special and unexpected. While I’m still waiting for that designer handbag and holiday to Hawaii (a girl can dream) the next best thing has got to be chocolates. I rarely buy myself chocolate. It’s not that I don’t allow myself chocolate, I just don’t see it as an everyday item and so it would have to be either a particularly good day or alternatively a the worst day to consider treating myself to it. So even though I love chocolate, one of the only times I get to eat it is when someone buys it for me. That means once a year, at Easter I have all the chocolate I need. For all of two days.
The thing is chocolate is such a traditional gift I’m not sure why I don’t receive it more often. I’m particularly difficult to buy for (did you just read the first paragraph!?) I am fussy about clothes and jewellery and being an independent woman if I really want something I’ll save to buy it myself. This rock I’m rocking? I bought it. Yes, that’s right. I depend on me.
Whoa, sorry… getting carried away there. In all this independence I still don’t have chocolates to nibble on whist watching a movie or when my rare, but feisty sweet tooth kicks in. Why!?
I’ve been trying to figure out why nobody buys me them and thinking about the reasons why I don’t give them as a gift myself and I think I’ve cracked it. When I give a gift I need it to show thoughtfulness and effort. Even if that means time spent researching and looking for the ideal gift rather than time spent making something from scratch.
I love making handmade gifts around the holidays! Last Christmas I took on the mammoth task of making both my mom and my niece a quilt. Yes, two quilts at once! This meant finishing the stitching Christmas morning in a panic and frantically wrapping up presents instead of enjoying unwrapping my own! (Still no chocolates guys!) The holidays are a busy time and as a consequence probably the hardest time to make gifts. Unless you’re super organised (unlike myself) there is a solution. You can give an existing gift a personalised twist! Taking something that is already a great present and injecting your own creative touches makes giving and receiving a hundred times more fun!
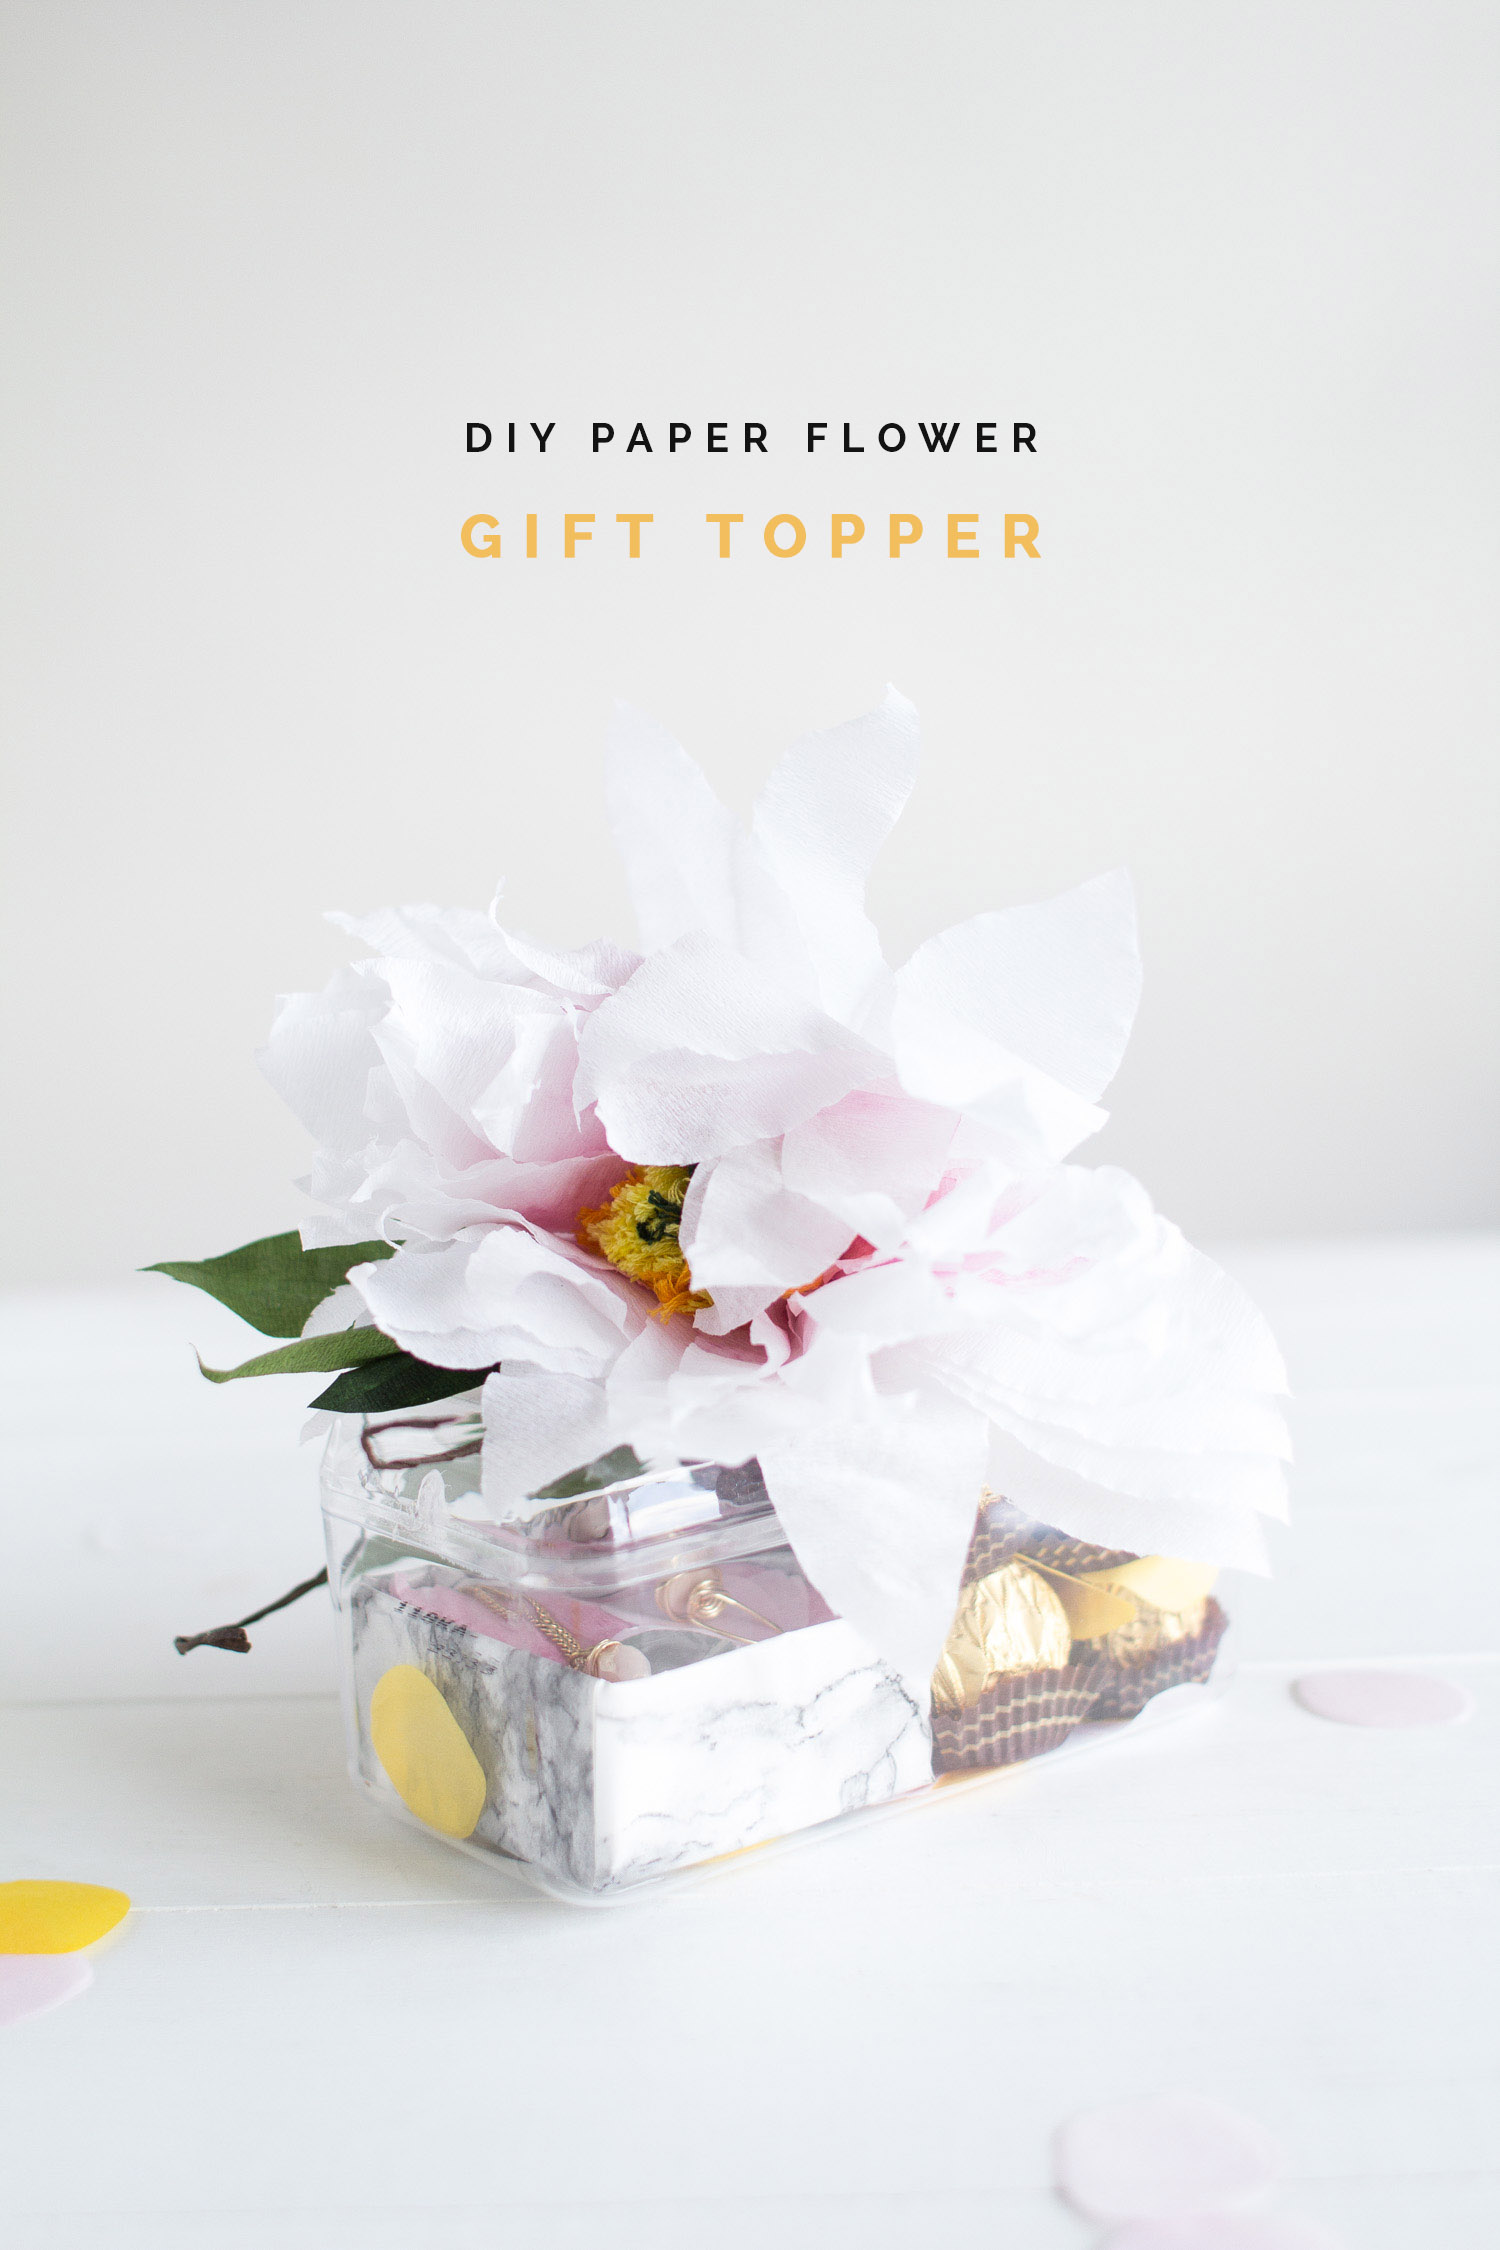
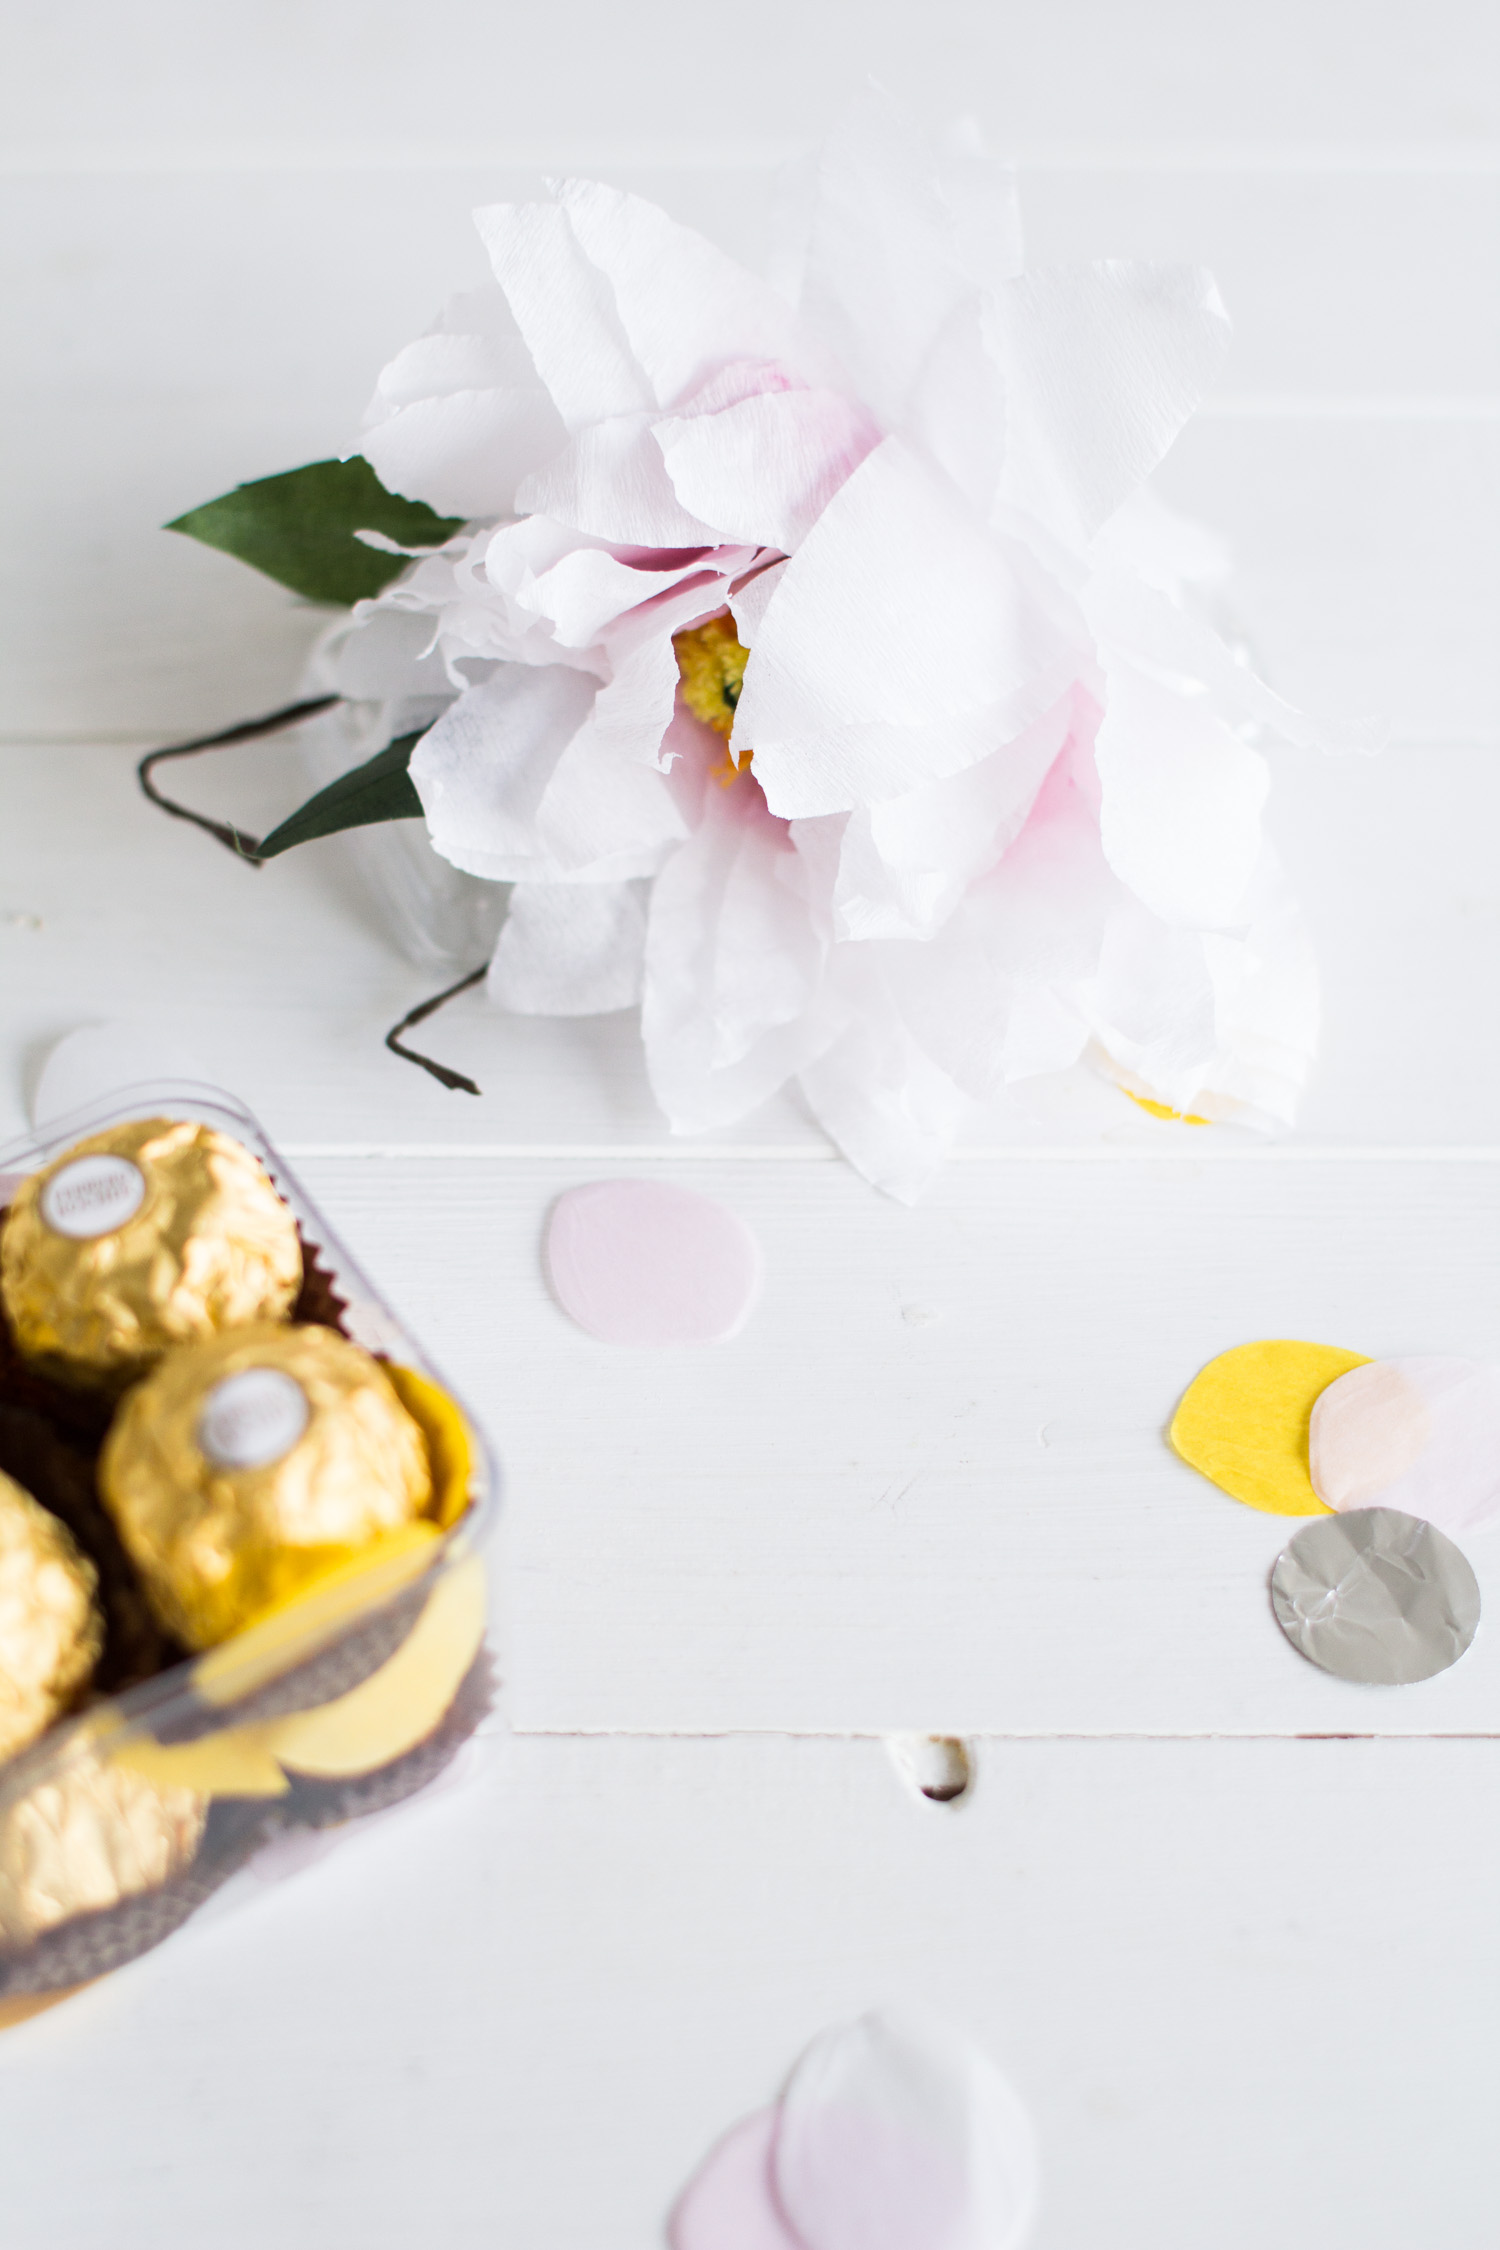
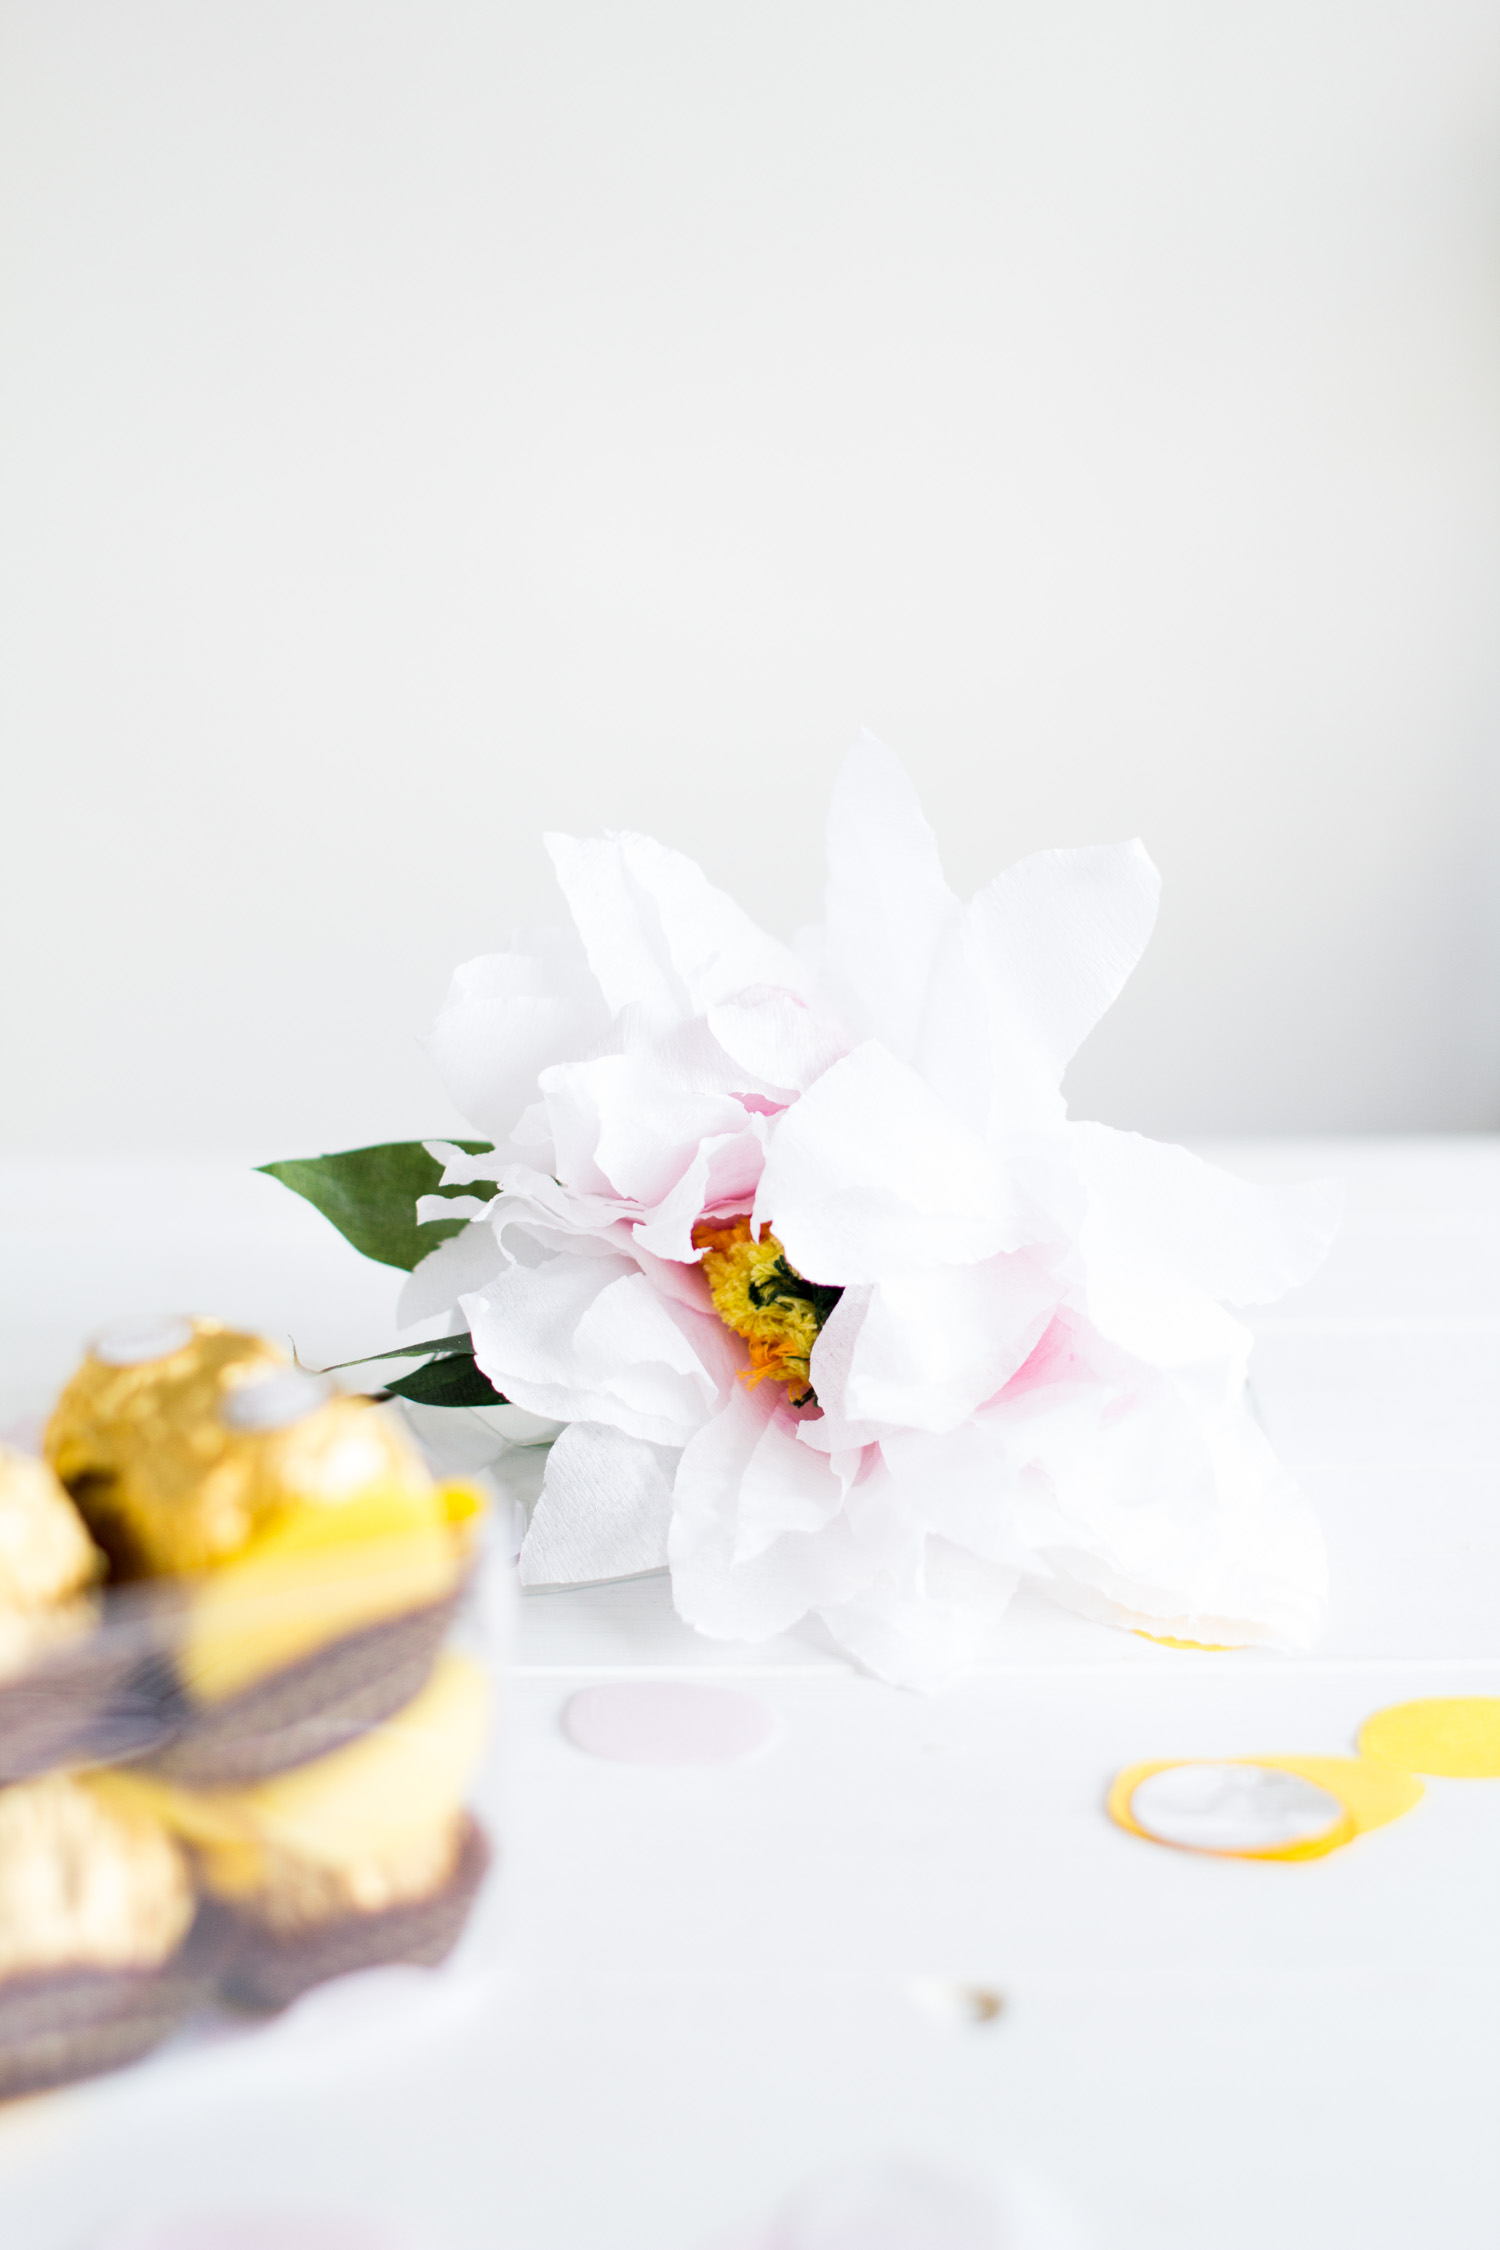
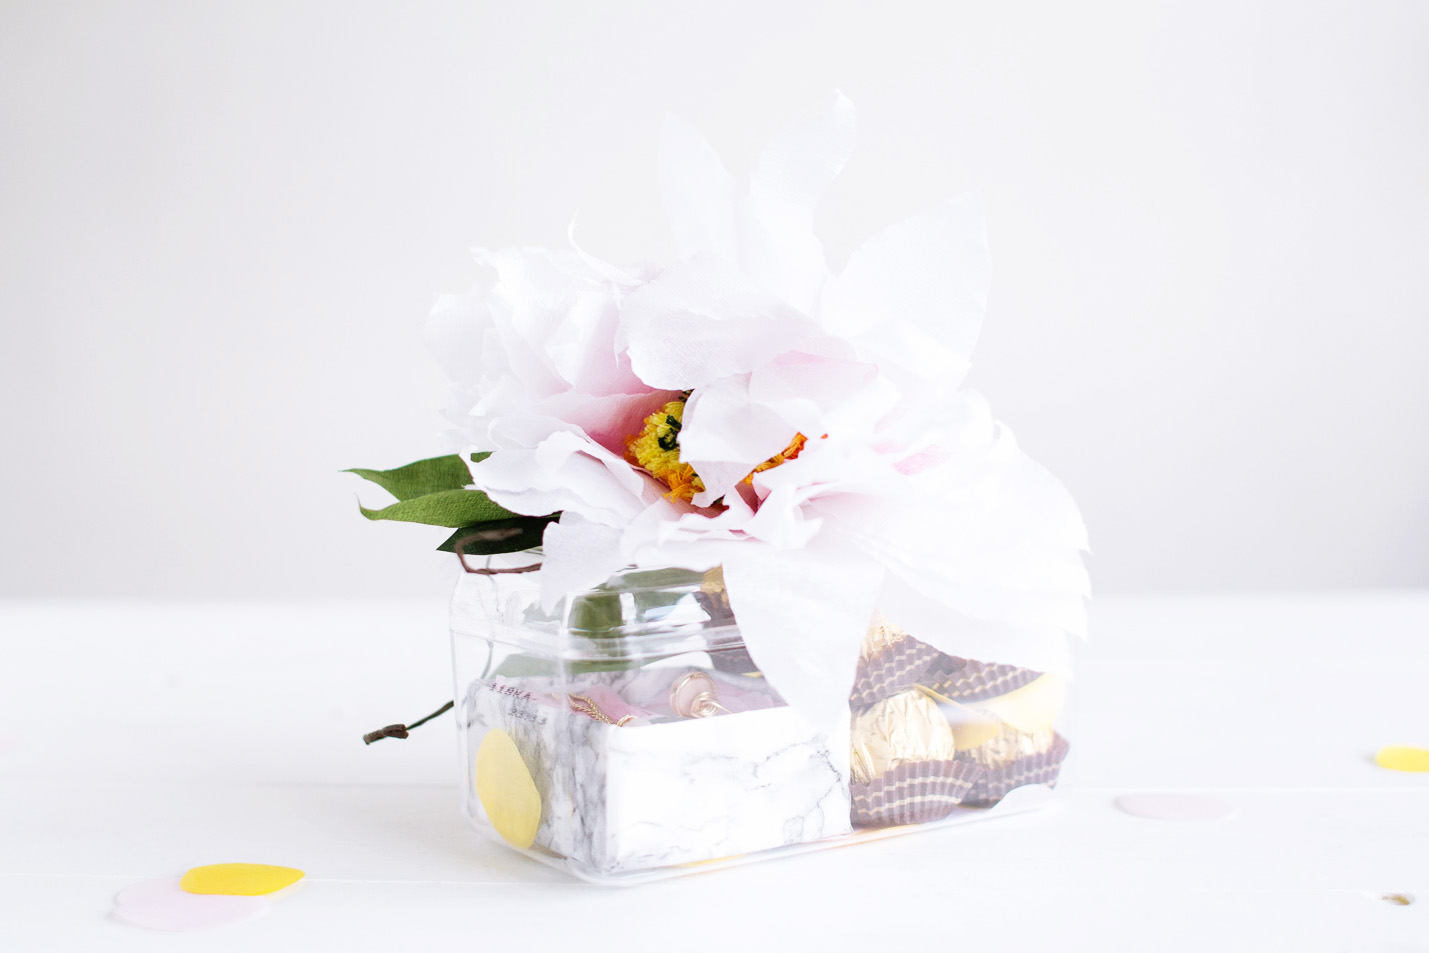
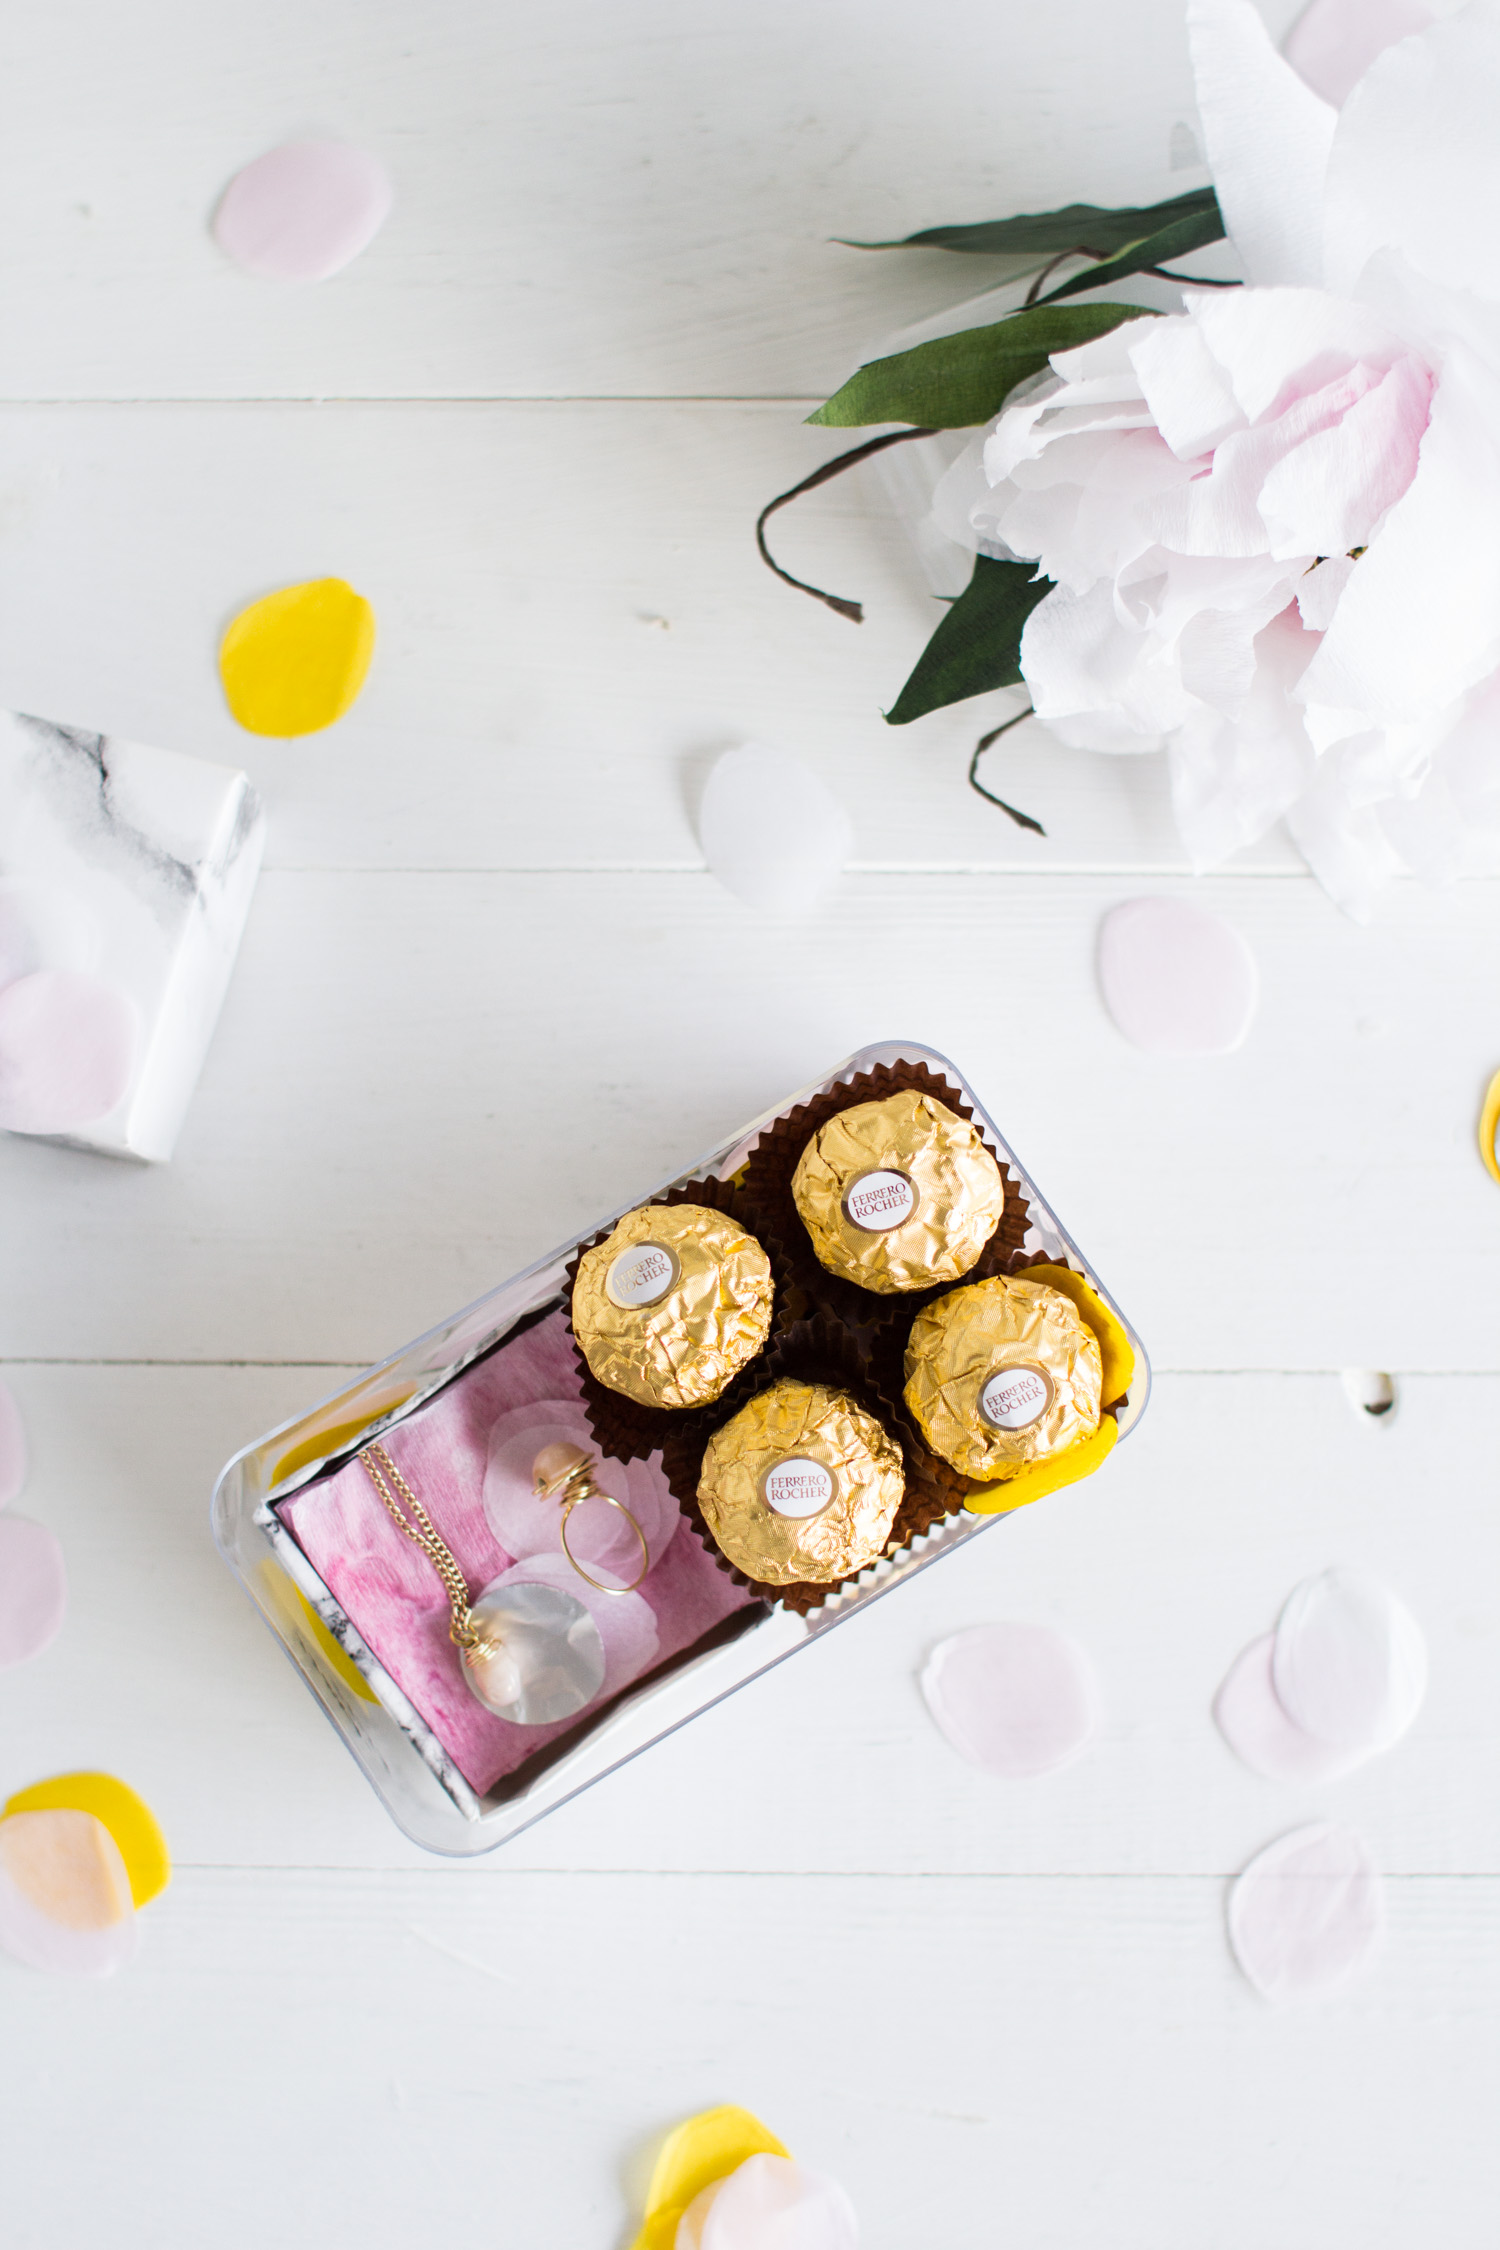
So I’ve made the perfect combination of the two in the hope that my lovely friends and family might see this and decide that this year they will treat me to a something chocolatey. I’ve combined this completely customisable (and easy to make) pendant necklace DIY and the wrapped ring from my Beads & Baubles ecourse with super indulgent Ferrero Rocher pralines. Yes, I am spoiling somebody. Once you have the contents of the box ready you can begin to work on the show stopper.
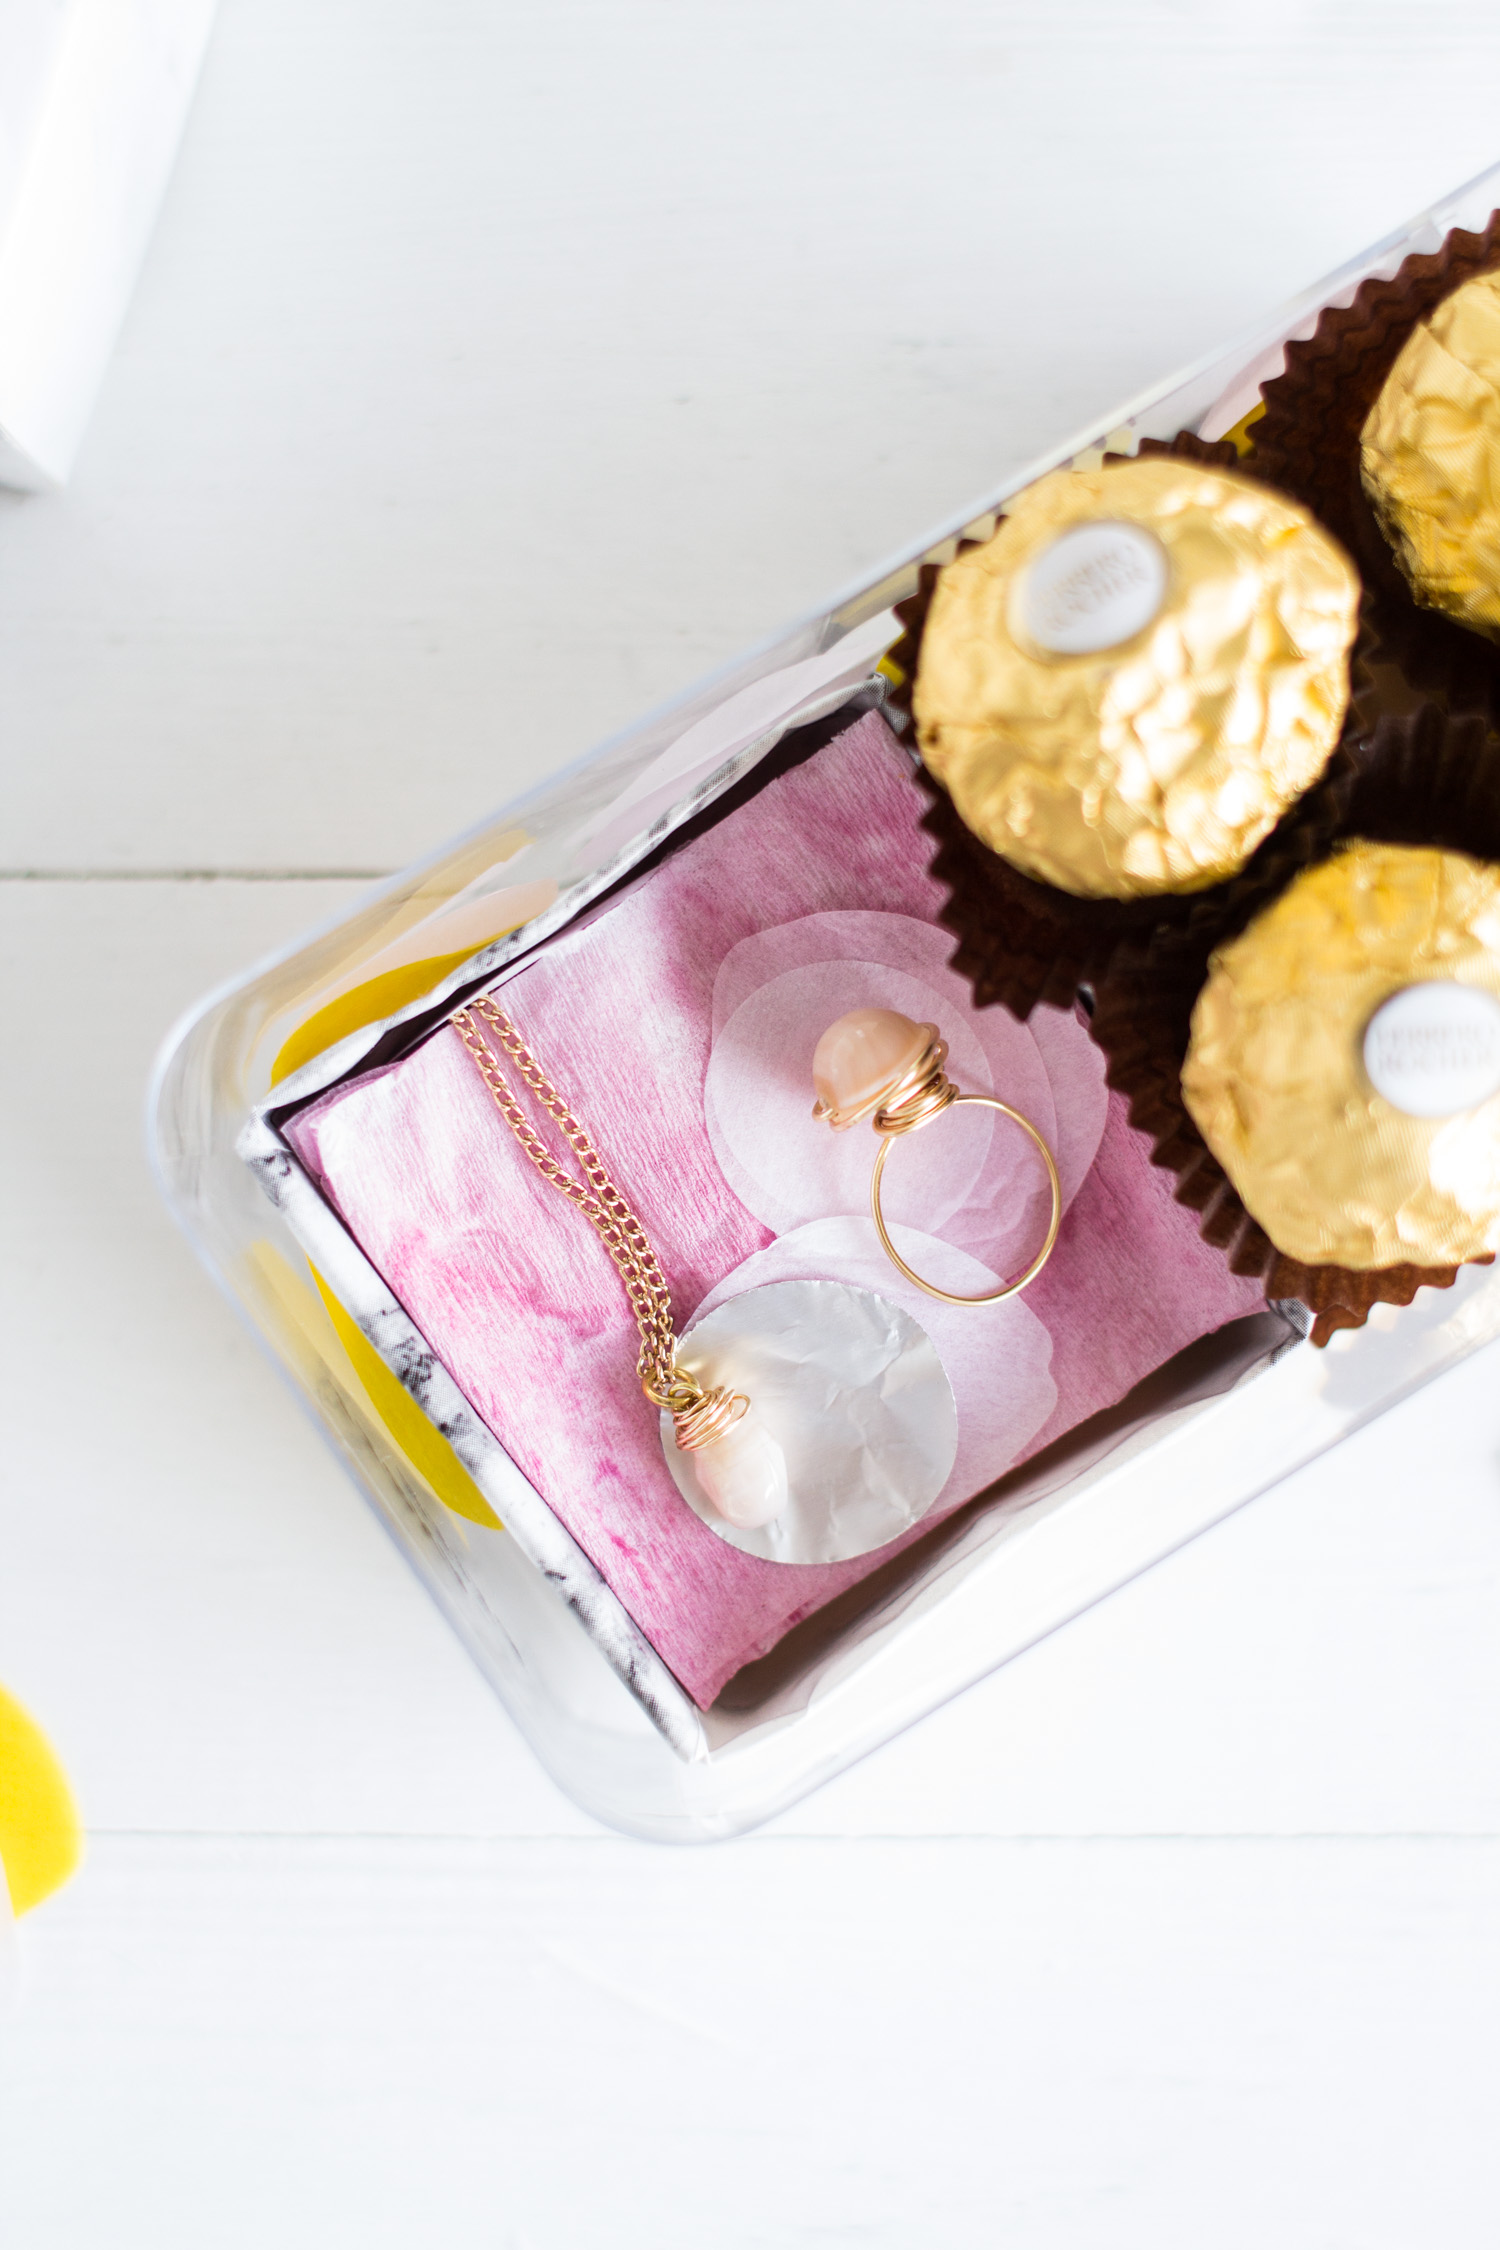
P.S. The best thing about this gift is that you need to take a few of the chocolates out to make way for the added jewellery. Just consider them a present to yourself for being such an awesome gift giver!
Watch the video or see the full tutorial below:
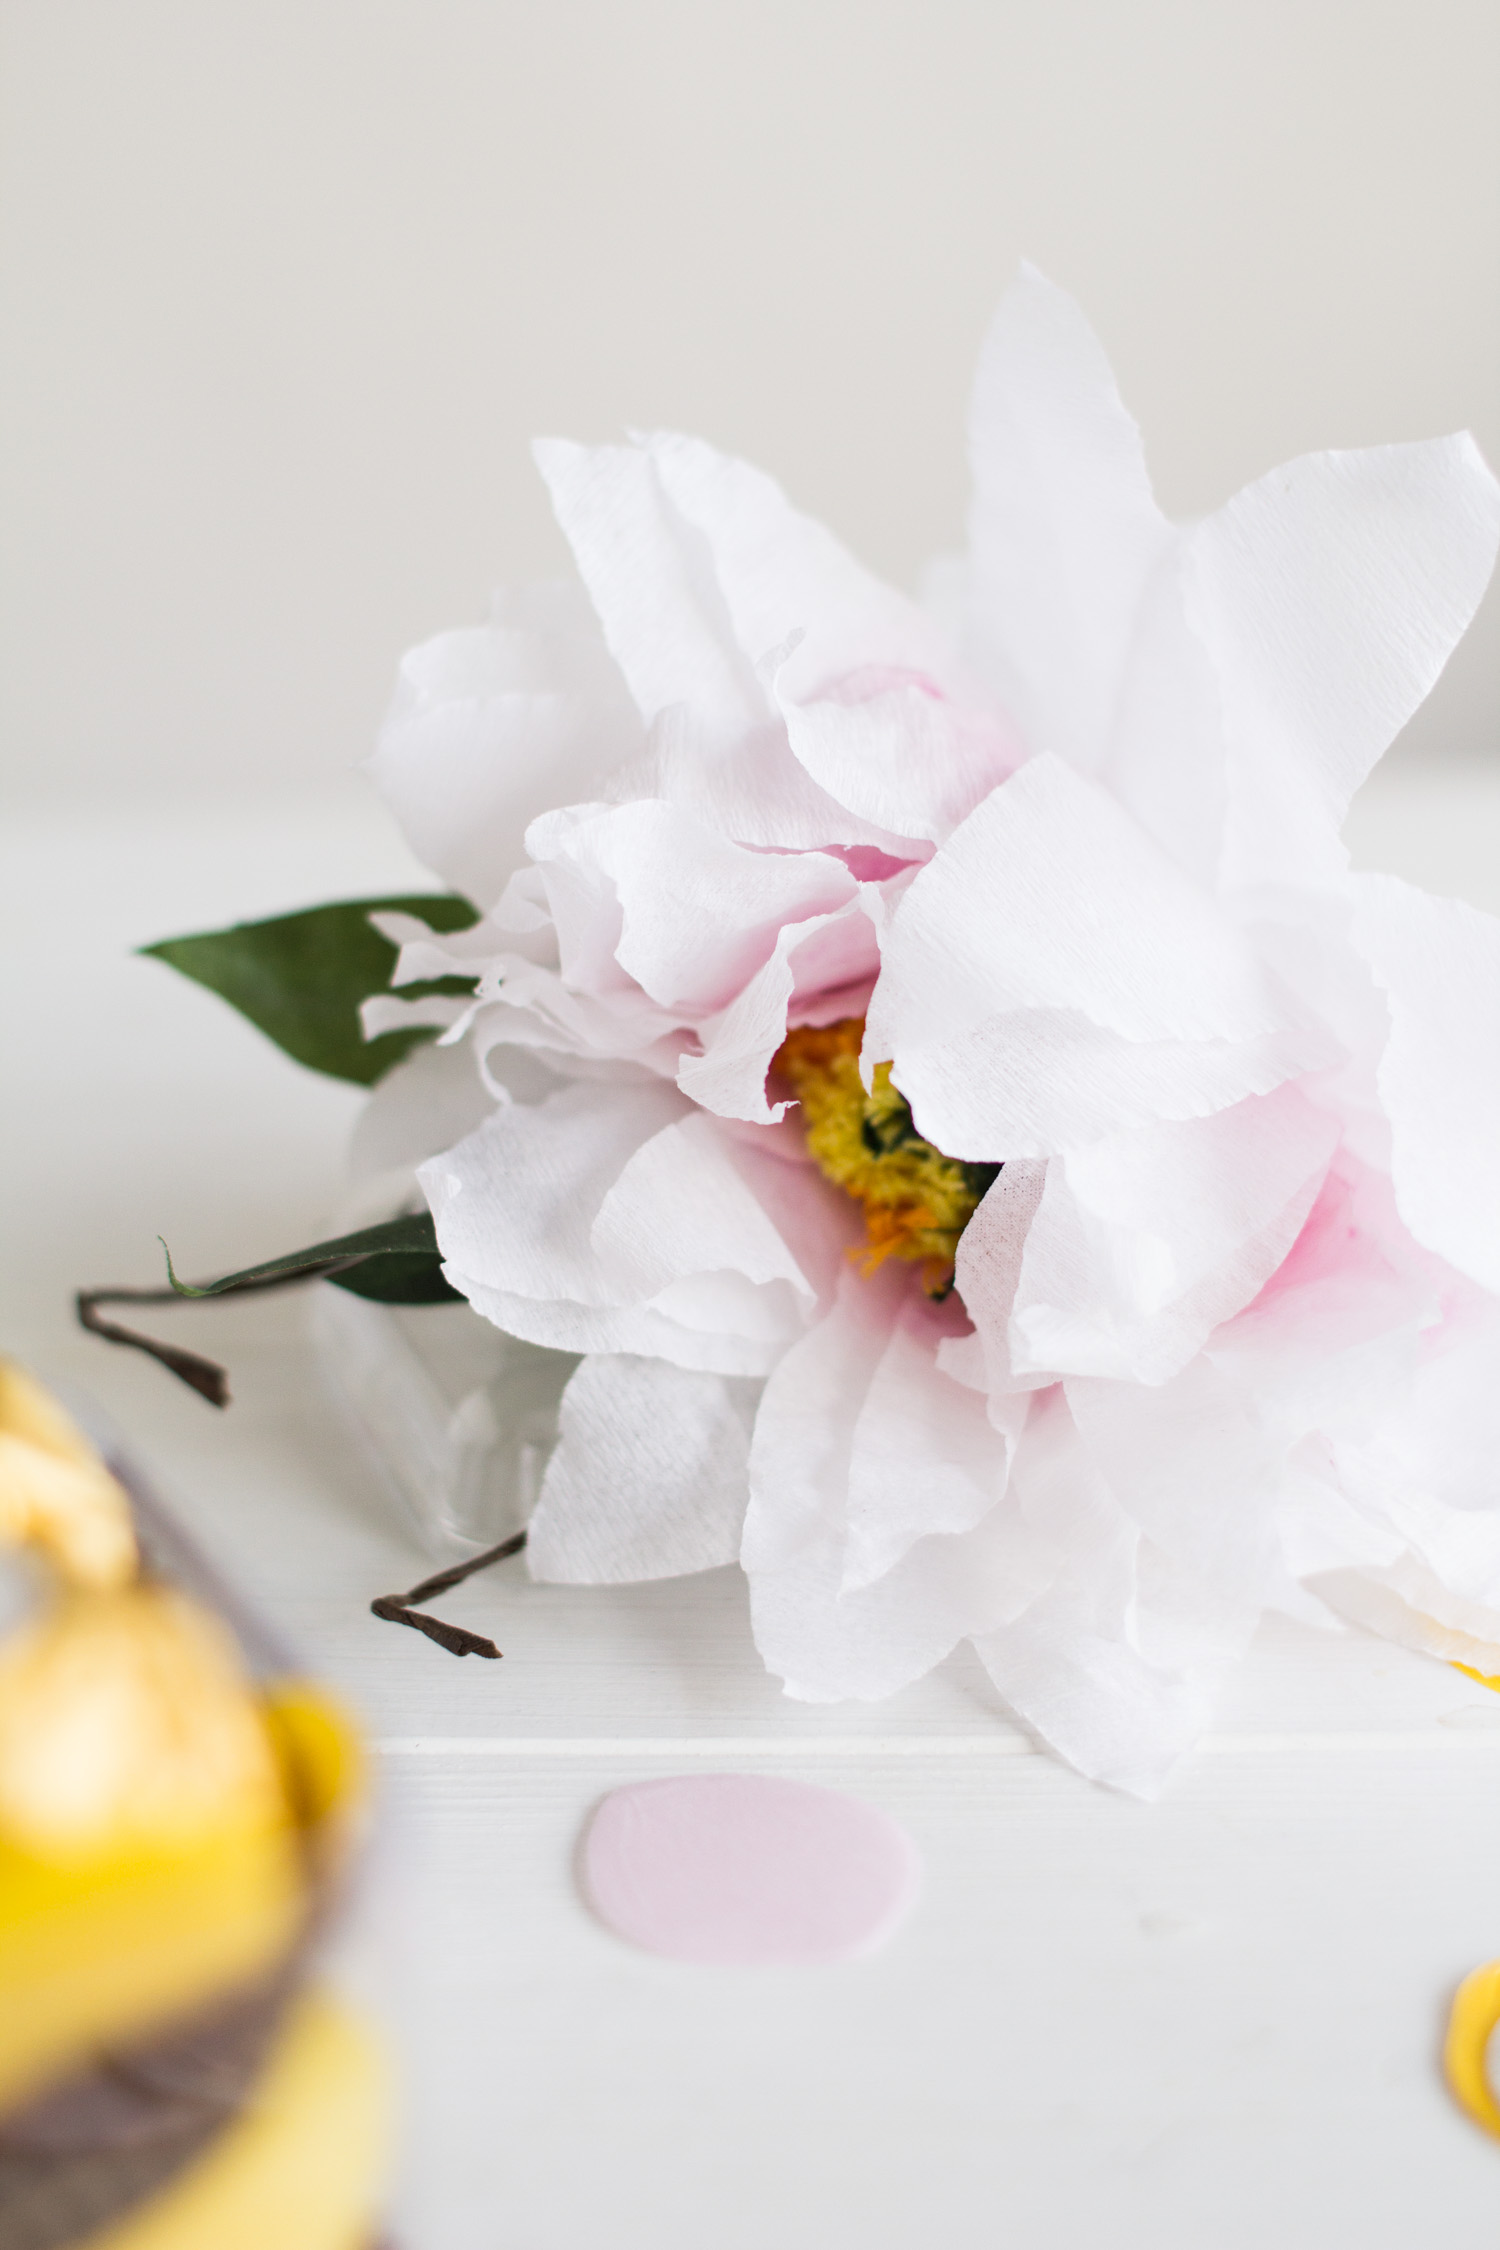
Making the flower:
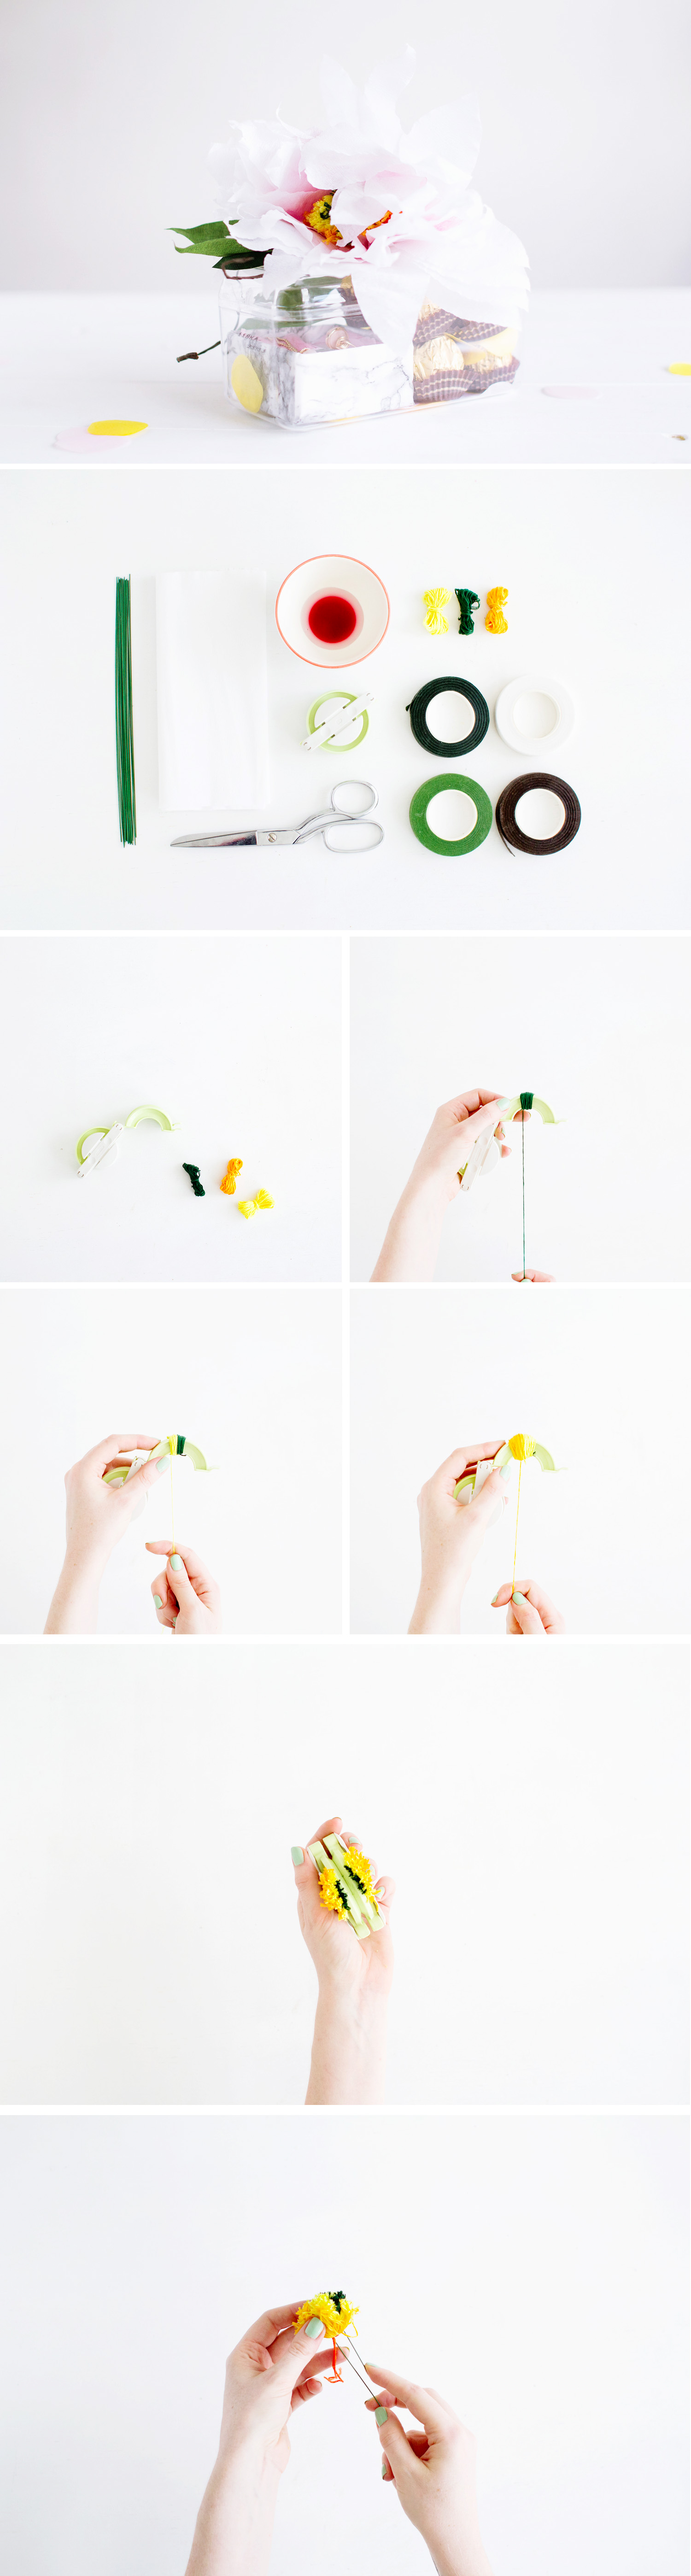
1. Open up one side of the pom pom maker and begin to wrap the green embroidery thread around the two arms. don’t worry about tying off the threads. Once you have a little green cut off the excess and start wrapping with the yellow thread. Make sure you cover all of the green so you can no longer see it. Then lastly do the same with the orange floss until you cannot see any yellow any more.
2. Close the arms of the pom pom maker and snip all the threads along the line the pom pom maker guides you to between the arms. Wrap a leftover piece of floss around the whole of the pom pom maker and tie in a tight knot.
3. Pull the two halves of the pom pom maker apart, leaving all of the threads tied together neatly.
4. Take a piece of floral wire and fold the end around the threads in the center leaving about a two inches tail. Bring the wires together and twist to hold the threads in place. Pull both sides of the floss together to make the center of the flower.
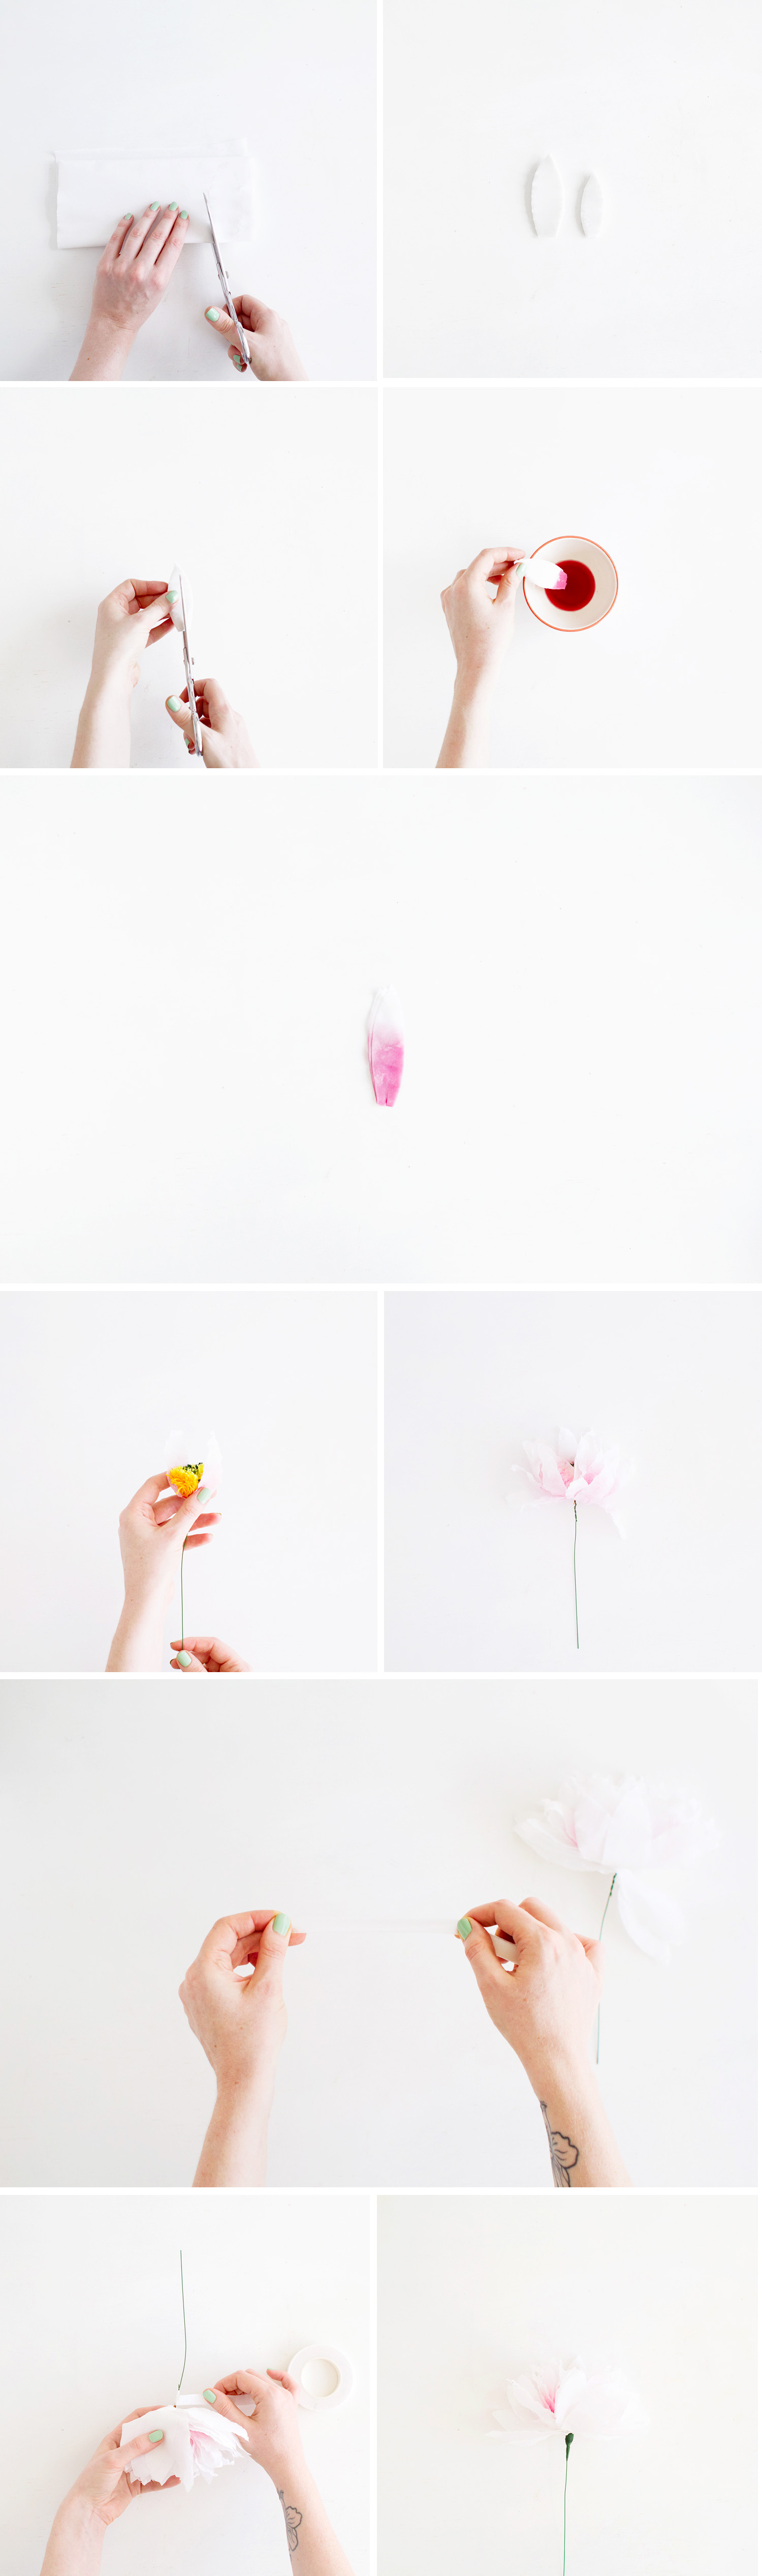
5. To make quick and easy petals use folder crepe paper. Draw a long petal shape so that the base of the petal ends at the folded side of the crepe paper. Draw another petal next to this half the size and cut them out. Do not cut along the base of the petal. Instead make a small slit from the base into the petal shape.
6. Take the smaller bunch of petals, dip into water then dip about two thirds of the petal into diluted (about 70/30 water to color) food coloring. Lay out flat to dry and pat the area where the color meets the white paper to blend. Leave these to dry somewhere warm. You can speed the process up by pealing the petals apart gently.
7. Once all the petals are dry open them out and thread onto the wire stalk through the cut in to middle. As you continue to do this with the rest of the petals move them into different positions around the pom pom centre of the flower to give your flower an even spread of petals.
8. Once all of the pink petals are in place take the bunch of larger petals and one by one peal off each layer and thread onto the wire stalk building up the flower until you are happy. If you want a bigger flower you can cut out and add more petals.
9. Wrap the stem just below the petals with florists tape. You need to stretch the tape out first so that it adheres to itself. Wrap the white tape until you have a bulb shape that is large enough to hold the petals in place. Finished this with the dark green tape.
Making the leaves:

1. Fold a length of floral wire just off the half way point. Cut off three pieces of dark green tape and three in light green all about two inches long.
2. Hold one strip of dark green tape and one strip of light green tape together sandwiching one end of the wire in between them. Make sure the sticky sides are facing each other and stretch them both, smoothing them out so that they adhere together.
3. Create a larger surface are for the leaf by stretching out another piece of tape and pressing onto the tape around the wire. Once you have a large enough area cut into a leaf shape then pinch the leaf at the base.
4. Repeat this step to create four leaves.
5. Cut of a strip of brown tape. Stretch out and twist together to create an uneven rolled strip. Wrap the tape around your finger and gently pull off in a coil.
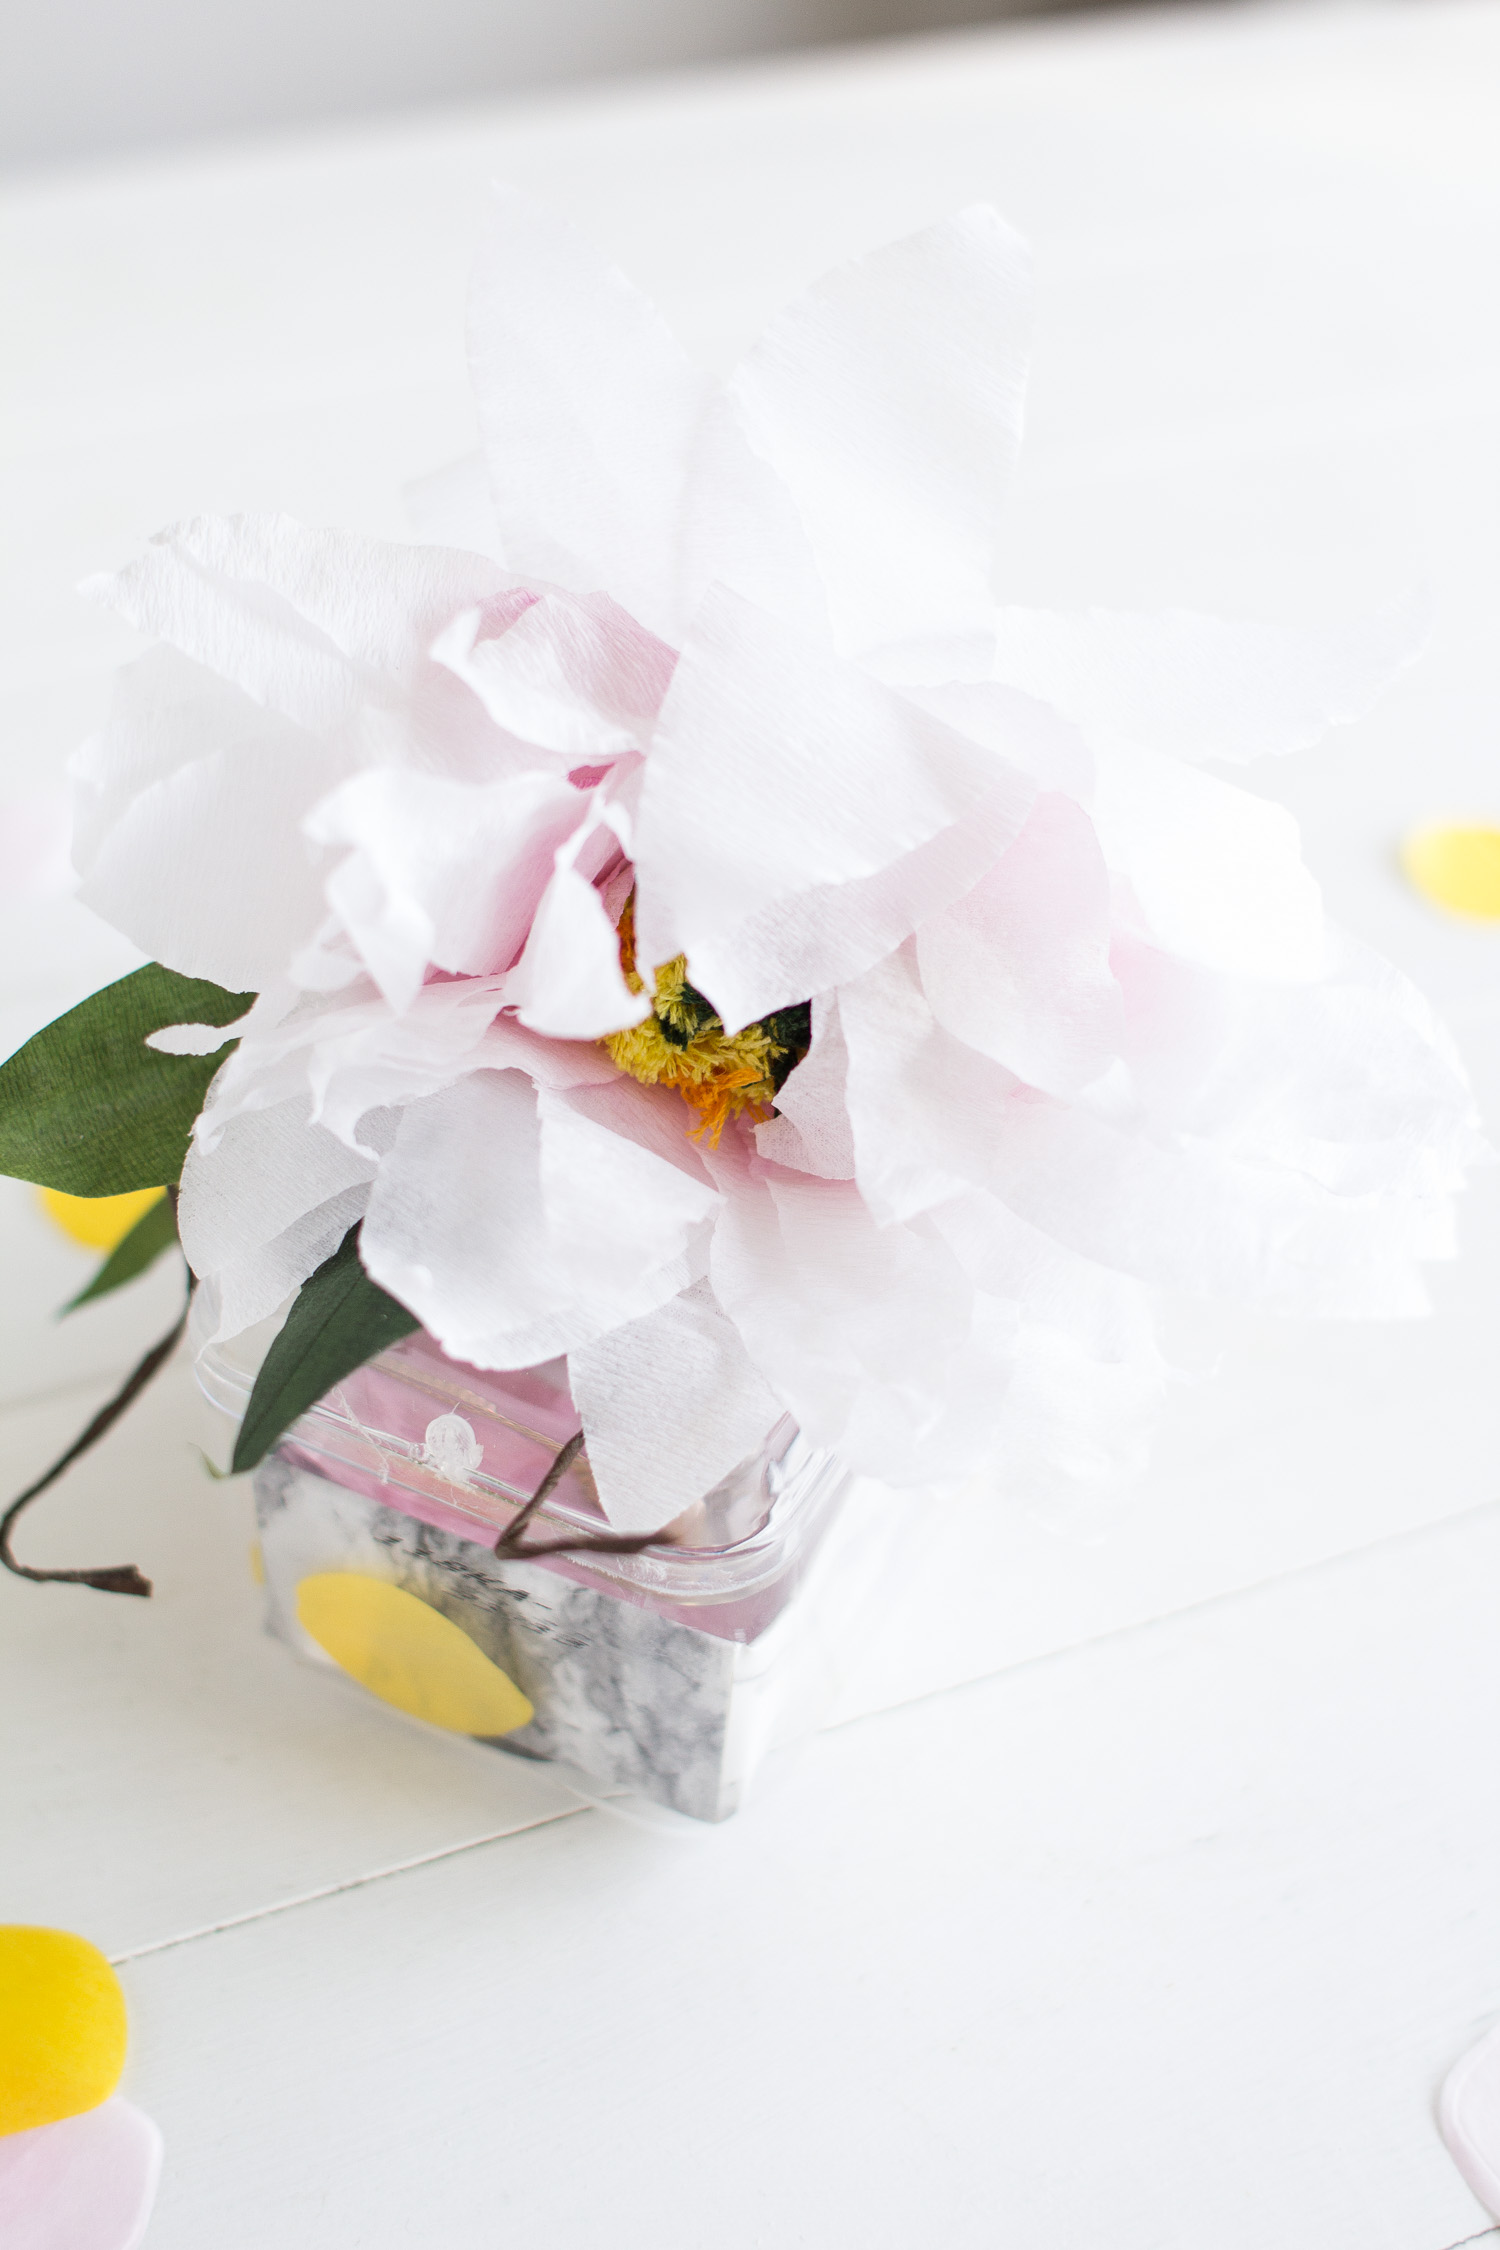
Put all the elements of the flower together and wrap into place with dark green floral tape. Cover any sharp ends and joins with the tape to neaten. Add the jewellery, chocolates and confetti to the box replace the lid and use a little tape to hold the flower topper in place.
If you’re looking for more ideas to make your gift wrap personal check out this post!
This post celebrating gift giving was made possible by Ferrero Rocher but all opinions are my own. Thank you for supporting the brands that support Fall For DIY.
Related
Original article and pictures take fallfordiy.com site
Комментариев нет:
Отправить комментарий