

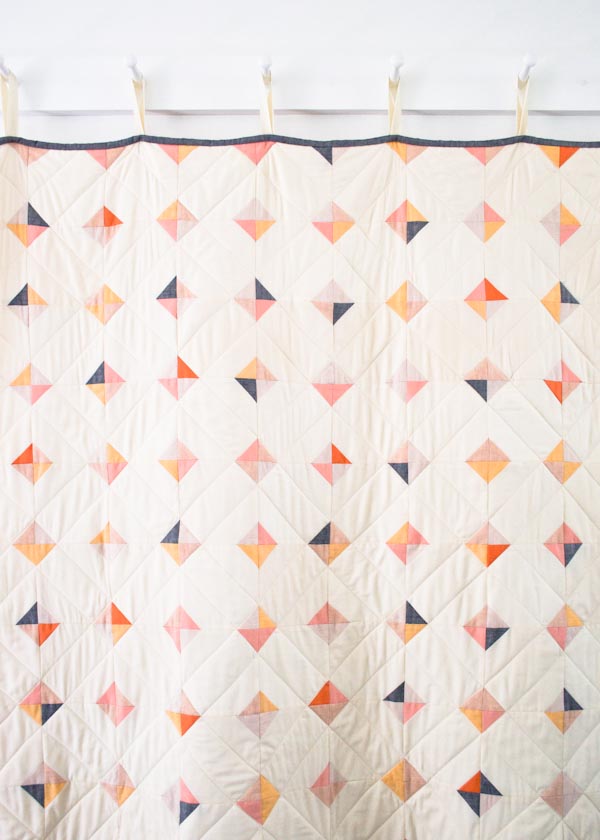
Our Tiny Tile Quilt’s diagonal lines and tiny pieced diamonds may give the impression of expert quilt making, but the reality is much simpler than that. All you really need is the easiest of building blocks: a basic square… and lots of them!
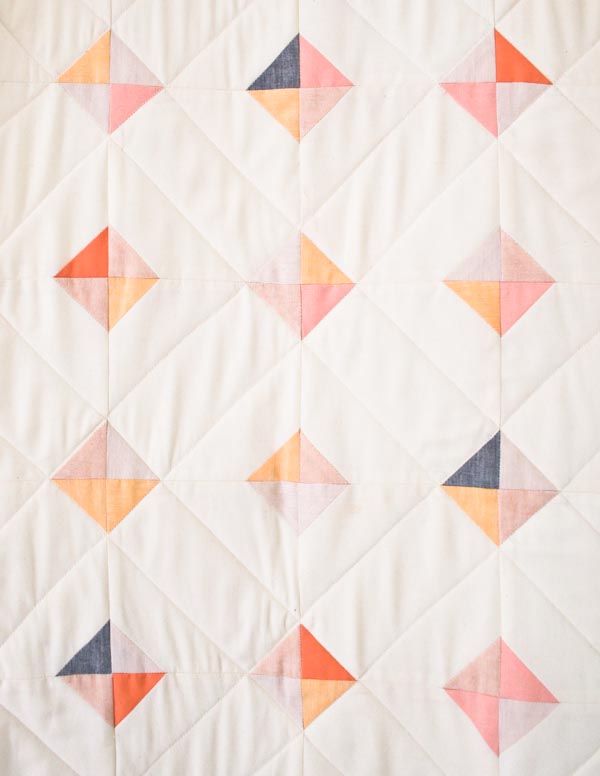
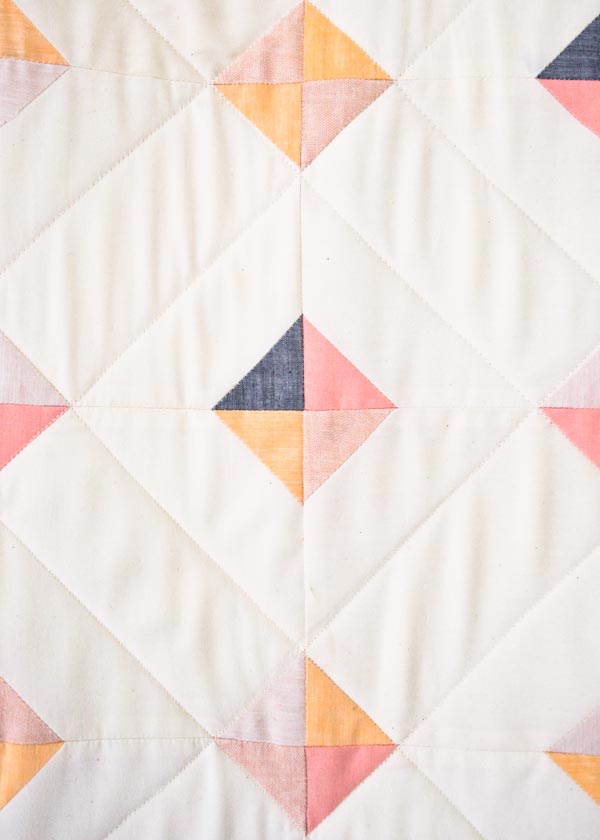
Piecing these squares, corner by corner and then row by row, creates this seemingly complex play of colorful diamonds. Add to that our palette of fresh spring blossoms and fruity sorbets, and the result is playful, sophisticated and a little bit surprising.

Pick up all the fabrics you’ll need with our Tiny Tile Quilt Bundle and make an heirloom… even if you’re a quilting newbie! -Corinne
Materials
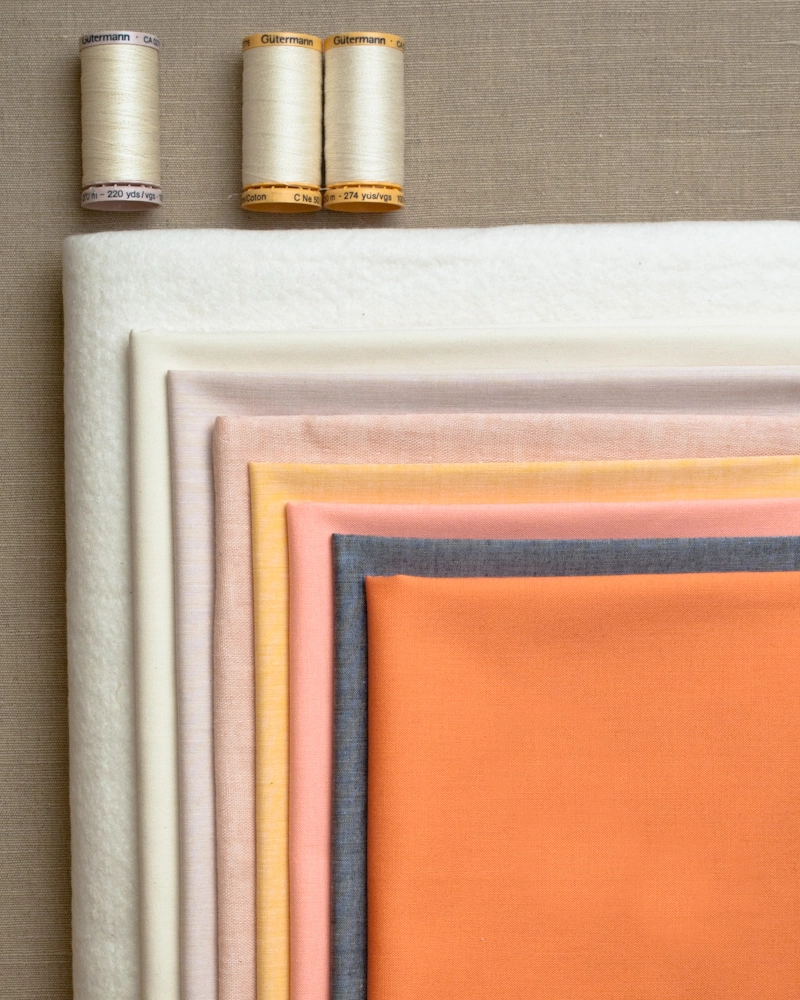
Our Tiny Tile Quilt Bundle includes (shown above, from the bottom of the pile to the top)…
- Quilter’s Dream’s Natural Request Dream Batting, Throw Sized, 100% cotton
- Fabric A: 1 ¼ yards Moda’s Moda Muslin – 110 inches, 200 Count in Natural
- Fabric B: 3 yards of Kiyohara’s Fine Solids in Beige (for the Quilt Top and for the Backing)
- Fabric C: ½ yard of Kiyohara’s Kokochi Double Gauze in Pink
- Fabric D: ½ yard of Kiyohara’s Fine Solids in Yellow
- Fabric E: ½ yard of Robert Kaufman’s Kona Cotton in Peach
- Fabric F: ¾ yard of Kiyohara’s Fine Solids in Black (for the Quilt Top and for the Binding)
- Fabric G: ¼ yard of Robert Kaufman’s Kona Cotton in Mango
- Two 274-yard spools of Gutermann’s 100% cotton thread in color 1040
- One 220-yard spool of Gutermann’s Hand Quilting Thread in color 919
These are enough materials to make one 50 x 60-inch quilt.
You will also need…
Size
Finished dimensions: 50 inches x 60 inches
Note
Prewash and iron all of the fabrics (but not the batting) before starting.
Pattern
Prepare the Backing
Trim the selvage edge off one side of Fabric B.
Cut the 3-yard piece of Fabric B in half across the selvages so that you have two pieces that are approximately 43 x 54 inches each.
With right sides together, stack the two pieces on top of each other, matching up the trimmed selvage edges. Pin the two pieces together along this trimmed edge.
Sew along the pinned edge and press the seam to one side. This piece measures approximately 54 x 84 inches.
Trim this piece down to 54 x 64 inches. This is the Quilt Backing.
Do not discard the 54 x 20-inch piece of fabric you cut off! You will use it later for the Quilt Top.
Cut
If you’re new to rotary cutting, please refer to our Rotary Cutting Tutorial before you start.
For the Binding
From Fabric F, cut six 2 ½-inch strips from selvage to selvage and then trim off the selvages.
For the Quilt Top
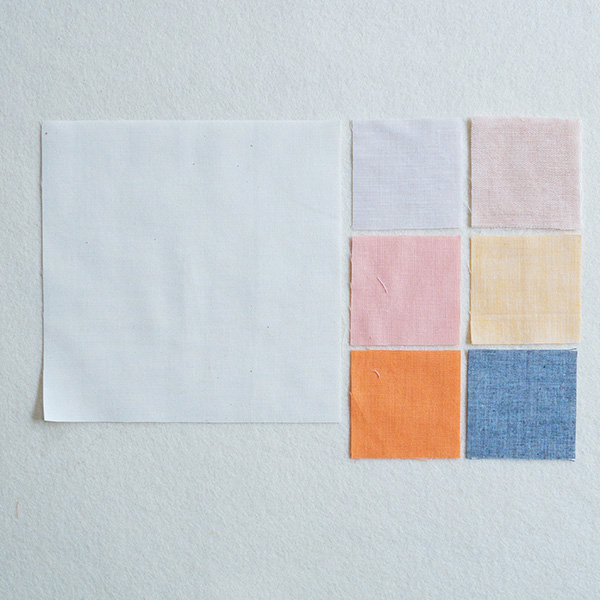
Cut 120 Large Squares from Fabric A.
Cut a total of 480 Small Squares (2 x 2 inches) from Fabrics B-G in the following amounts . . .
Fabric B: 120
Fabric C: 120
Fabric D: 90
Fabric E: 88
Fabric F: 40
Fabric G: 22
When you have finished cutting the Small Squares, put them into a paper bag and jumble them all together.
Organize the Large Squares into 12 piles of 10 squares each.
Piece the Squares
Pull 10 Small Squares from the paper bag (no looking!). Do not worry about having an even amount of colors in the pile. The random mix of colors and tones is part of the charm of this quilt!
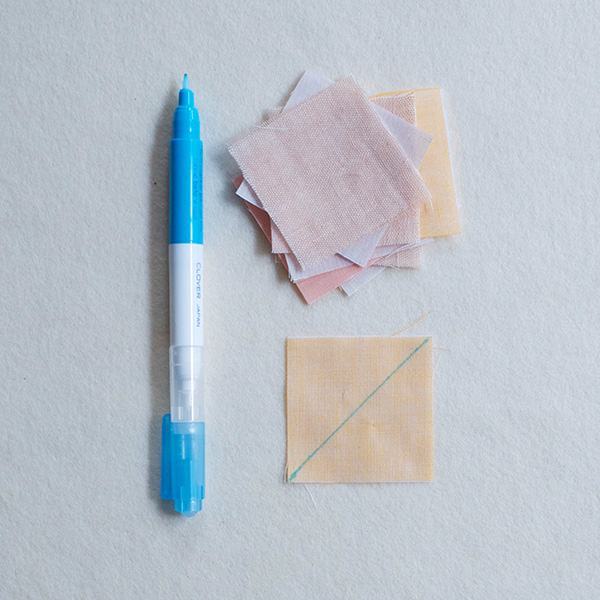
Pull one Small Square from the pile, and with the wrong side facing up, use your preferred fabric-marking tool (I used a water-soluble fabric marker) and a straight-edge ruler to draw a diagonal line from one corner of the square to another, as shown above.
Repeat for all 10 Small Squares.
Now, grab the first stack of 10 Large Squares.
Lay one Large Square out flat with its right side facing up.
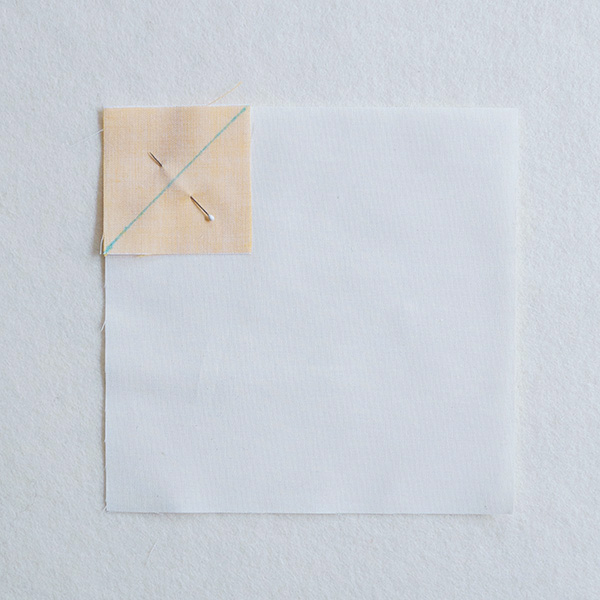
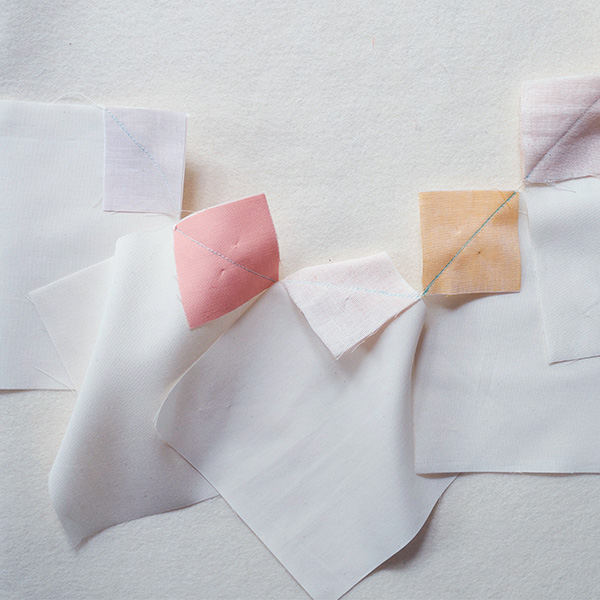
With its wrong side facing up, place one Small Square on one corner of the Large Square so that the marked line runs across the Large Square’s corner (rather than through it), as shown above. Pin in place.
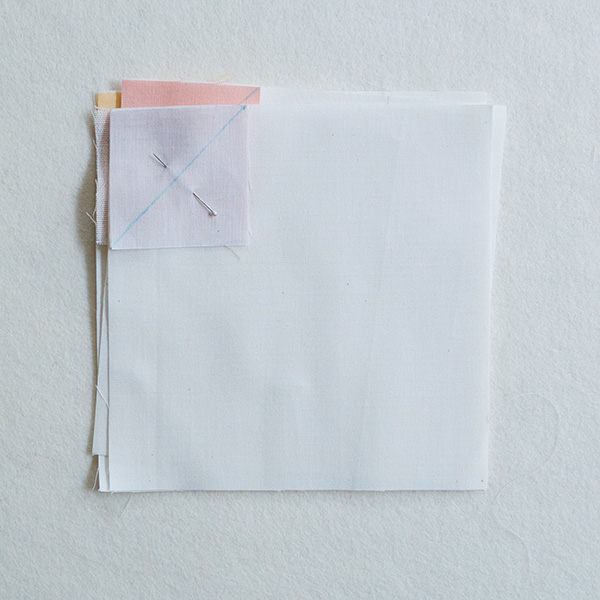
Now, sew each Large and Small Square together along the marked diagonal line. You can sew the Squares one at a time (you don’t need to backstitch at the beginning and end of the seam), or use the quilt-making technique called “chain piecing,” which means continuously sewing the pieces together without lifting the presser foot or cutting the threads. Here’s how . . .
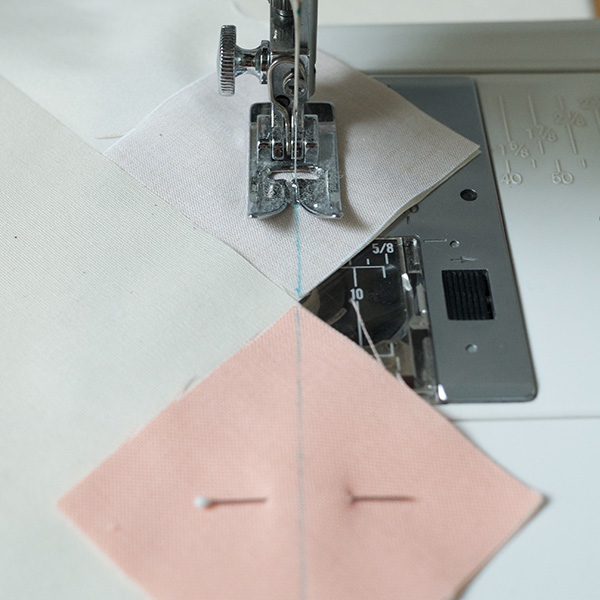
Start sewing the first Square in the pile. When you reach the approximate center of the marked line, grab the next Square in the pile and place it in front of the working Square. Orient its marked line so that it is in line with the marked line of the previous Square. The Large Squares of the two pieces overlap, but the two Small Squares abut, and you should only ever sew through one set of Squares at a time.

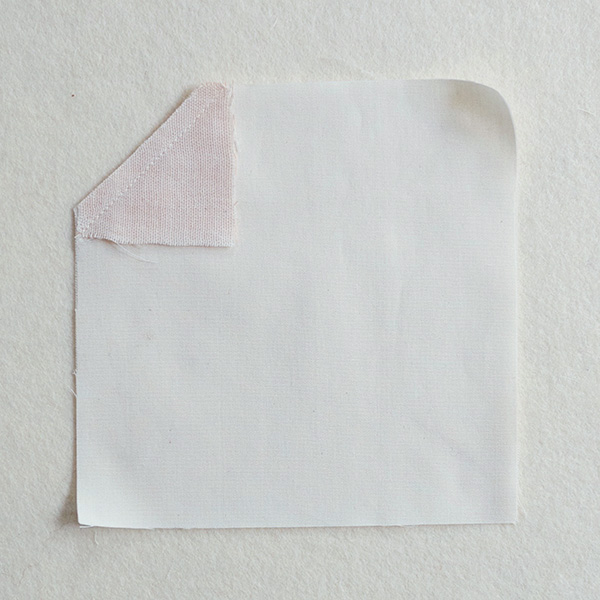
Lay one pieced Square out flat. Trim the corner where the Small Square is attached, leaving a ¼-inch seam allowance. The Small Square is now a Small Triangle!
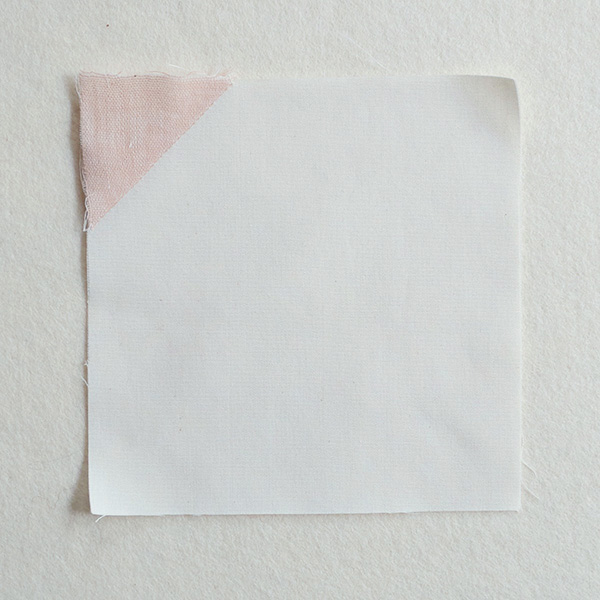
Repeat with the remaining pieced Squares.
Now, grab 10 more Small Squares from the paper bag. Mark, pin and sew them to an un-sewn corner of the same 10 Large Squares, as described above. Trim the Small Squares into Small Triangles and press, also as described above.
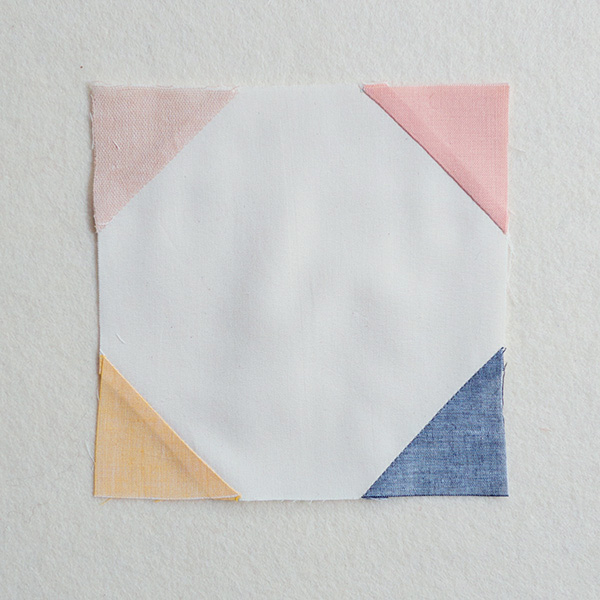
Once you have pieced all four corners of the Large Squares, you can set these aside and grab another stack of 10 Large Squares from the pile. Piece the Small Squares to these Large Squares in the same manner.
Repeat until all 120 Large Squares have been pieced.
Arrange the Quilt Top
Although the layout of the finished Tiny Tile Quilt appears random, and to a certain extent it is, I suggest arranging the pieced Squares before you sew the rows. This allows you to space the colors as you like and to check that the bold colors don’t group together.
Arrange 10 squares across and 12 rows down.
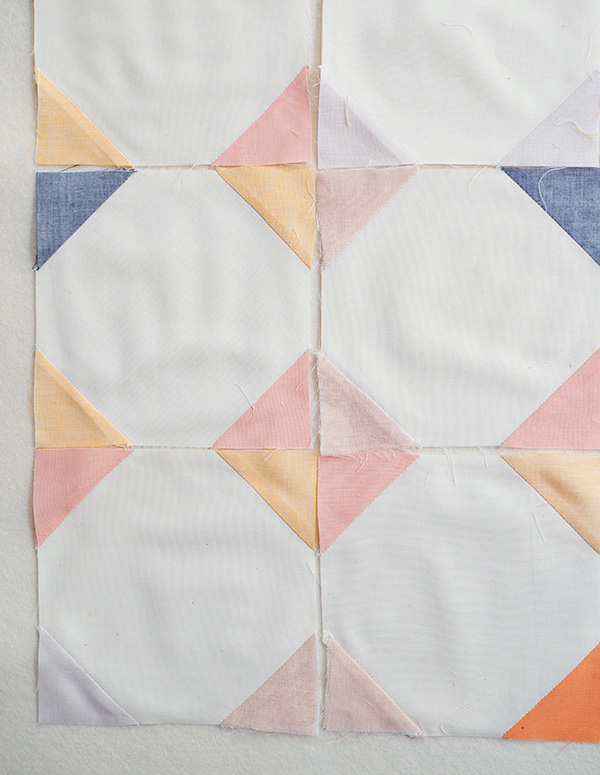
You will notice as you lay out the Squares that the Small Triangles group together and create rows of colorful diamonds. Group the Triangles as you like, and play around until you have an arrangement of colors that you are happy with!
Take a picture of your final layout. You can reference this photo as you piece the Squares into rows.
Piece the Squares into Rows
Working row by row, organize the Squares into 12 stacks of 10 Squares each.
Sew together a row of 10 squares, working left to right along the row. Here’s how . . .
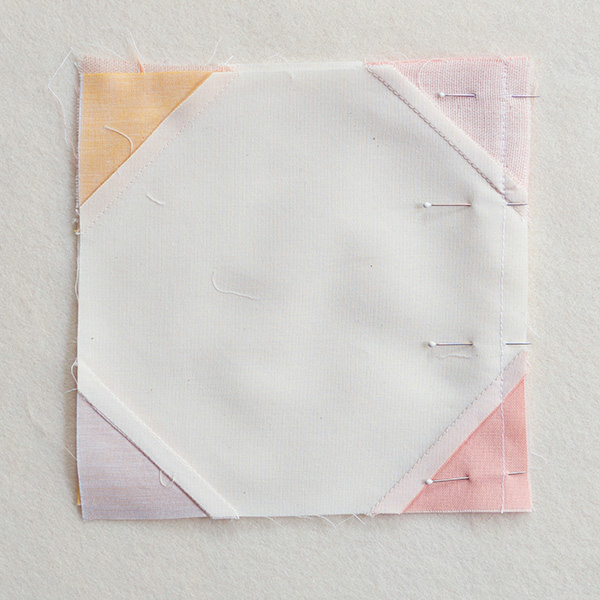
With right sides together, stack the first and second Square on top of each other and pin along their adjacent sides (refer back to your photograph, as needed, to remind yourself which sides are adjacent in your layout). Sew along the pinned edge with a ¼-inch seam allowance (you don’t need to backstitch at the beginning and end of the seam).
Now, stack the third square on top of the second square, again with right sides together and adjacent sides aligned. Pin and sew, as described above.
Repeat with the remaining squares in the pile, working in order and referring to your photograph as needed.
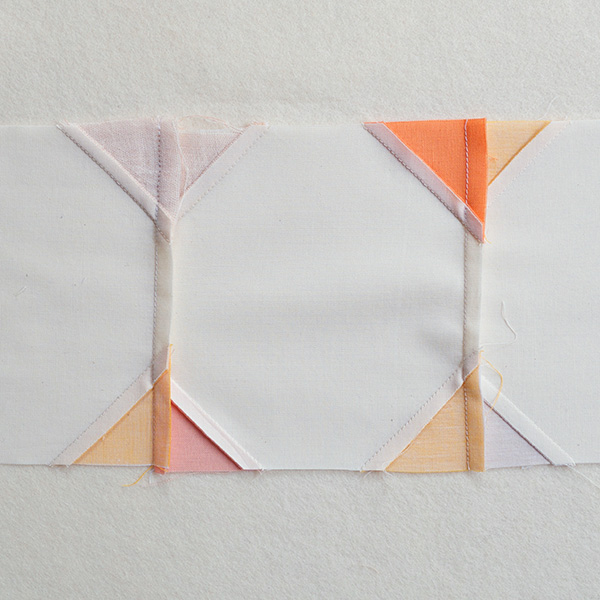
Sew together the next stack of 12 Squares.
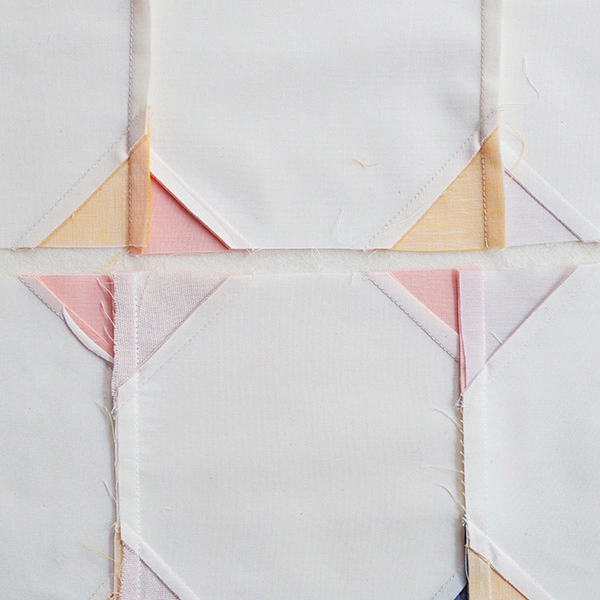
Once you have finished piecing this row, press all the seams in the opposite direction as you did in the last row (if you pressed all seams towards the beginning of the previous row, press this row’s seams towards the end, or vice versa).
Repeat with the 10 remaining stacks, always pressing the seams in the opposite direction of the previous row.
Piece the Rows
To finish the Quilt Top, sew together these 12 finished rows. Here’s how . . .
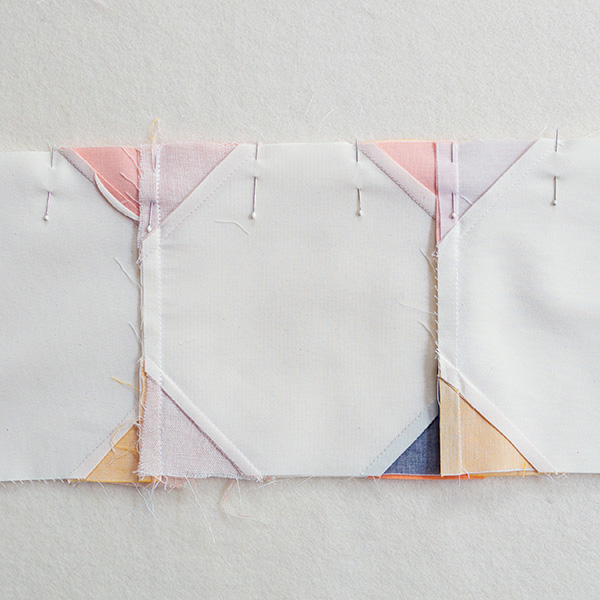
Working from the top down and with right sides together, stack the first and second row on top of each other. Align the long bottom edge of the first row with the long top edge of the second row. Pin them together along this edge, making sure that all straight seams are aligned. Sew along the pinned edge with a ¼-inch seam allowance. Press the seams open.
Now, stack the third row on top of the second row, again with right sides together and adjacent sides aligned. Pin and sew, as described above.
Repeat with the 10 remaining rows.
Your Quilt Top is now finished!
Mark for Quilting
Press the Quilt Top and then, with the right side facing up, lay it down on a clean, hard surface, most likely a floor.
Using masking tape, tape the fabric down to the floor around all four sides, pulling it taut as you tape. First tack down the centers of the opposite sides and then tape along each side, from the center out.
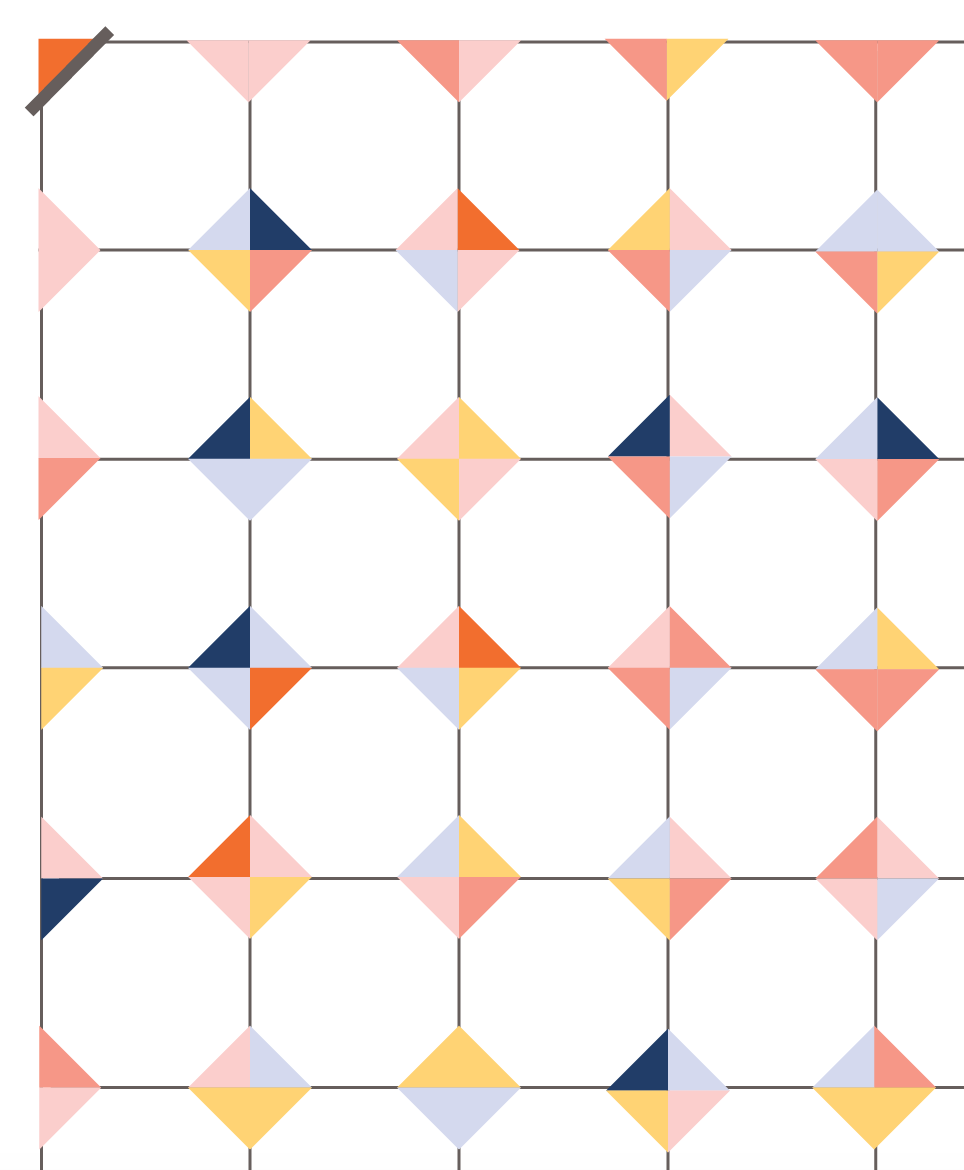
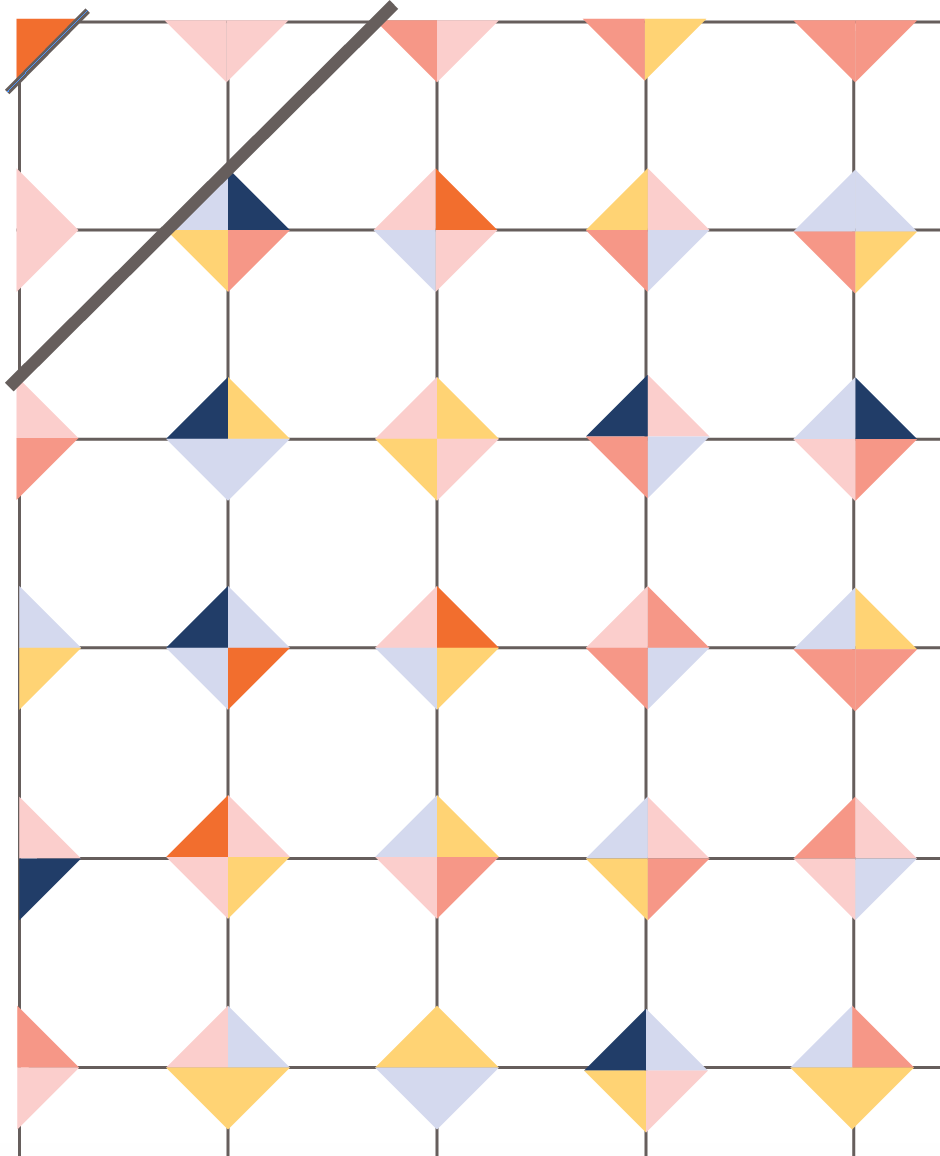
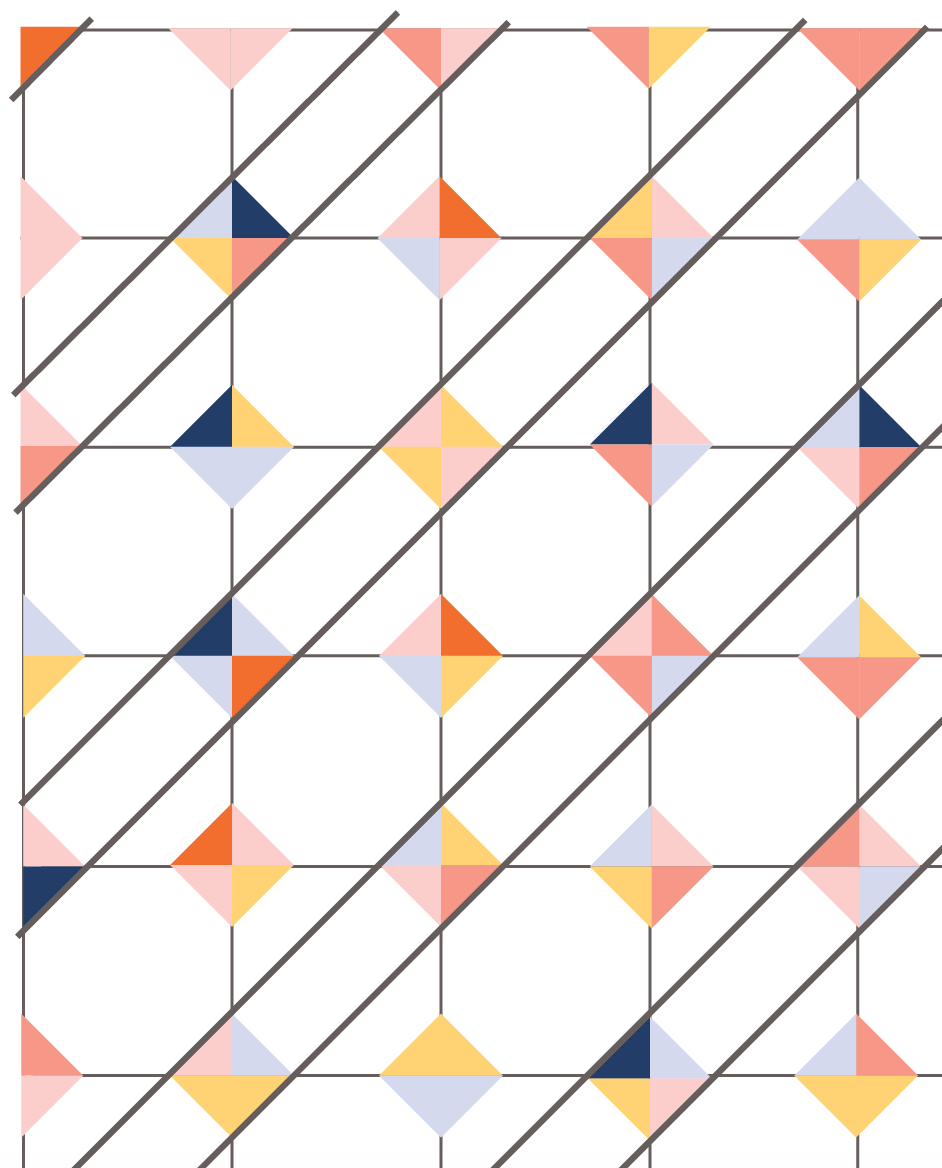
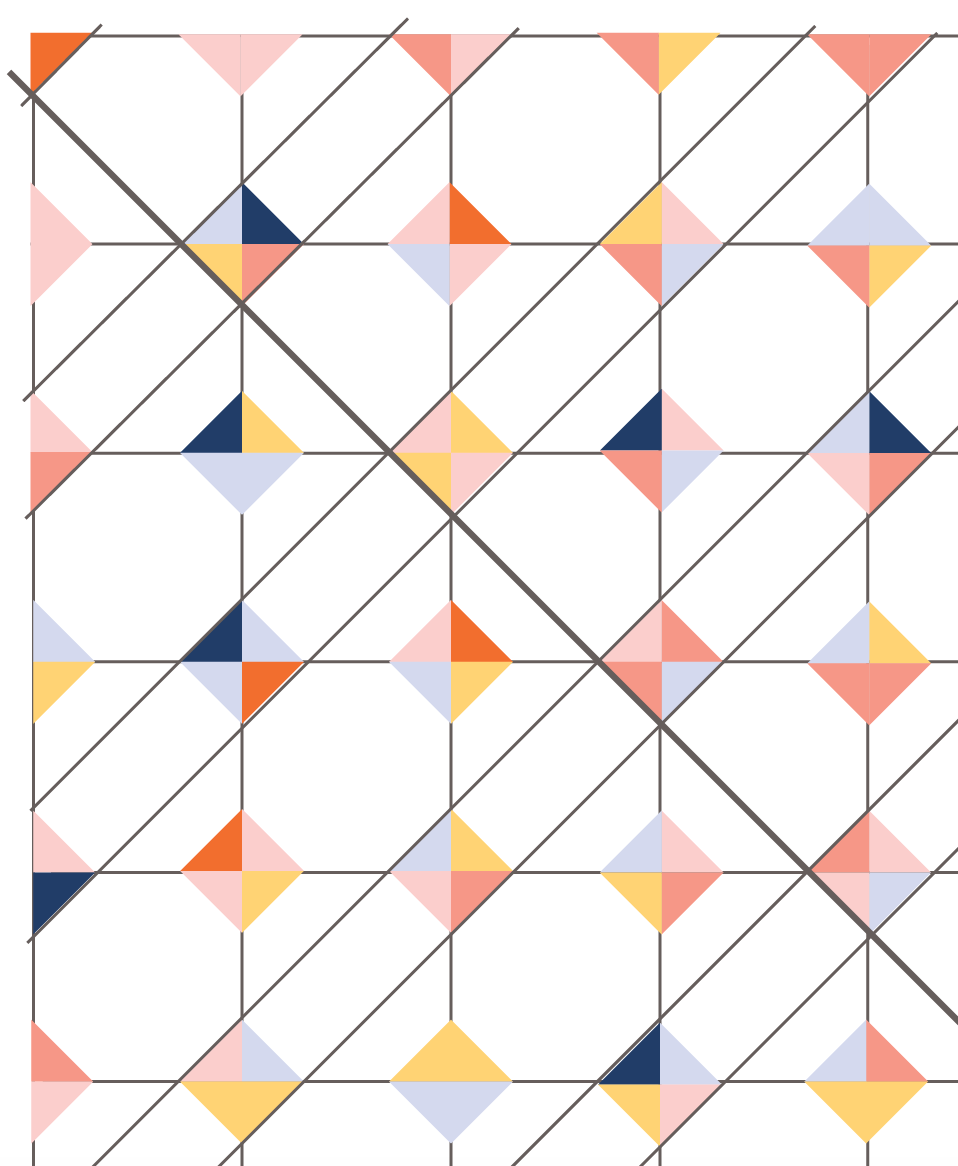
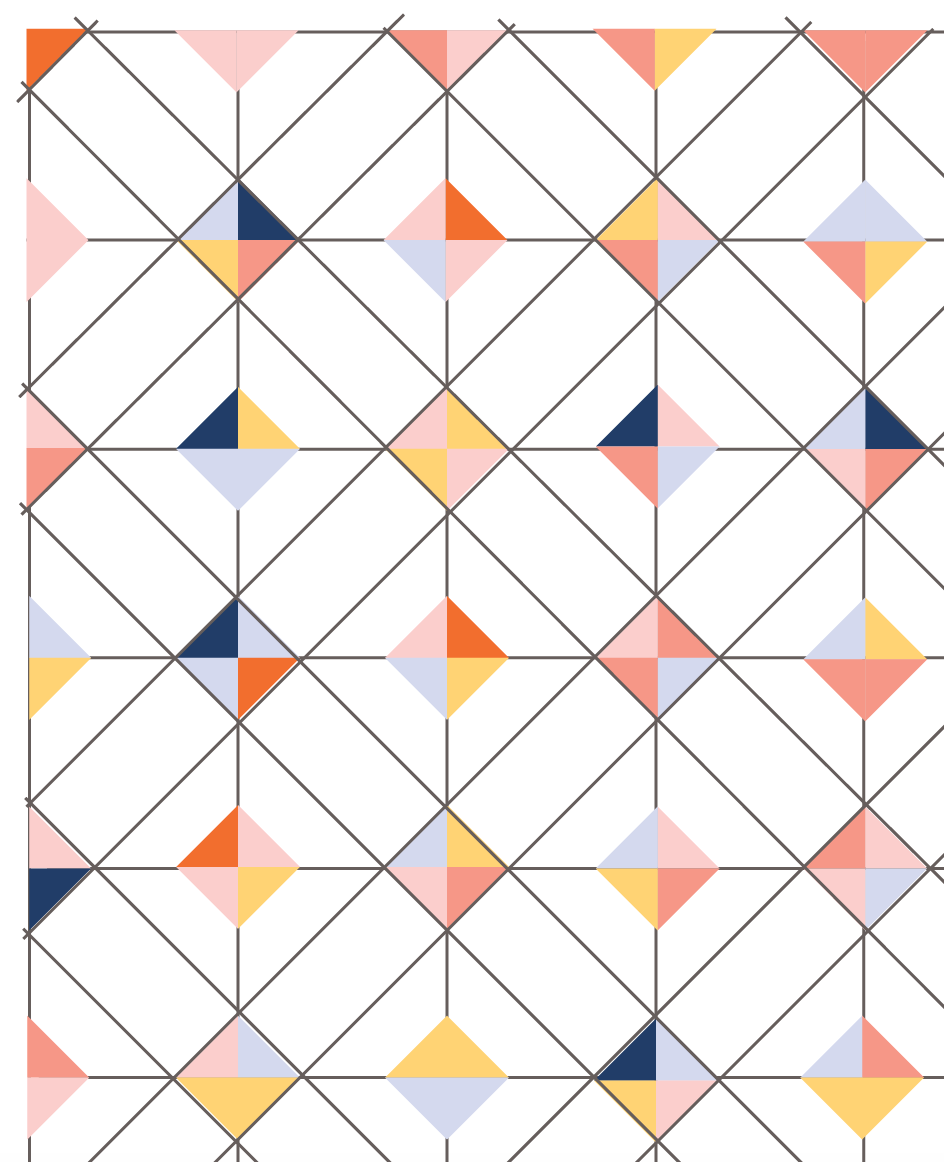
Using a long ruler and starting in one corner, use your preferred fabric-marking tool (I used my Hera Marker) to mark a line along the seam of the corner Small Triangle, shown above in bold.
Baste
Make a quilt sandwich and pin-baste the Backing, batting and Quilt Top together. For instructions on how to do all this, please check out our Pin-Basting Tutorial!
Quilt
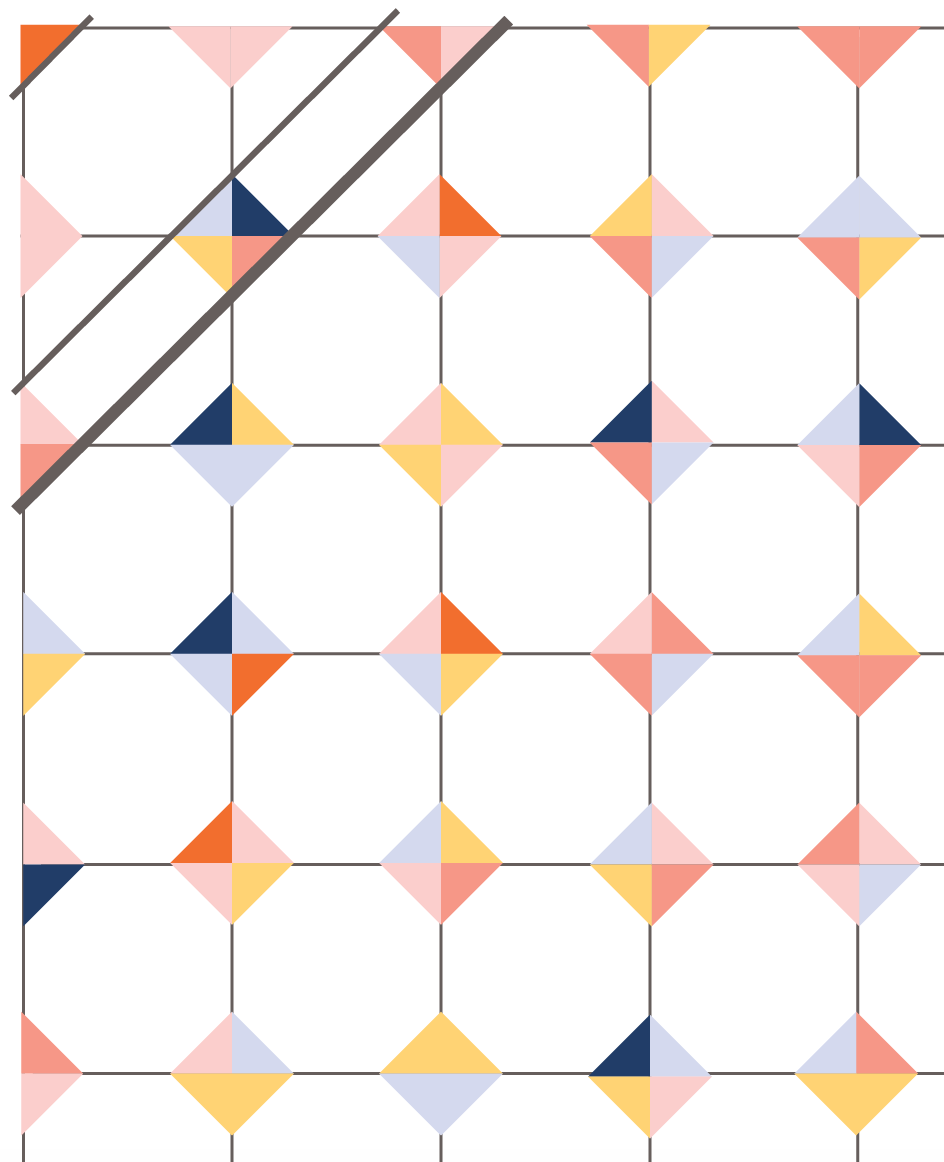
Now it’s time to quilt all the pieces together along the marked lines, first sewing all the lines slanting in one direction and then the lines slanting in the other direction..
Using your machine’s walking foot, start with a line that runs through the center of the Quilt (or close to it), sew along this line from one edge of the fabric to the other (you do not need to backstitch at the beginning and end).
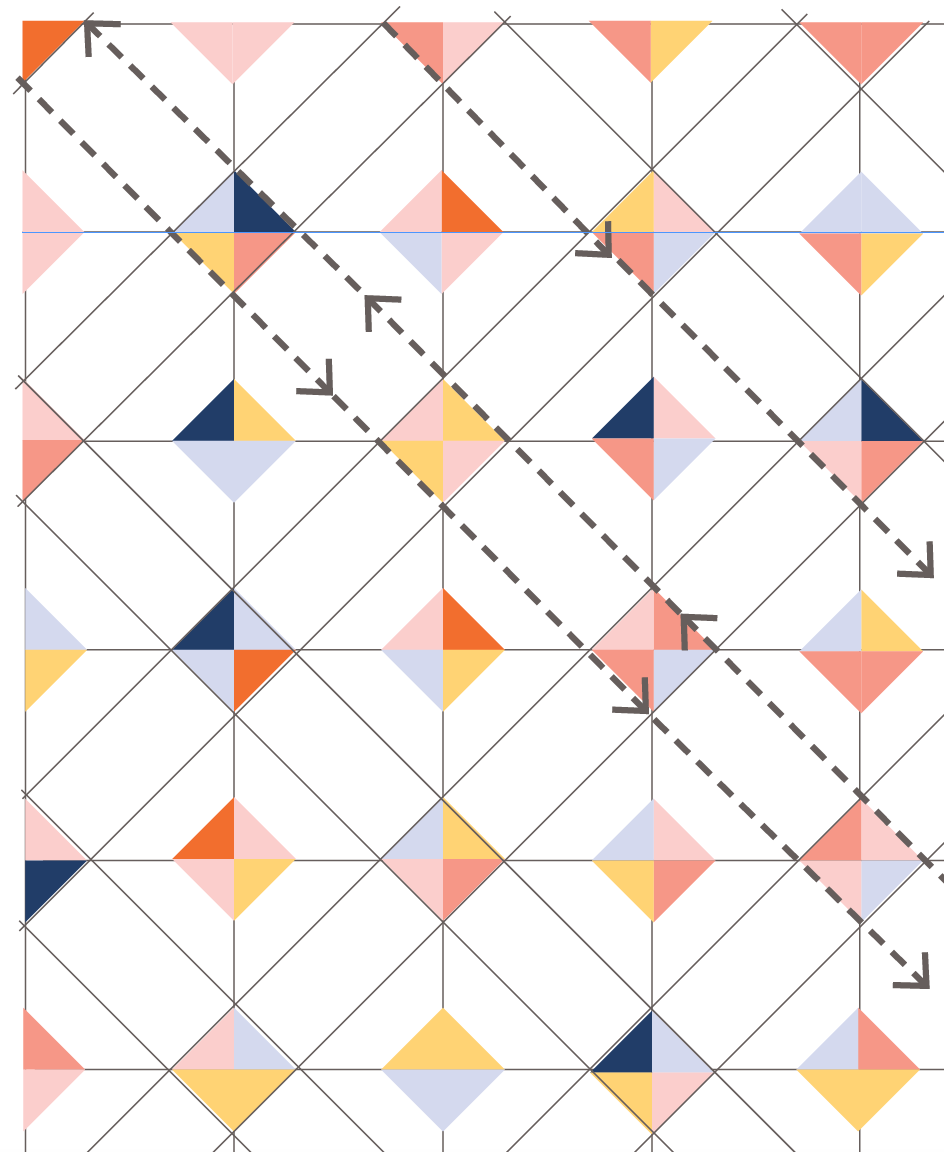
Continue to sew along the remaining parallel lines in this same manner: When you have finished sewing one line, rotate the Quilt and sew along the line next to it.
Sew all of the parallel lines on one side of the center line and then sew all of the lines on the other side of the center line in the same manner.
Next, quilt all of the diagonal lines slanting in the other direction in the same way: Start sewing with the center line and alternate directions as you sew along all the parallel lines running to the right and then to the left of this center line.
Trim the batting and Backing along all four sides so that they align with the Quilt Top.
Bind
Use the binding strips you cut from Fabric F to bind the Quilt with double fold binding. For instructions on how to do this, please check out our Making Double Fold Binding and Sewing on Double Fold Binding tutorials!
Similar Posts You Might Enjoy:
Original article and pictures take www.purlsoho.com site
Комментариев нет:
Отправить комментарий