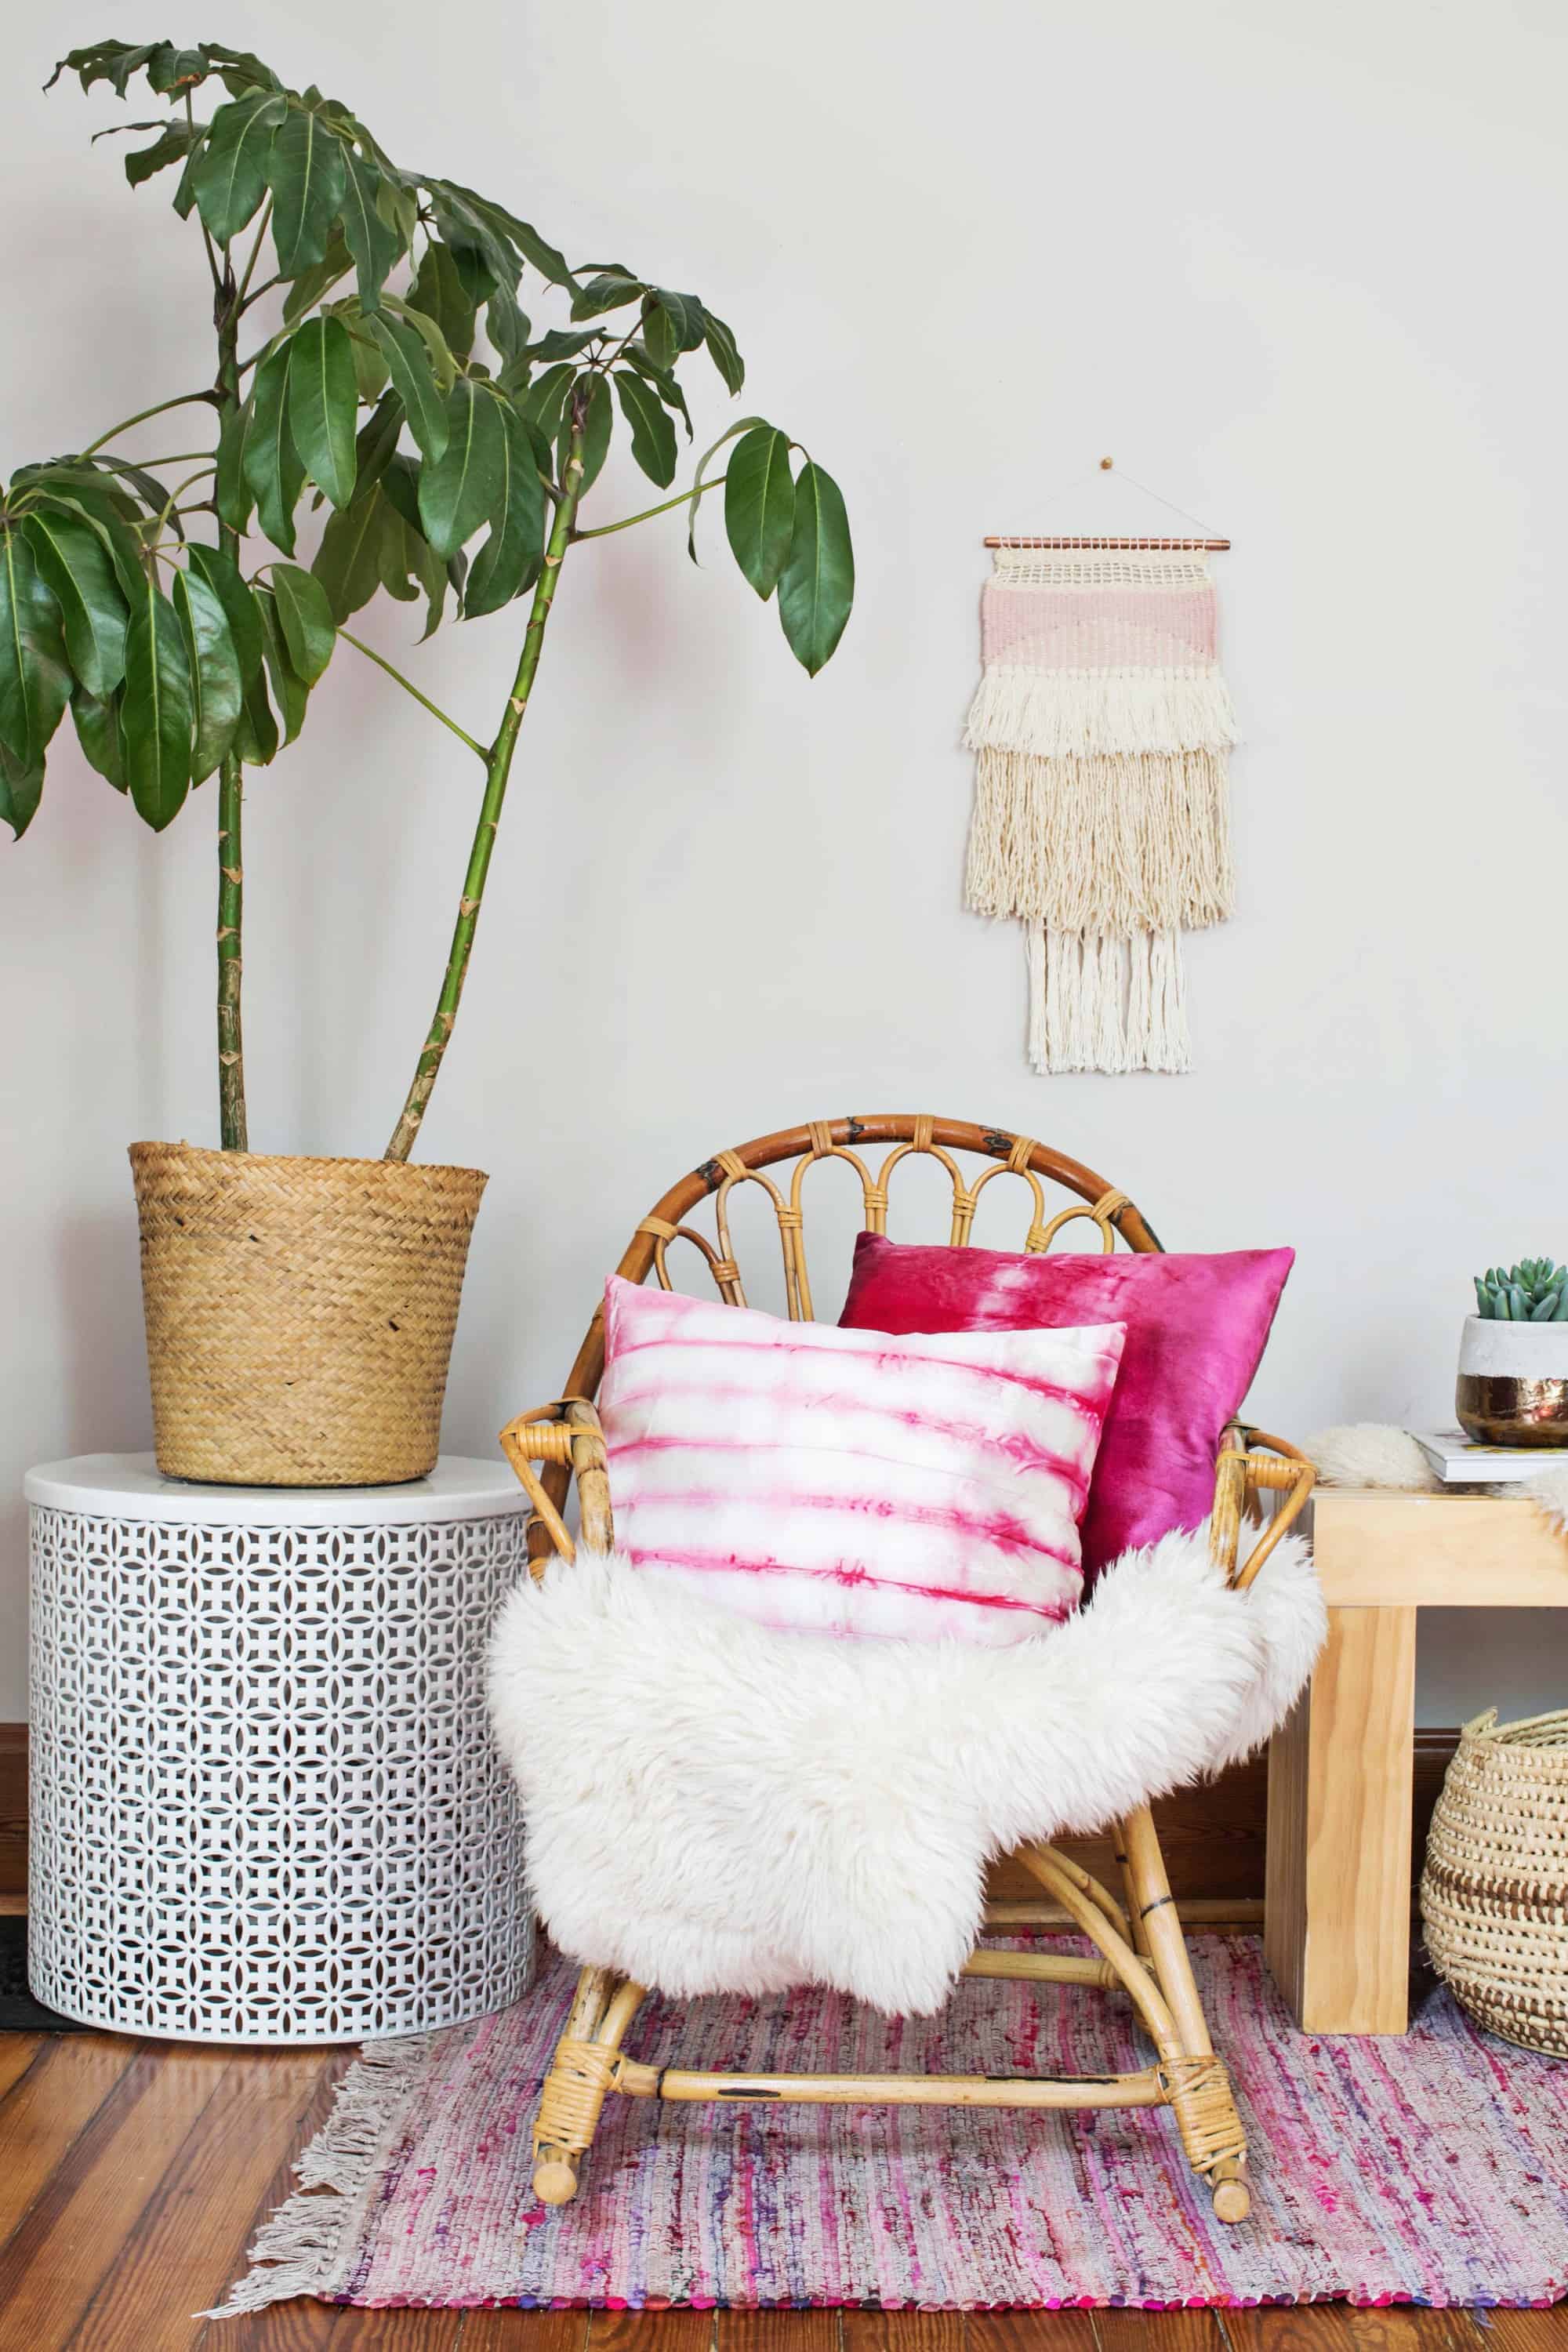
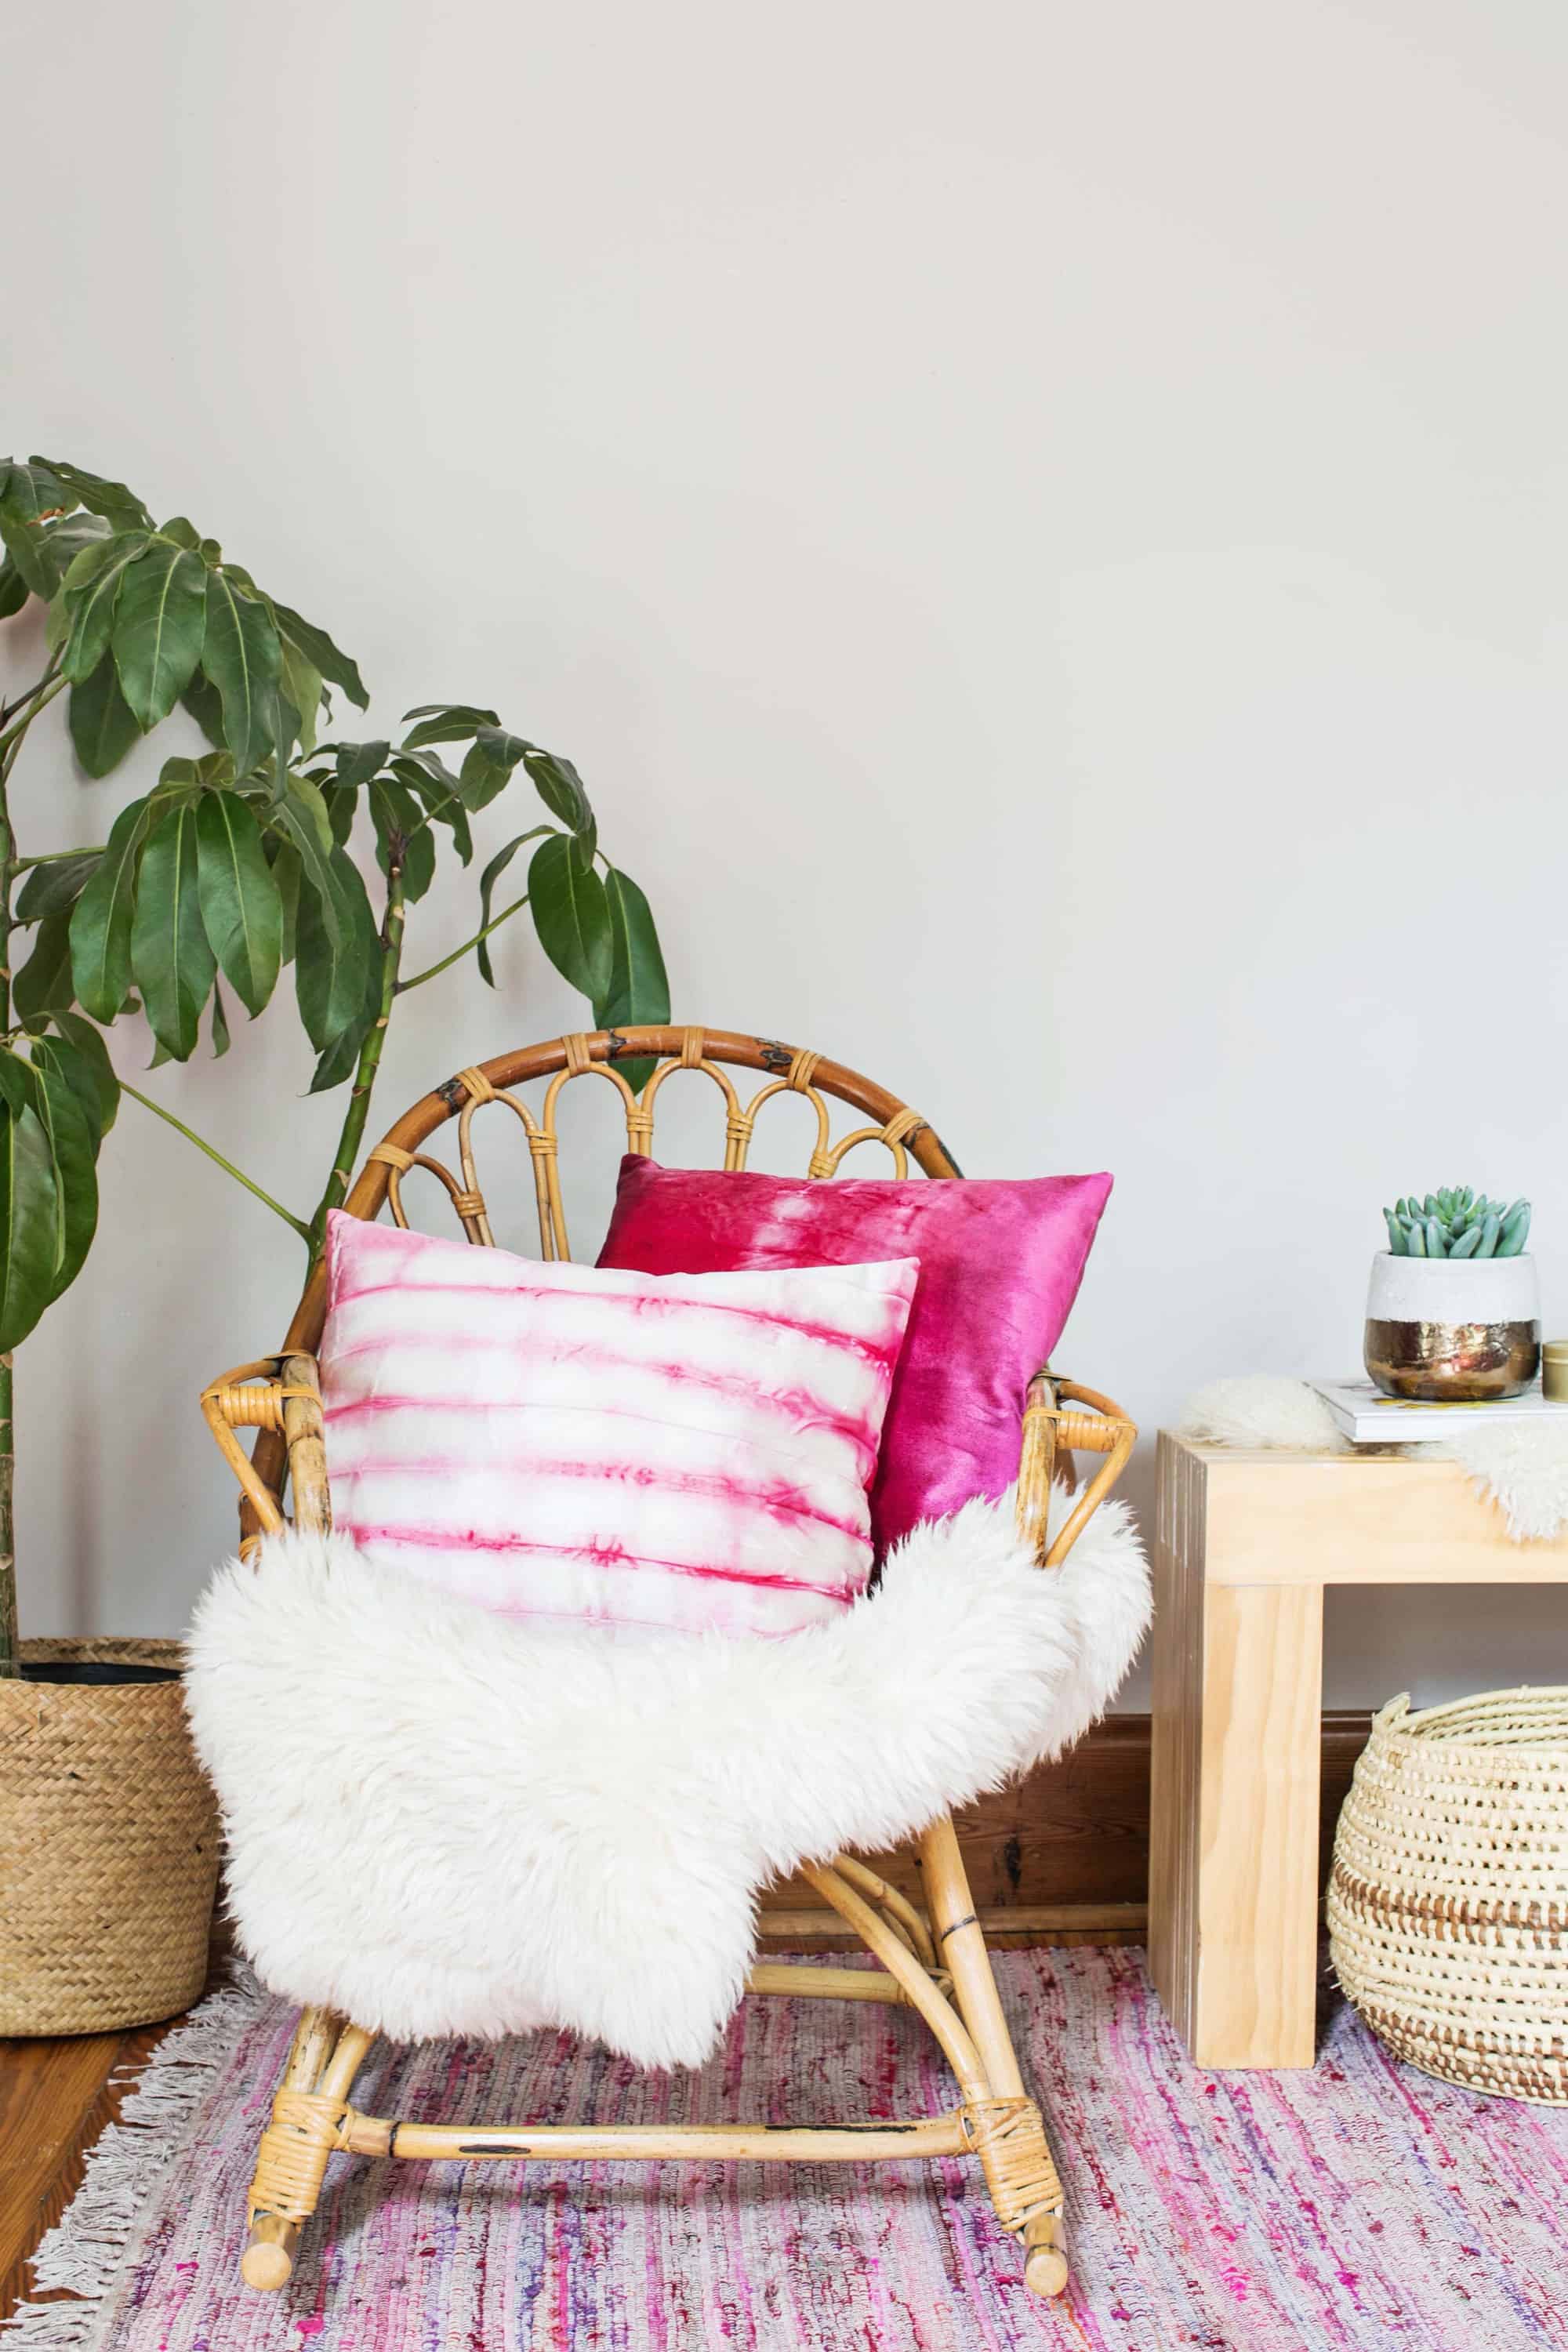
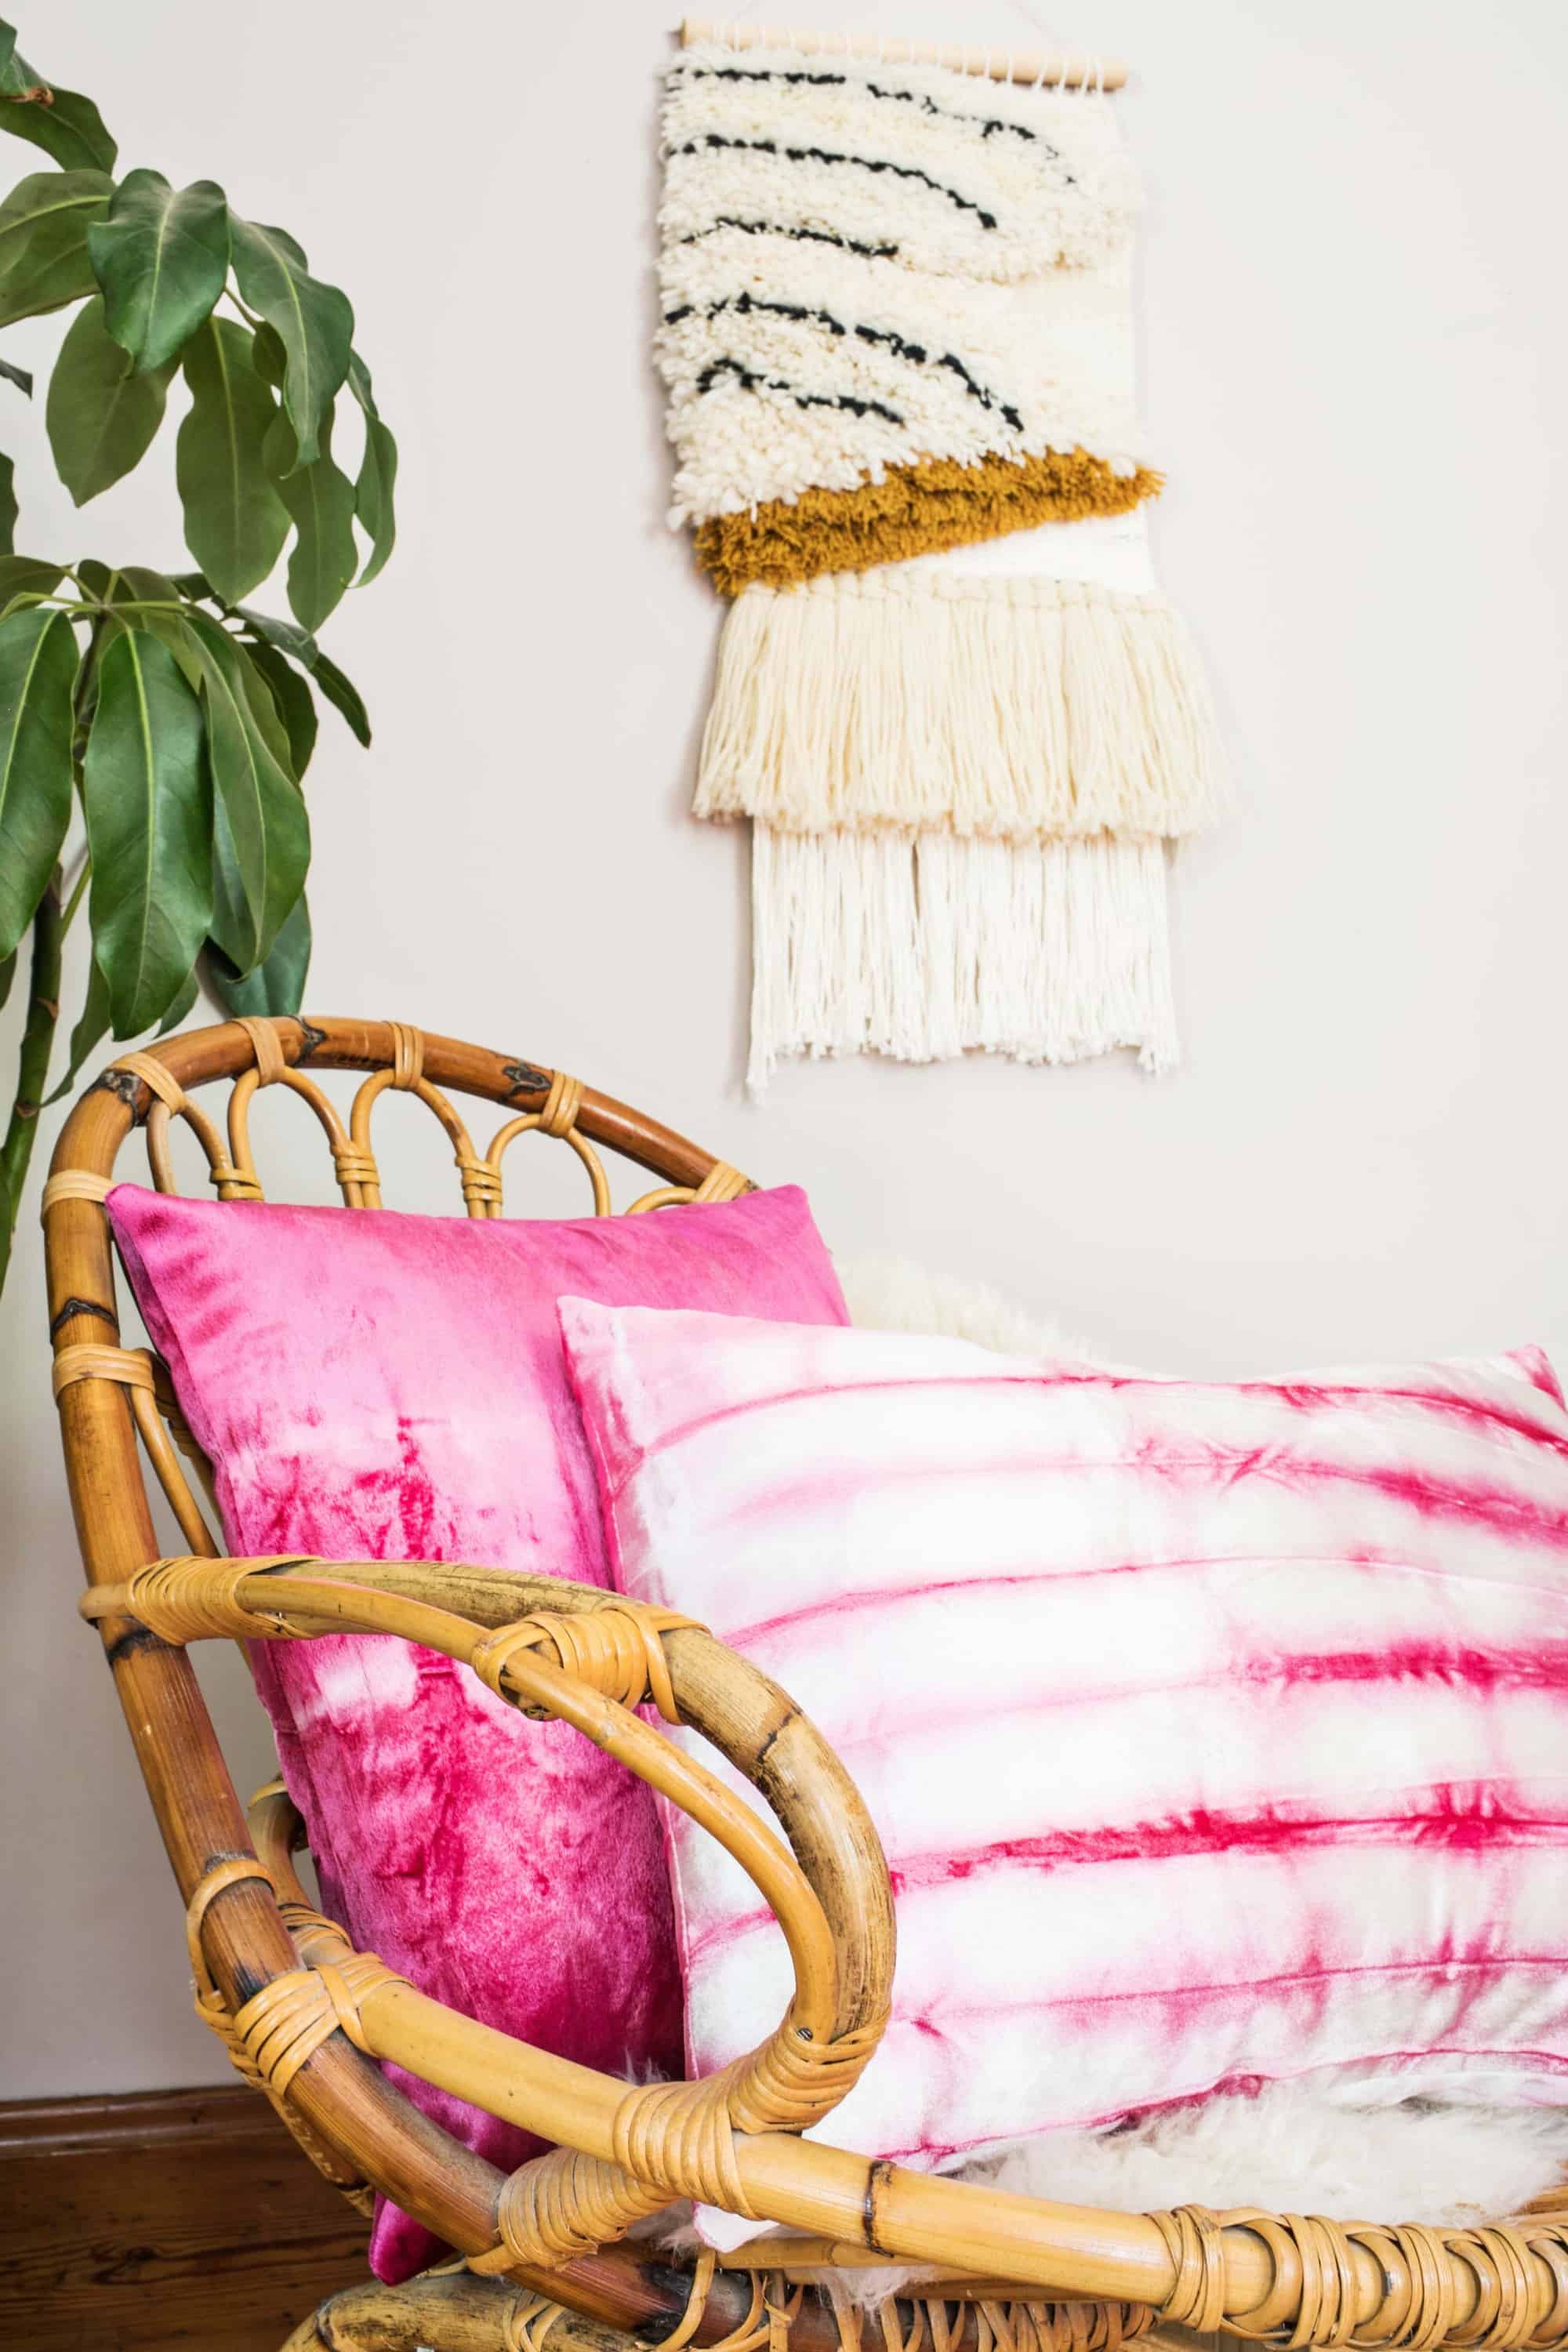
I, Rachel, recently had to toss my favorite pink vintage velvet pillow after it had a run-in with a permanent marker. It was a sad, sad day until I realized I could recreate something very similar! While I’m much more a fan of natural dyes these days, I was having a hard time tracking down velvet fabric that didn’t have a polyester blend to it. I finally decided to try dyeing my velvet/poly blend fabric with synthetic dye made for use on synthetic fibers. I cut enough fabric for two pillows to test out different Shibori folds and fell in love with the results. This velvet pillow DIY is perfect for ushering in a fall refresh in your favorite room!
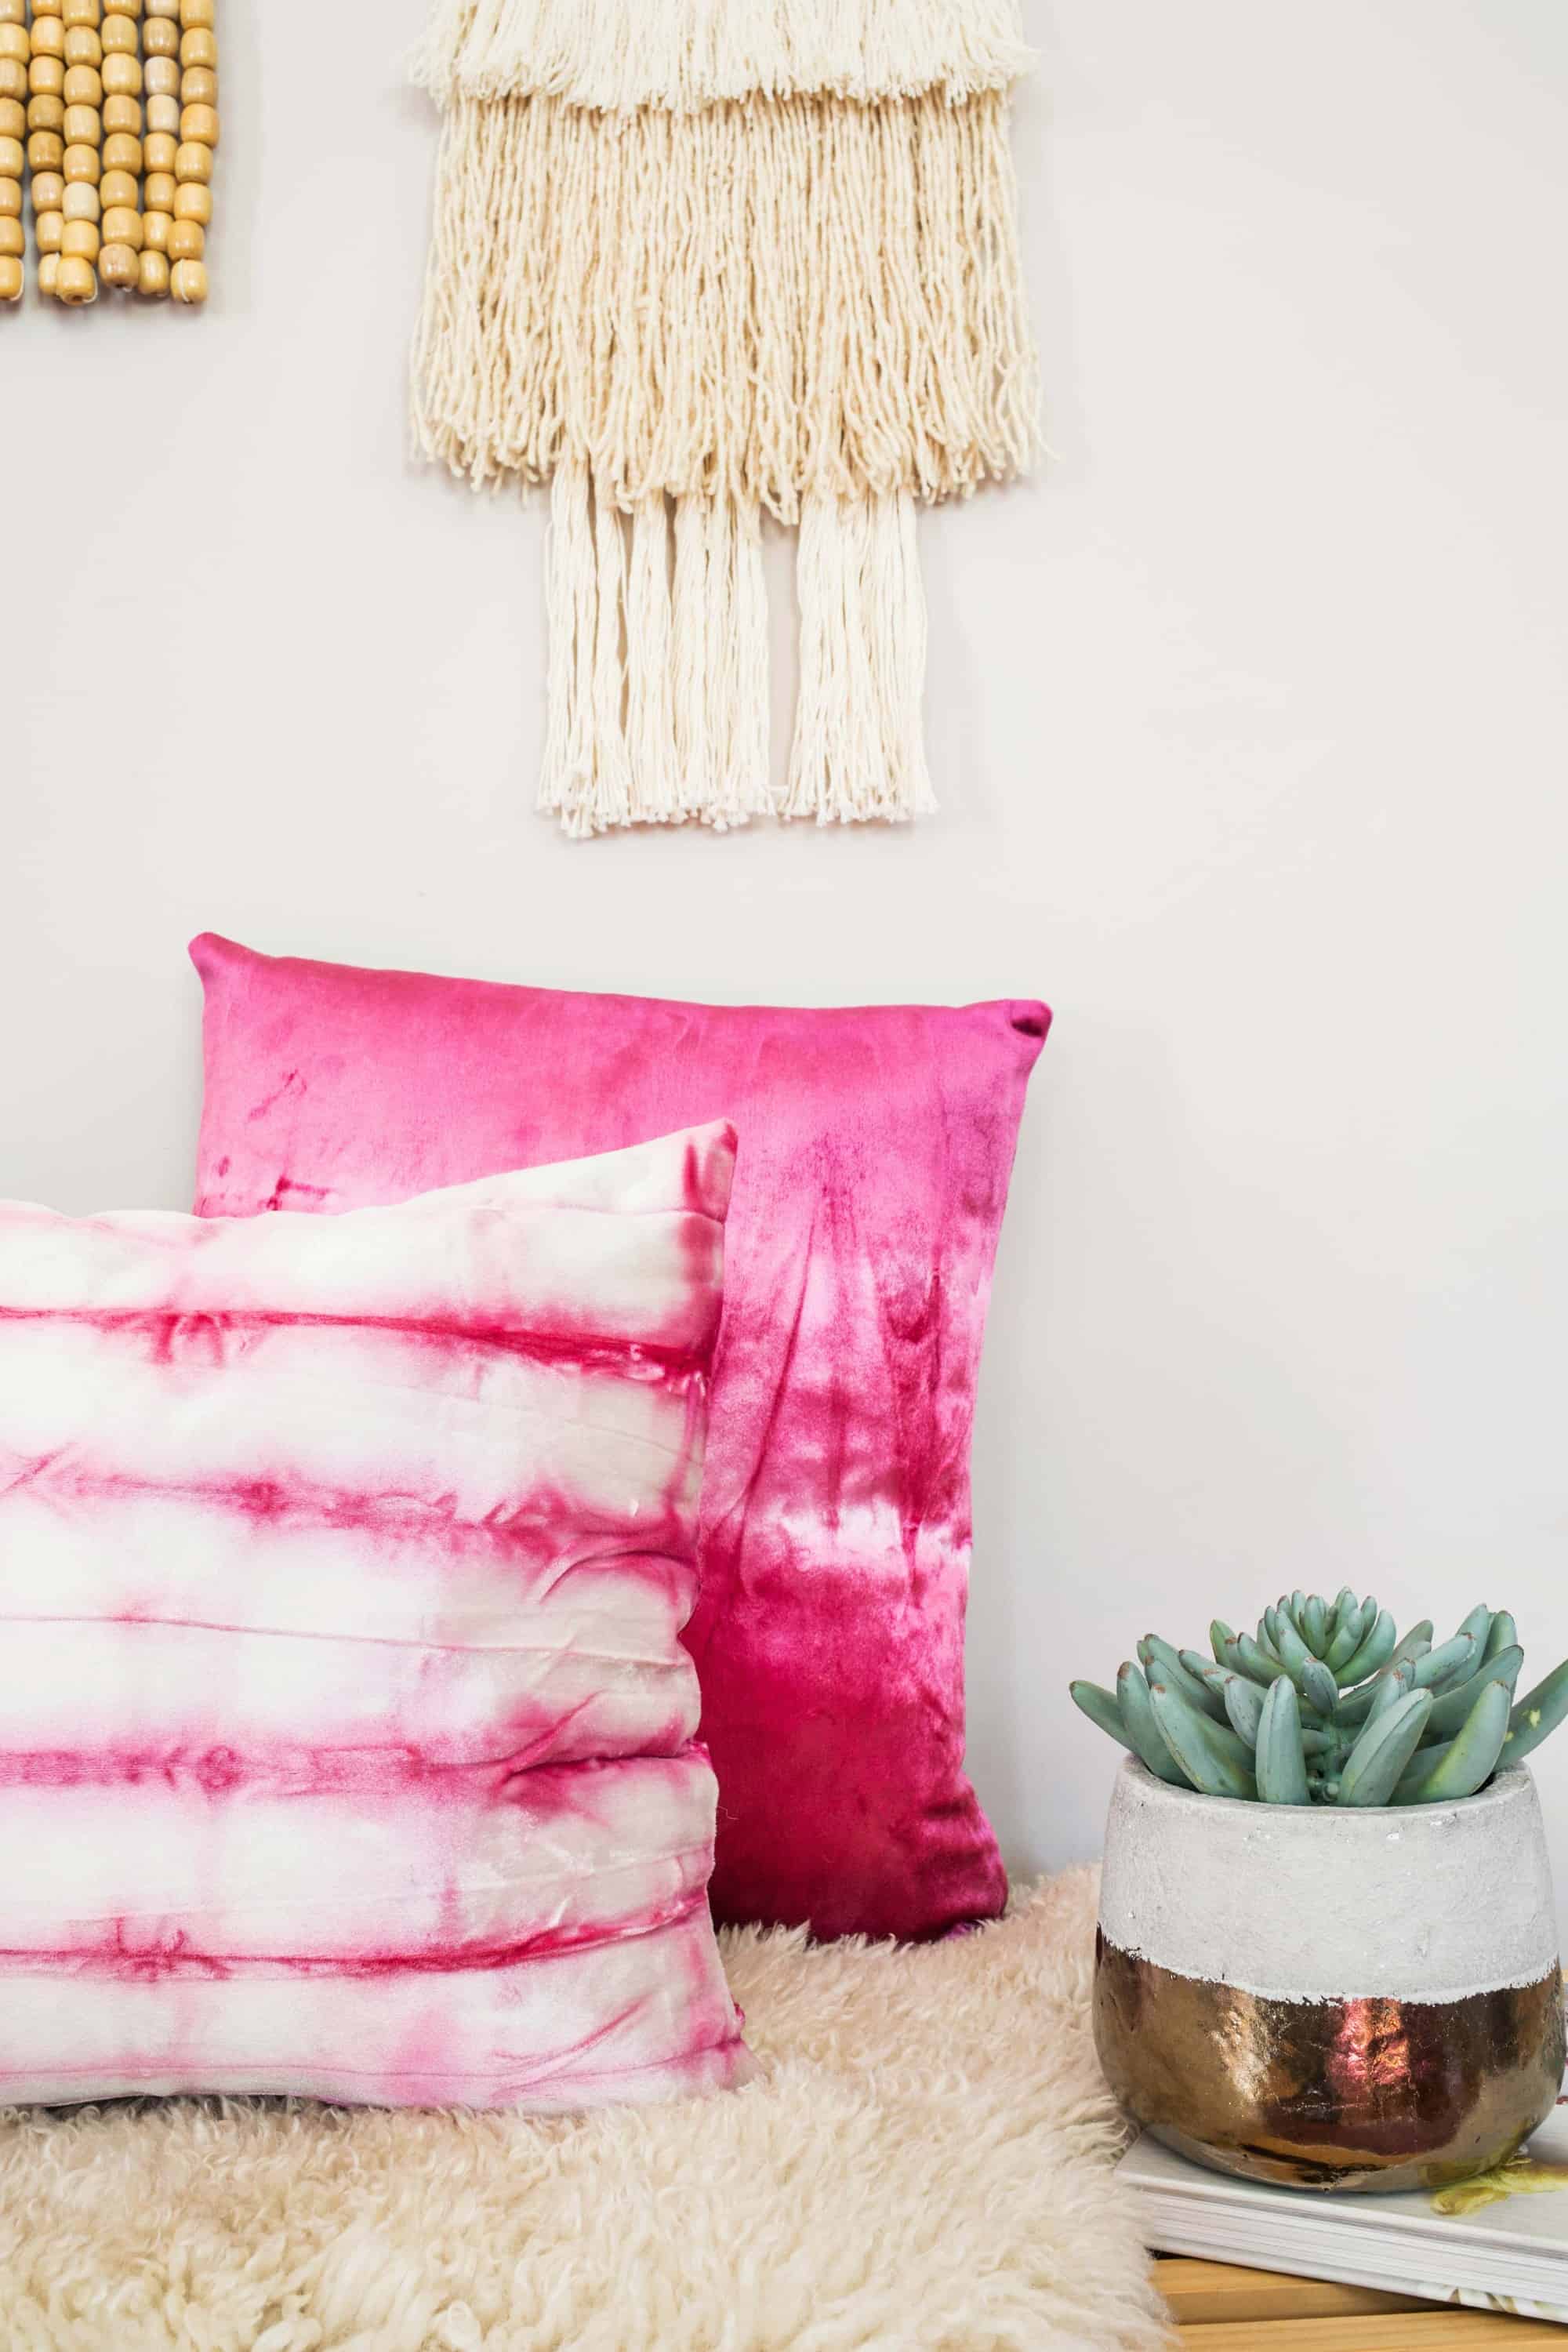
Synthetic dyes come in a variety of colors, but you can also experiment with small swatches of fabric until you’ve blended the perfect shade using two different colors. I dyed both pillows using the pink color straight from the bottle and then added 2 TB of the purple color to the dye pot before dipping the end of one of my pillows in it. The ombre effect added a little more depth to it than if I’d just left the entire pillow pink. It’s just one more way you can customize your space to reflect your unique style. In my case, it’s another layer of pink!
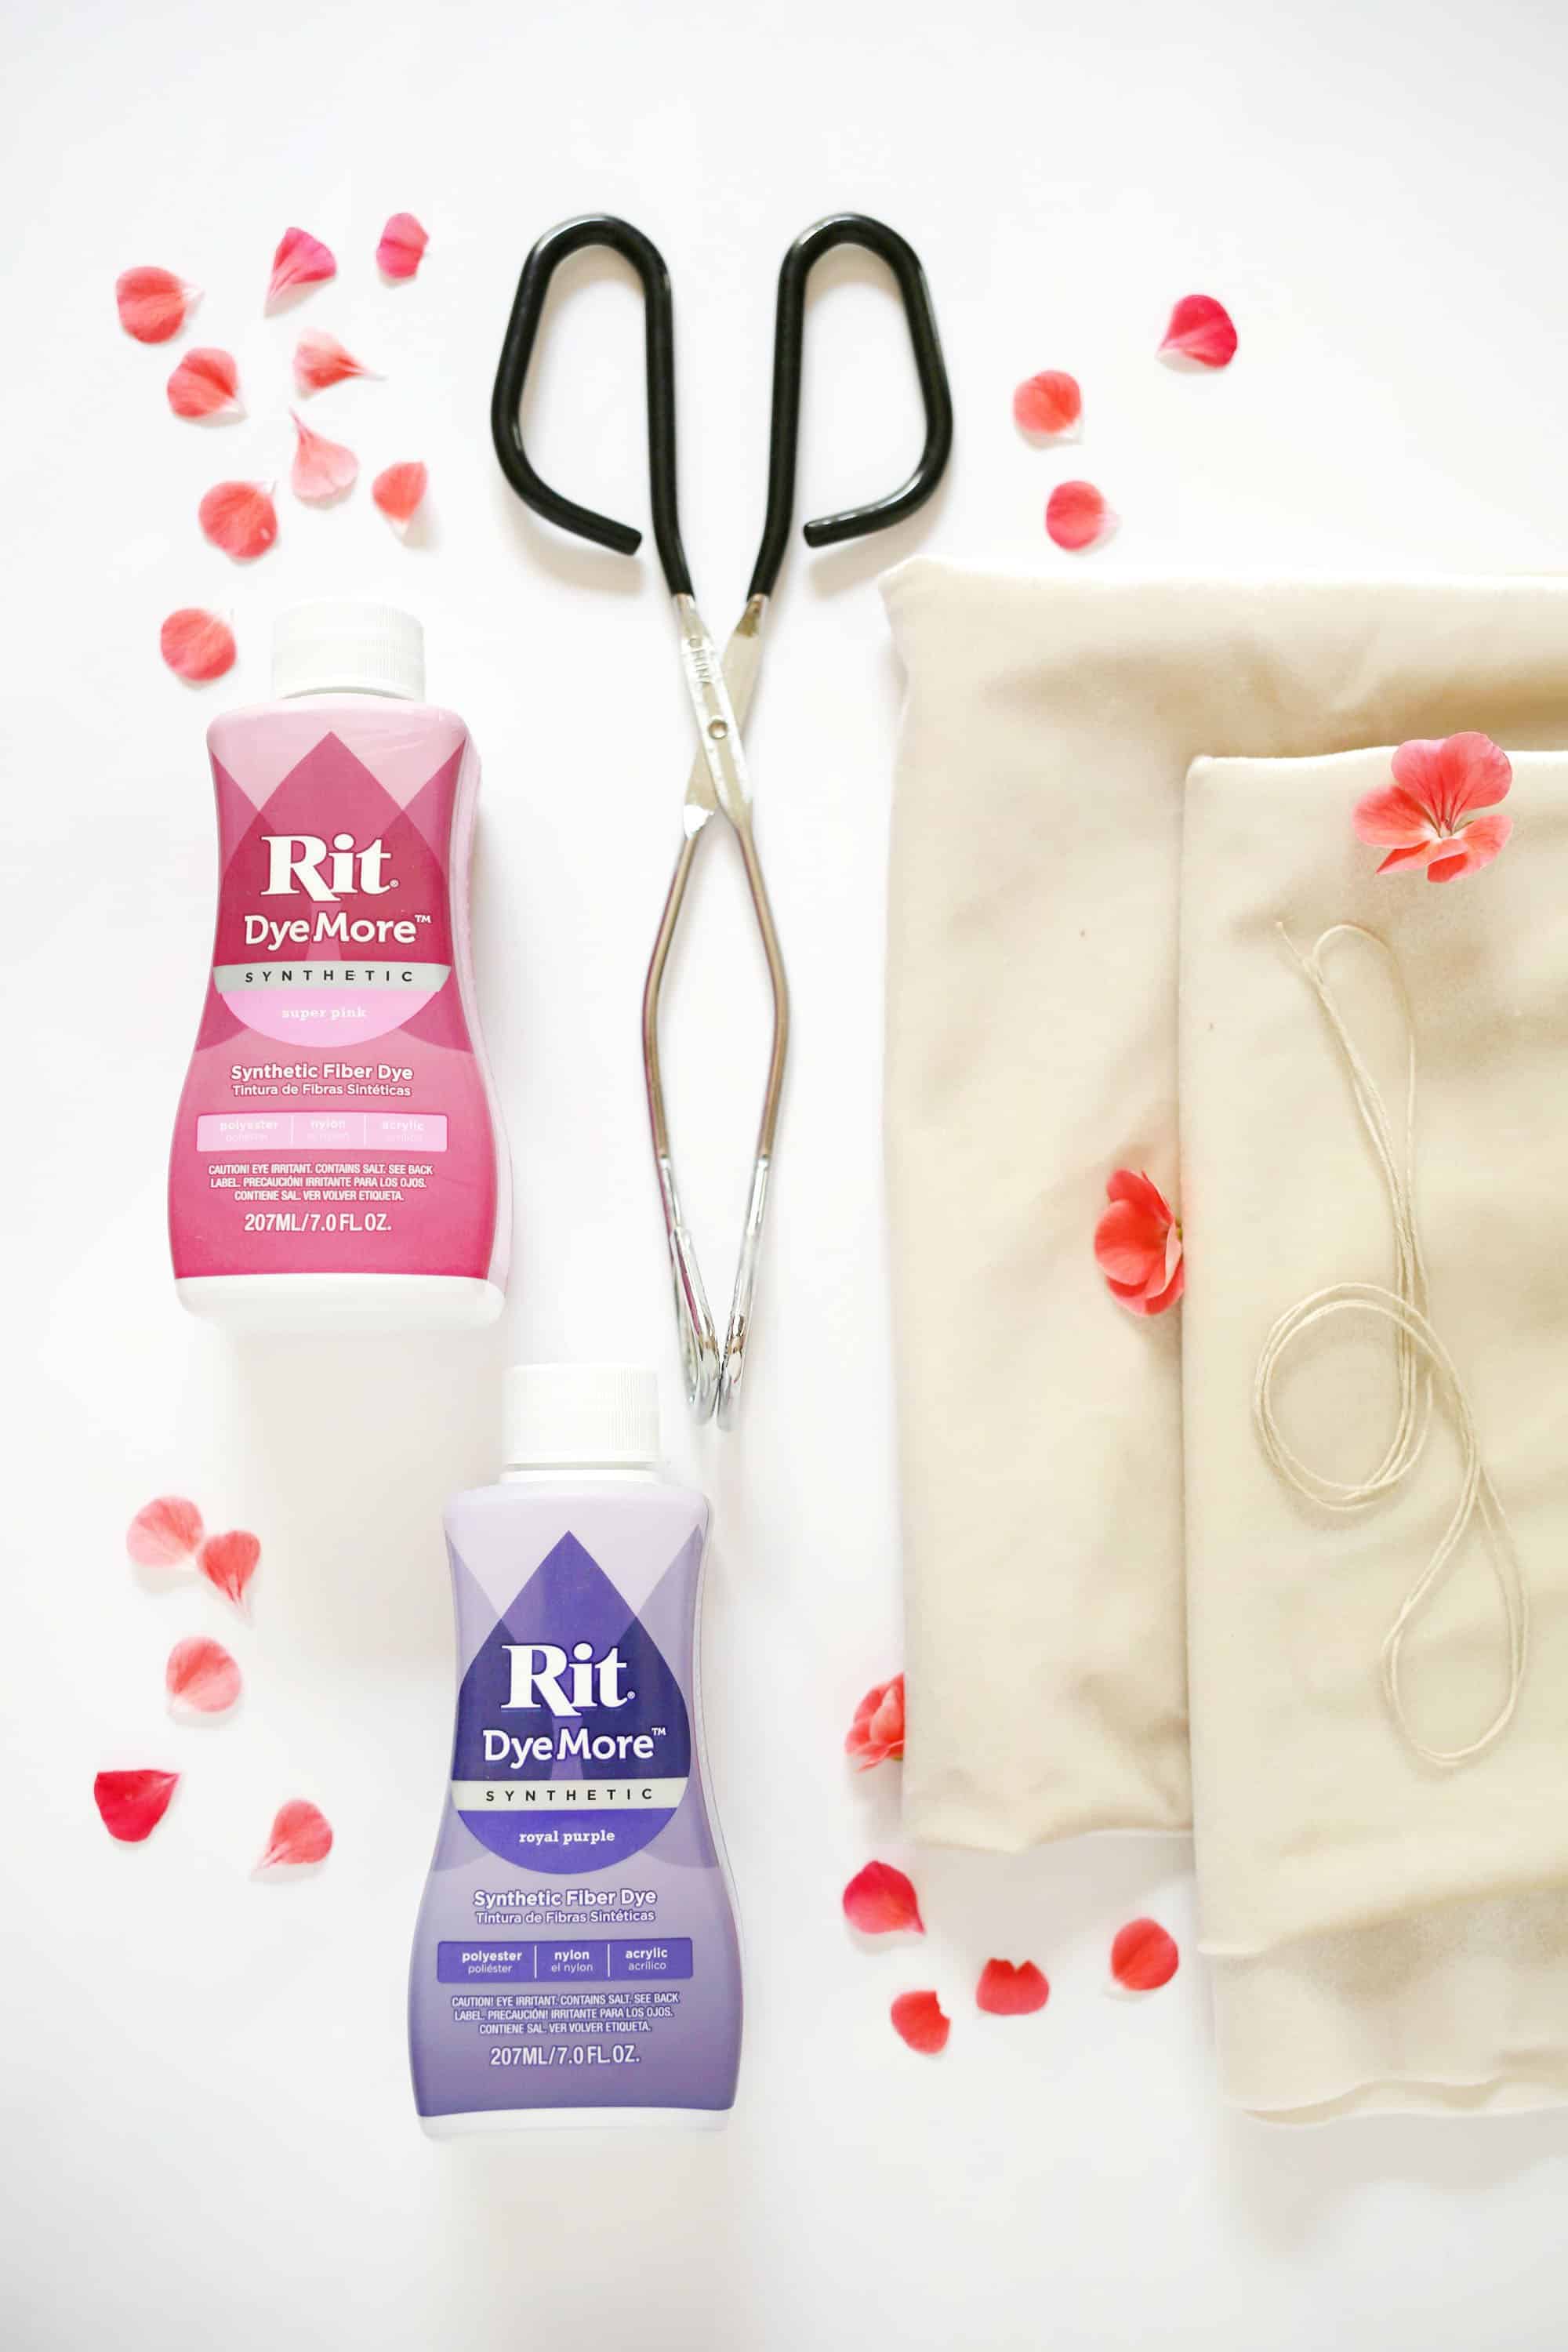
Supplies:
-one 7 oz. bottle of Rit DyeMore Synthetic in preferred color. Use two different colors if you want to color blend.
-stainless steel pot
-tongs or long stirring spoon
-plastic bag
-rubber bands
-sewing machine
-straight pins
-stuffing
-needle and thread
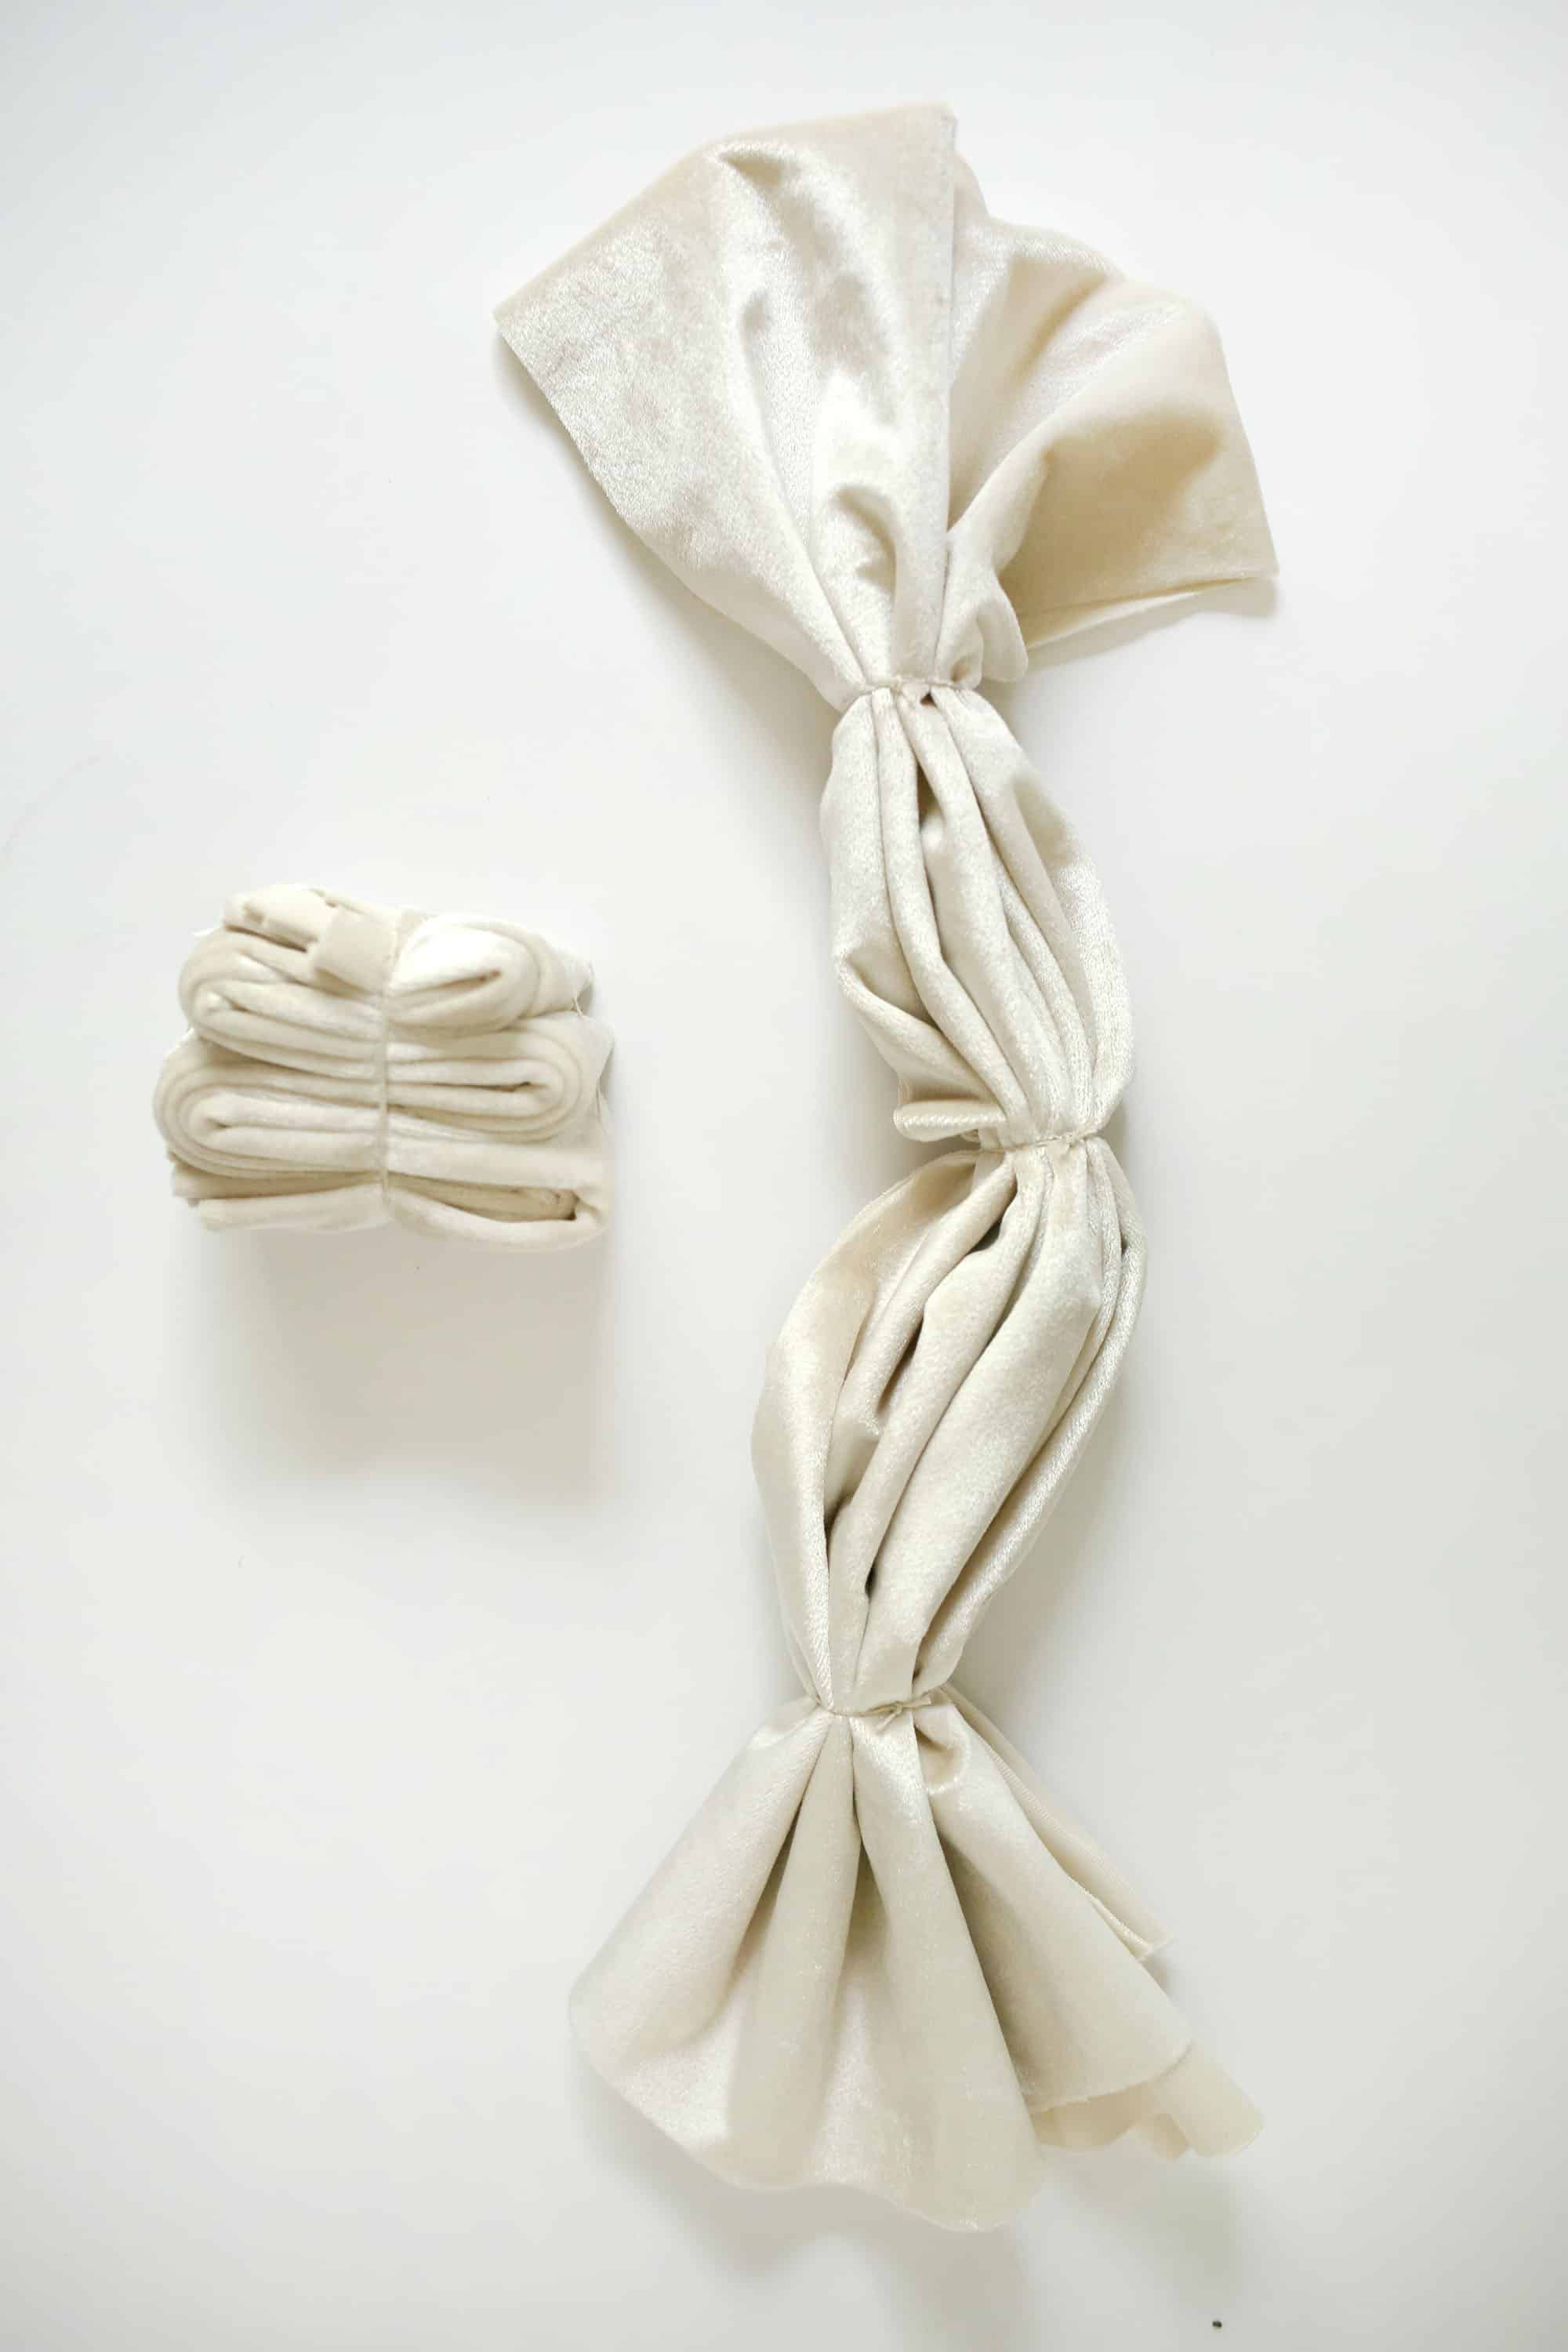
Cut your fabric to measure twice as wide as you want your pillow to be and then add 1″ to the height. My 14″ square pillow was cut to measure 28″ wide and 15″ high. Dyeing this specific cut of fabric will give you a mostly consistent dye job from the front to the back for a nicer looking pillow. Then decide how you want to fold your fabric.
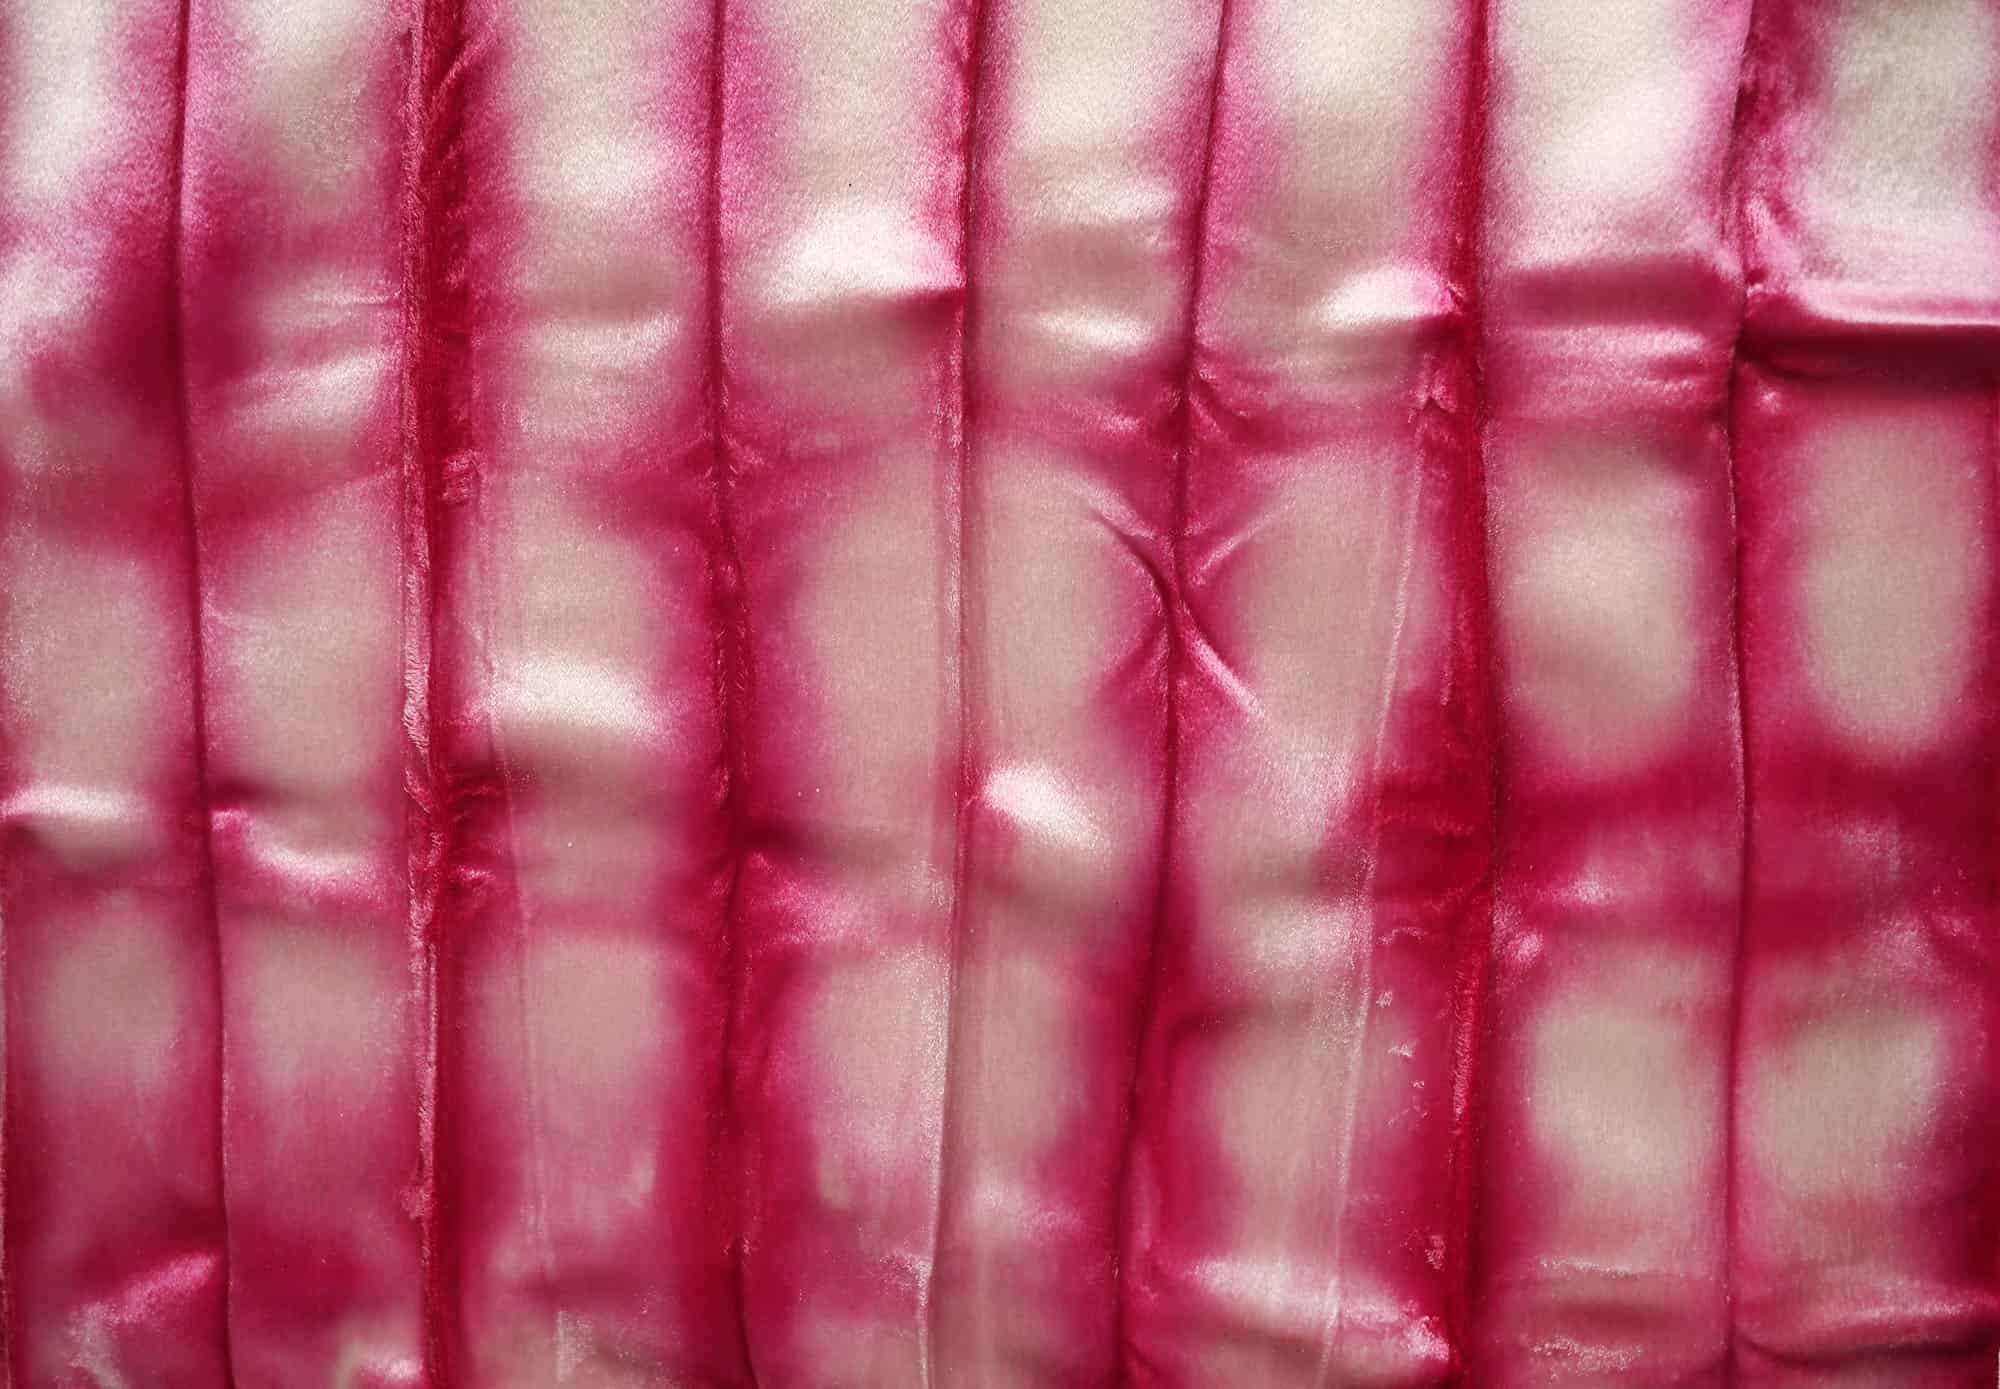
I folded one pillow in an accordian fold and then folded it into thirds. The other pillow got a more loose accordian fold that was then bound with rubber bands to break the space into thirds.

Soak your bound fabric in room temperature water for 30 minutes to help open up the fiber and make it more absorbent. This tinted pink bowl is just full of water, but I realize it looks like it’s got dye in it.
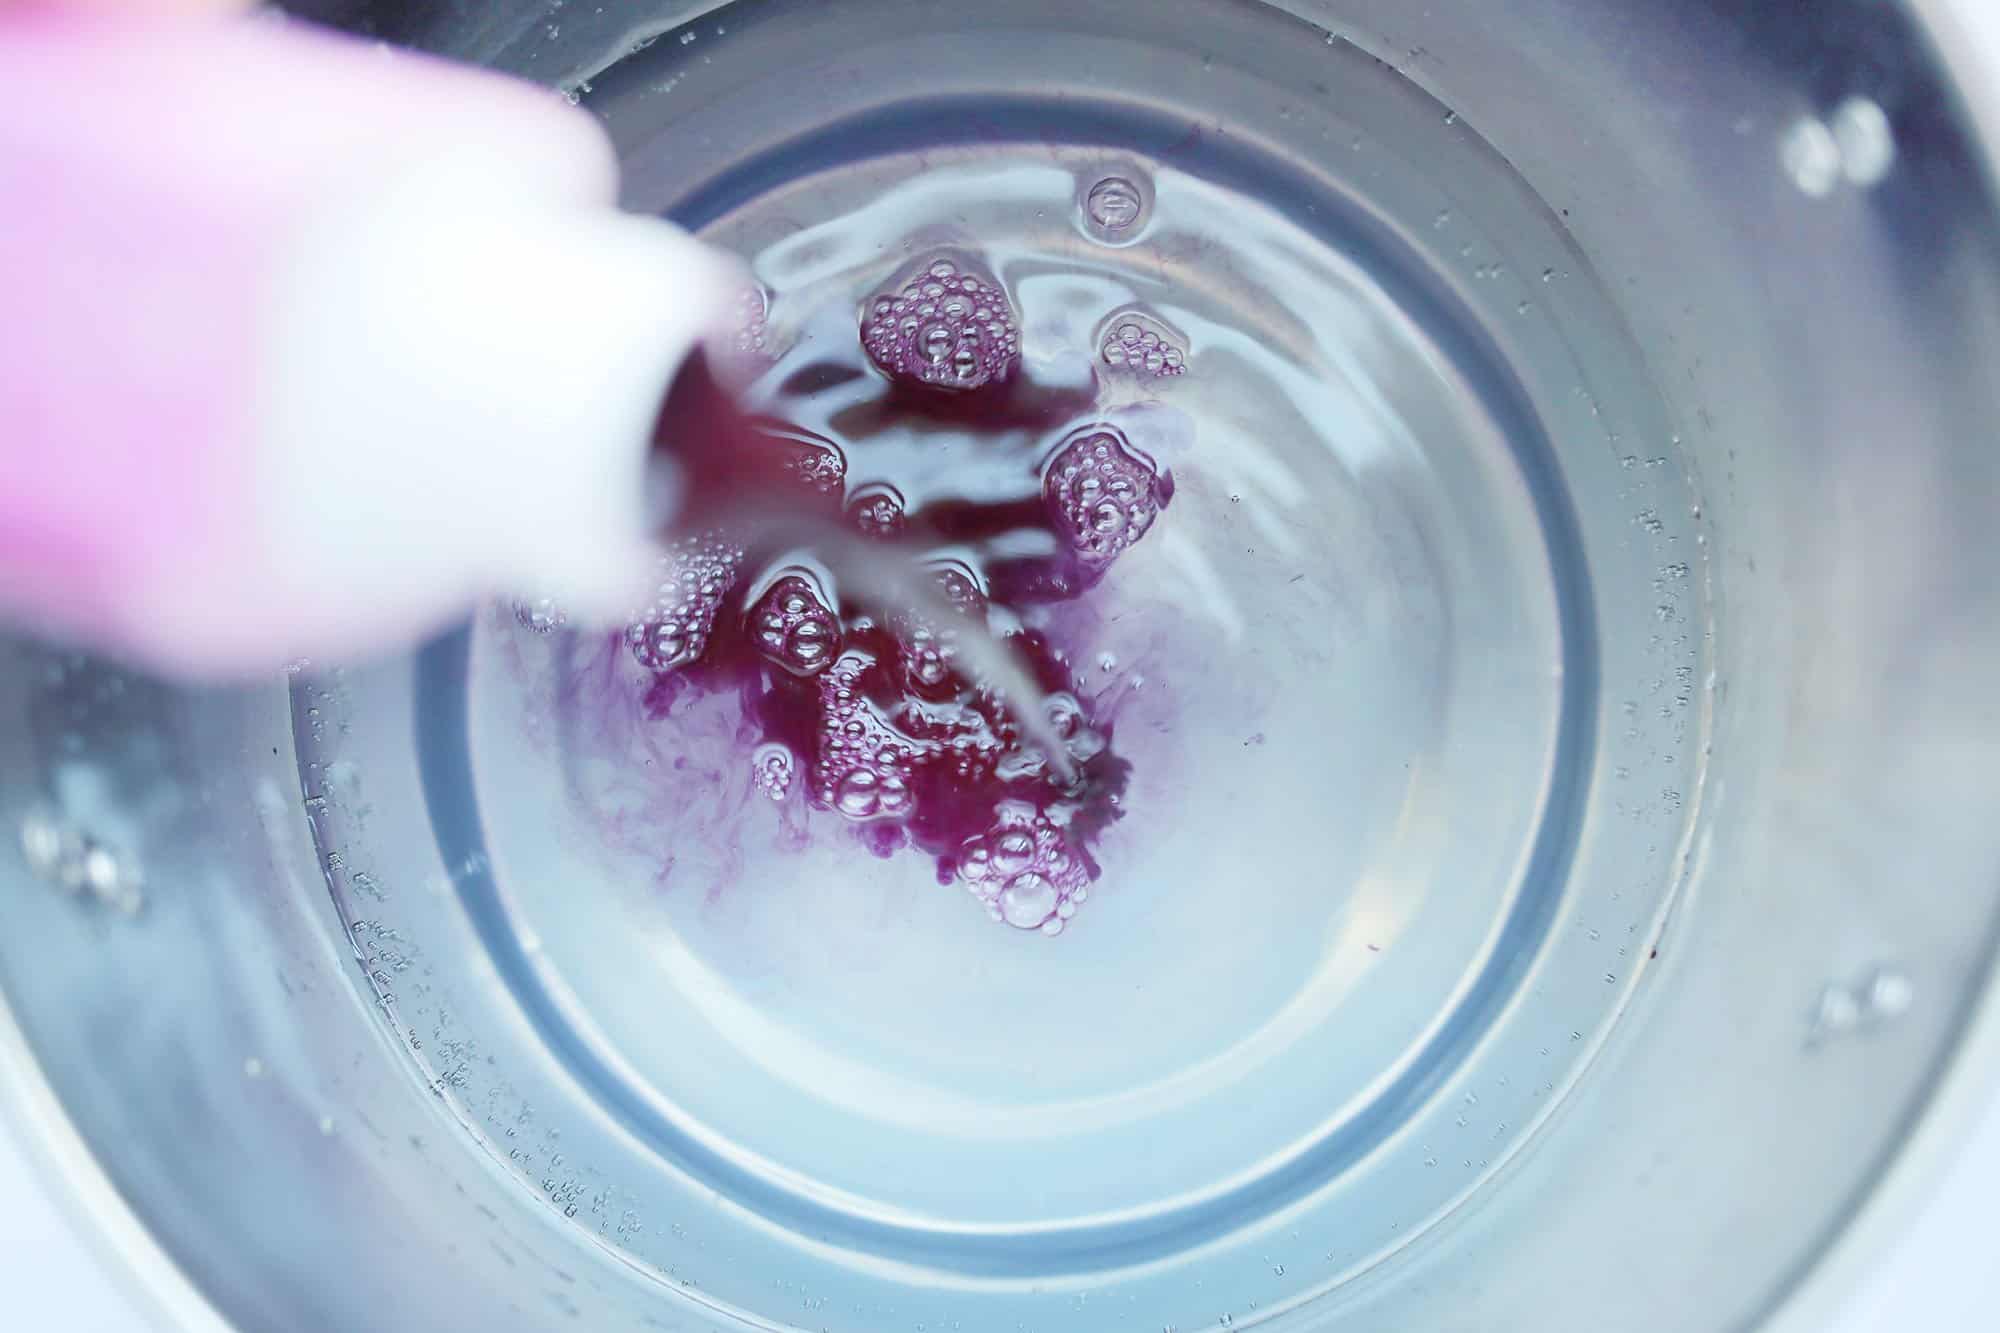
Fill a stainless steel pot with enough warm water that your fabric can move around freely. Turn your stove to medium-low heat and cover your pot. Once your water is at a simmer, meaning it’s got tiny bubbles forming on the bottom of the pot and steam is coming off of the water, add your synthetic dye. Stir well. The less dye used, the lighter the color. If you really want to sample shades, buy extra fabric and cut small swatches to make sure you’re getting the color you want. Otherwise just go for it. I used the whole bottle of pink.
Add your wet fabric and stir gently to keep things moving enough so that it’s dyed evenly on all sides. Keep stirring for 30 minutes and then stir every 5 minutes for another 30 minutes. You can do it!!! It’ll be worth it!!!
Note: If you’re interested in dyeing with a second color that will be added to your first color, remove all of your fabric and set it on your plastic bag to cool. Add your second dye to the dye pot and stir. Then place the part of your fabric you want dyed in the pot or lay it over the edge of the pot (but keep the other edge away from the burner). Allow it to sit in the dye as you stir for another 15-20 minutes.
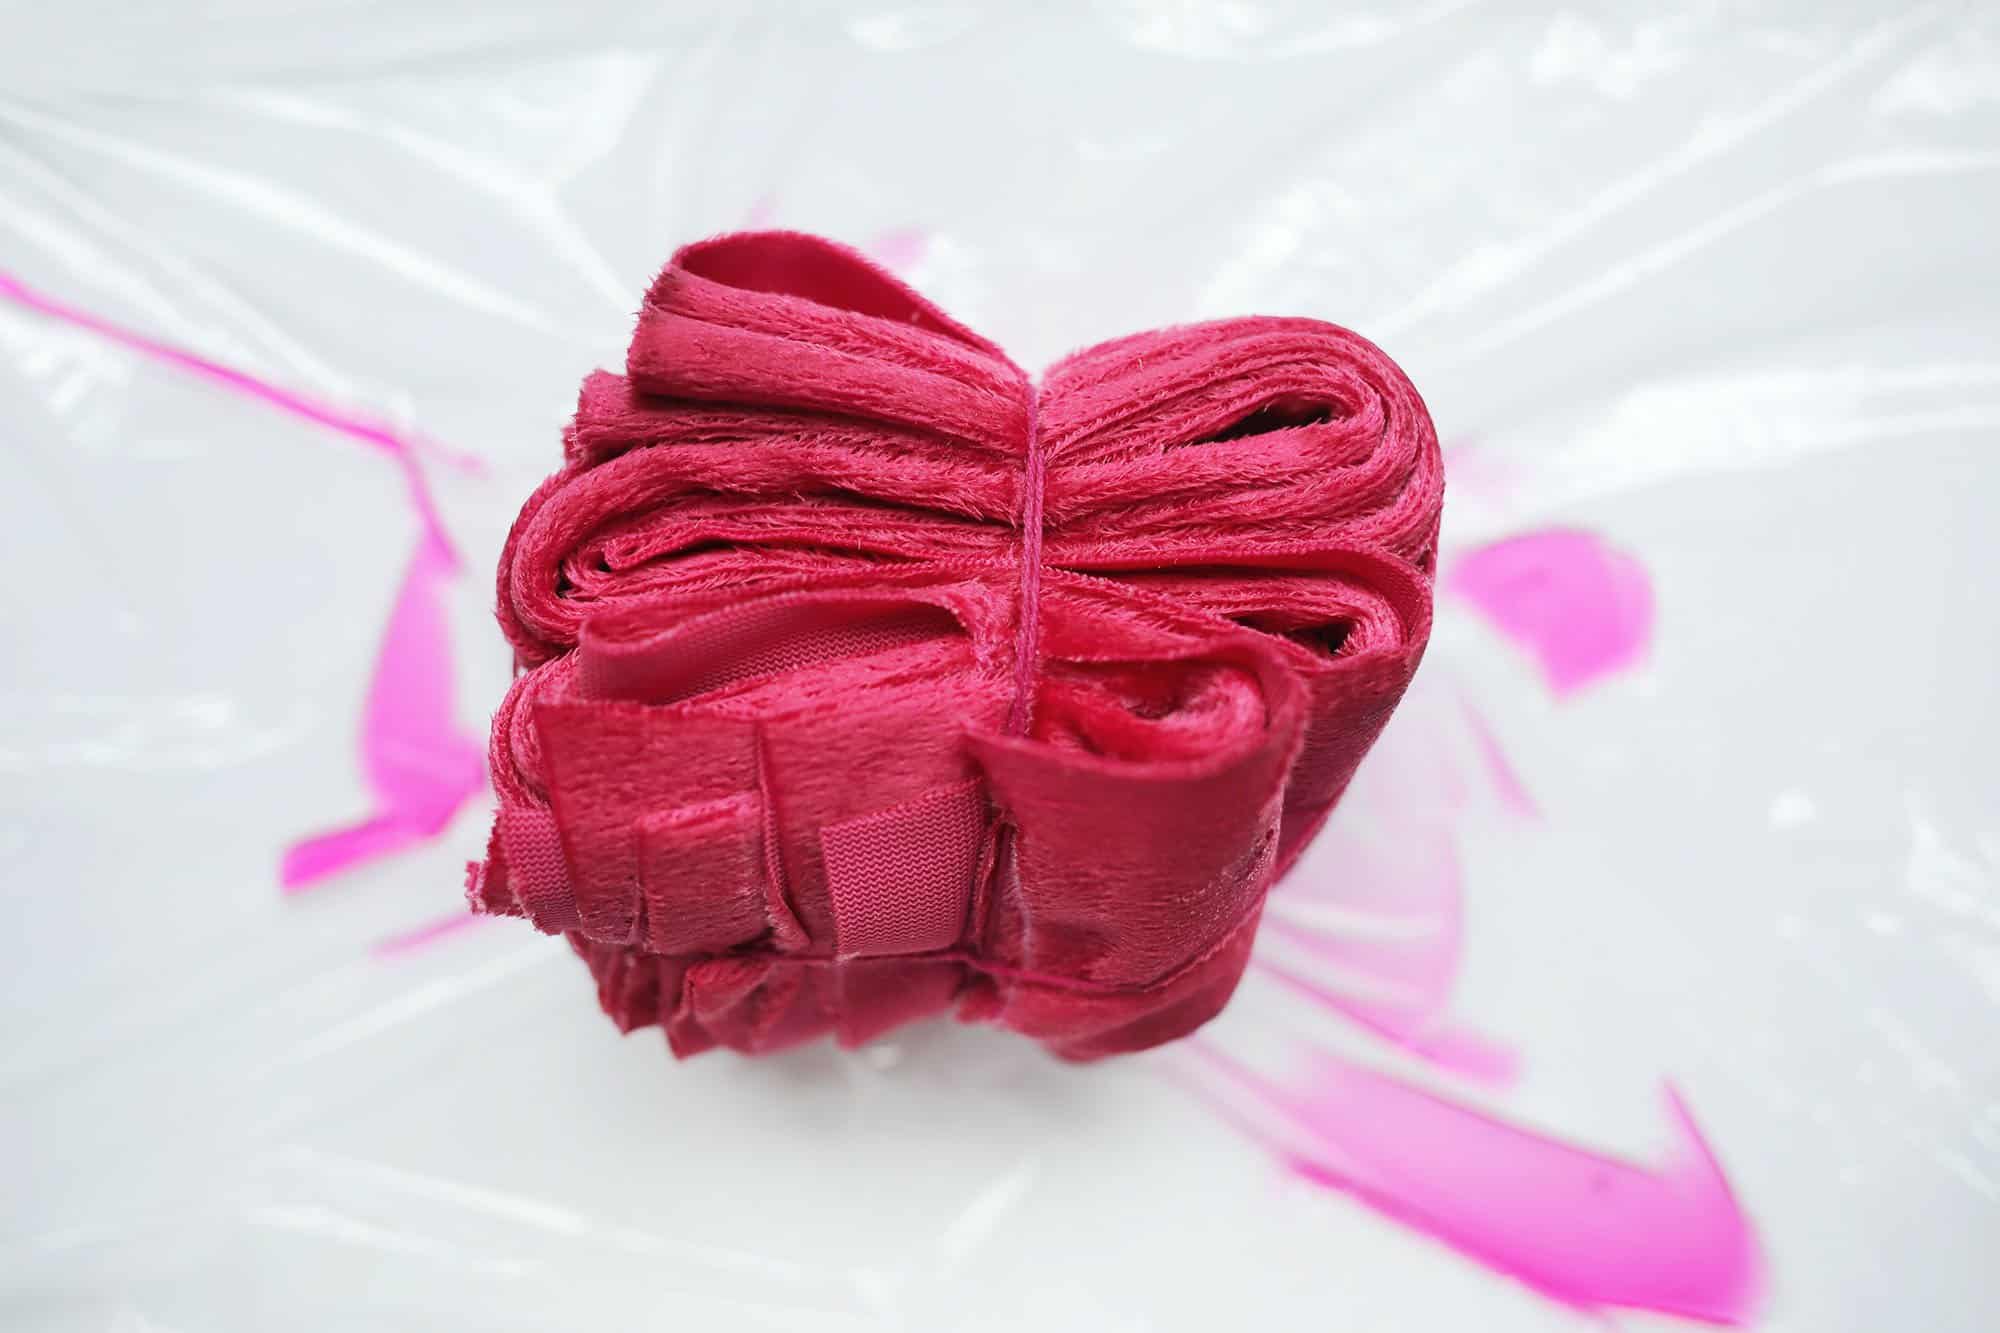
Pull your wet bundles from the pot and place on your plastic bag so it doesn’t drip on your work surface. Let it cool off. Unbind it and then rinse under cool water until the water runs clear and hang to dry.

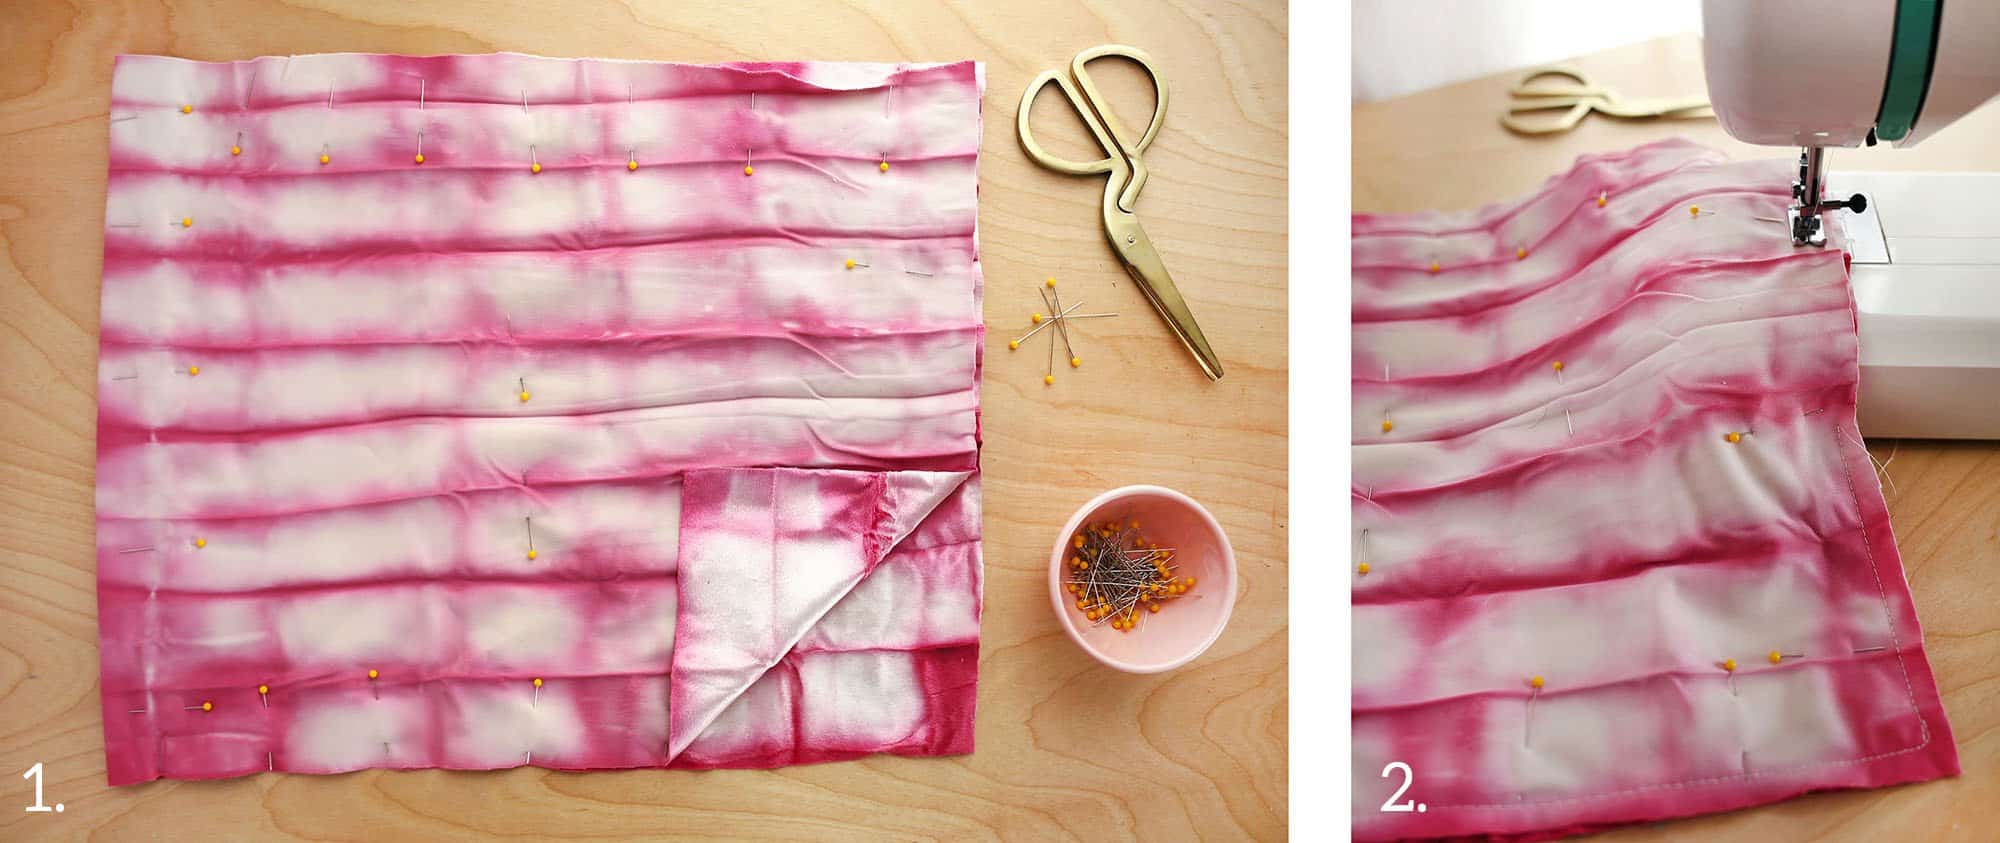
Step One: To sew your fabric into a pillow, fold the fabric in half so that the two short sides are together and the velvety sides of the fabric are facing each other. Pin your straight pins all the way around the perimeter but leave a space about as wide as your fist in the center of the open, short side.
Step Two: Start stitching around your perimeter after one side of your opening and all the way around to the opposite of your fist opening. Keep your stitches about 1/4″ away from the edge. Remove your pins and trim off any excess fabric.
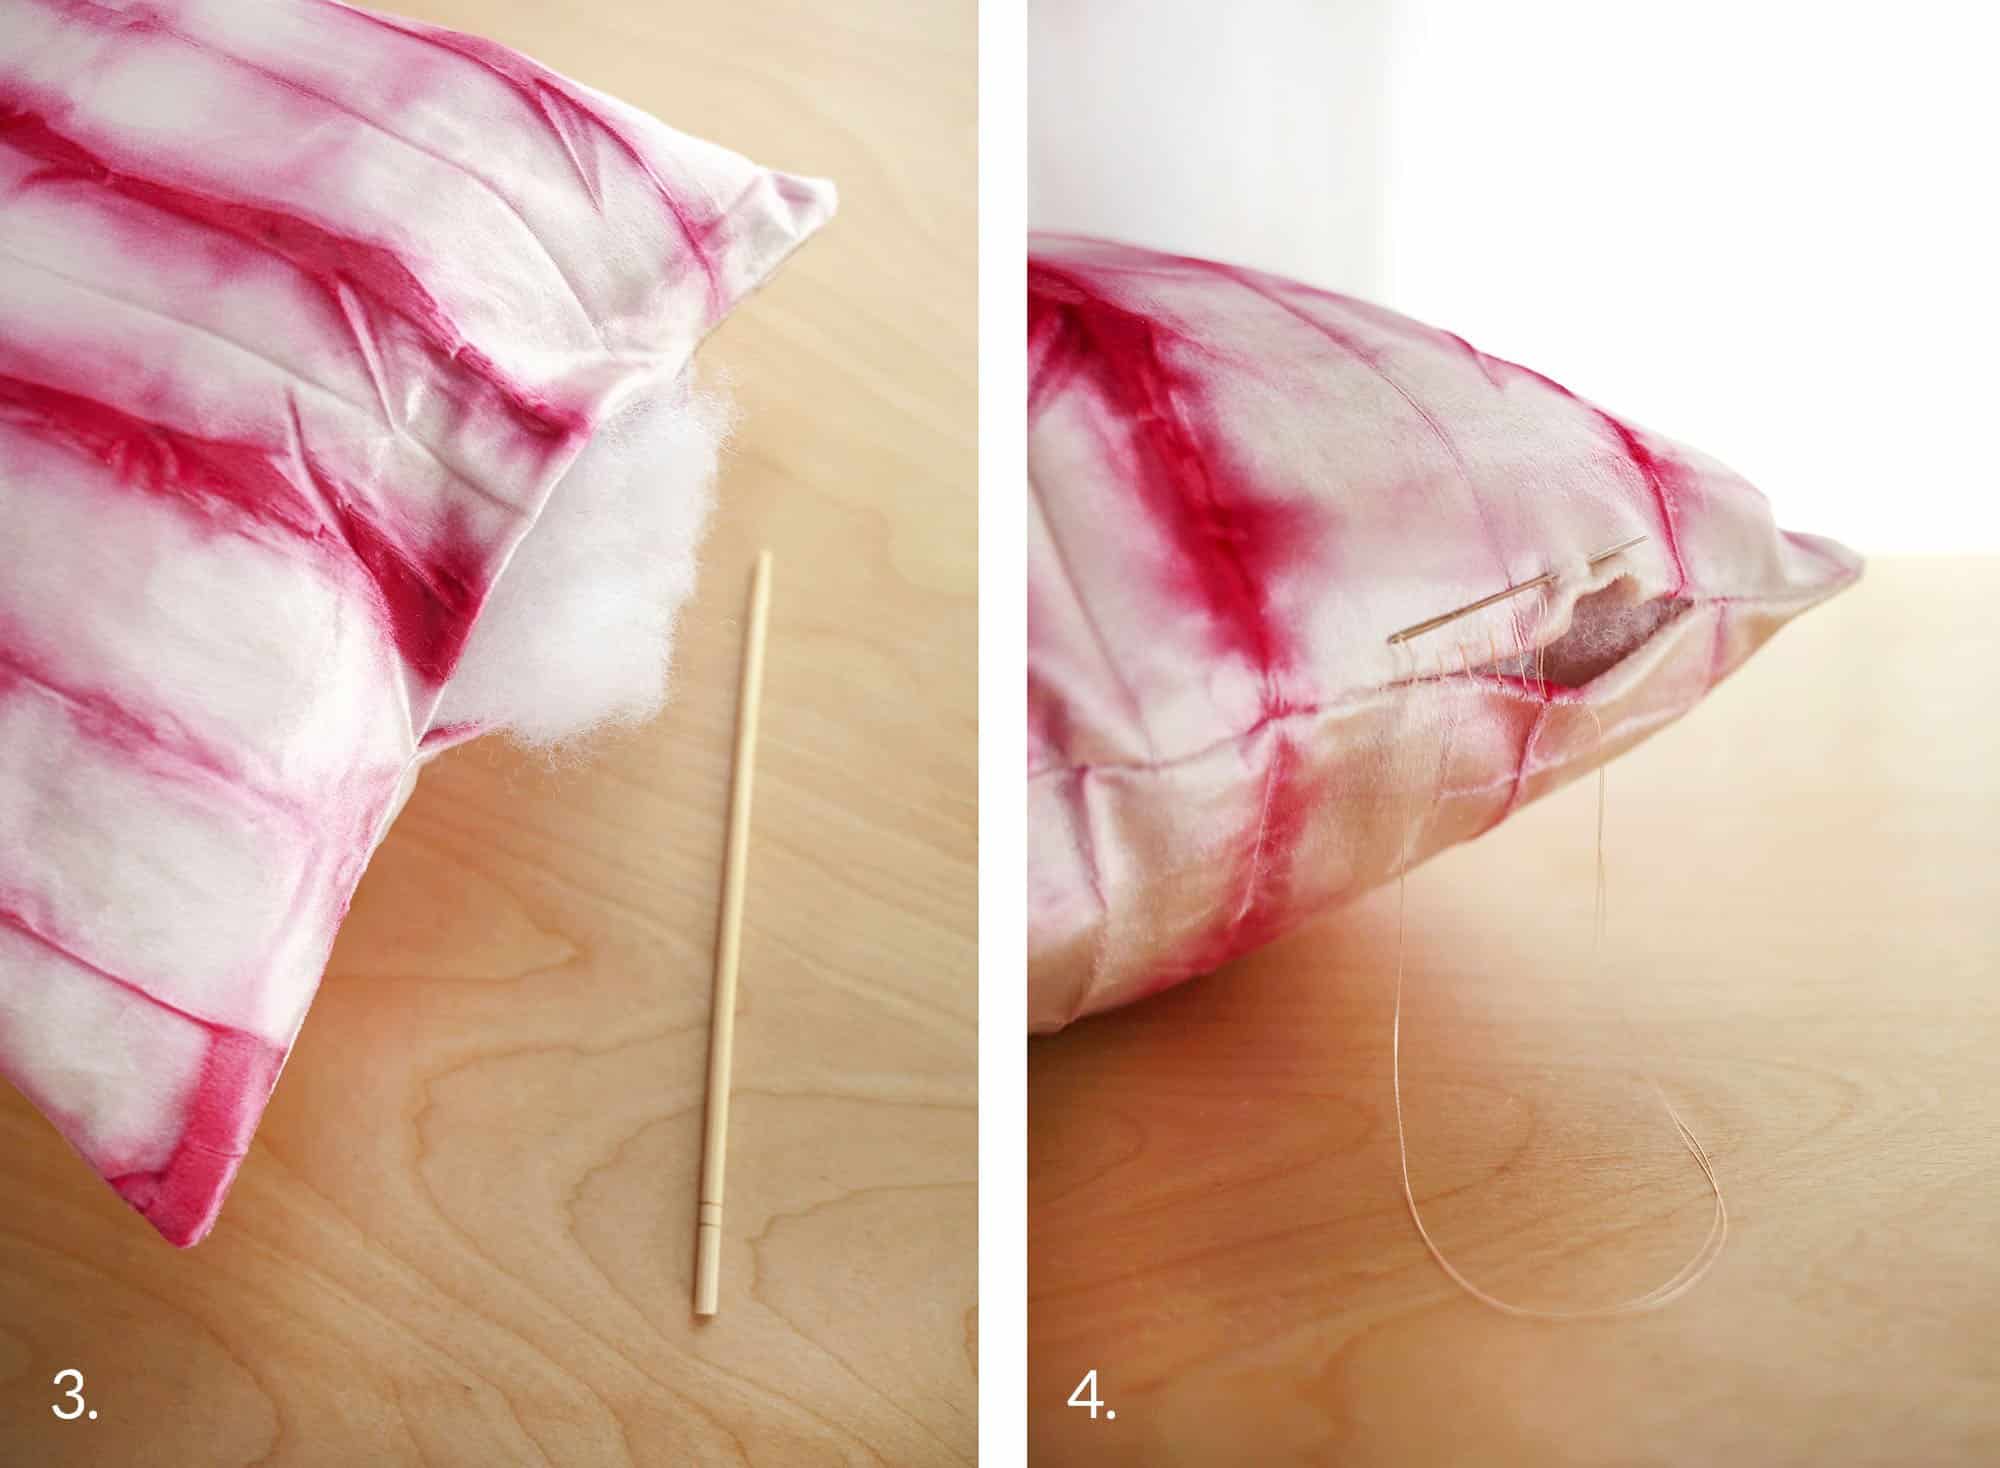
Step Three: Turn your fabric right side out. Poke out your corners with a chopstick or something else semi-blunt. Fill with stuffing.
Step Four: Stitch your opening closed with an invisible stitch (ladder stitch). You can do this by stitching along the creased fold one side of your opening and then stitching straight across into the creased fold on the other side. You keep stitching along the crease until you close things up and then tie a knot and stitch it back into the pillow and pull out. Trim your end and fluff.
This same technique would work on a polyester velvet dress! Can you even imagine how pretty that would be? Now if only I could figure out the best colors to blend to get my favorite shade of citron yellow. – Rachel
Credits//Author: Rachel Denbow. Photography: Rachel Denbow and Janae Hardy. Photos edited with A Color Story Desktop.
Original article and pictures take abeautifulmess.com site
Комментариев нет:
Отправить комментарий